PowerPoint insert or Delete a Row, Column or an Entire Table

Inserting or deleting a row, column,or an entire table in Power

How to insert or delete a row, column, or an entire table in PowerPoint

Inserting /deleting row, column or the entire table in PowerPoint
Figure 1


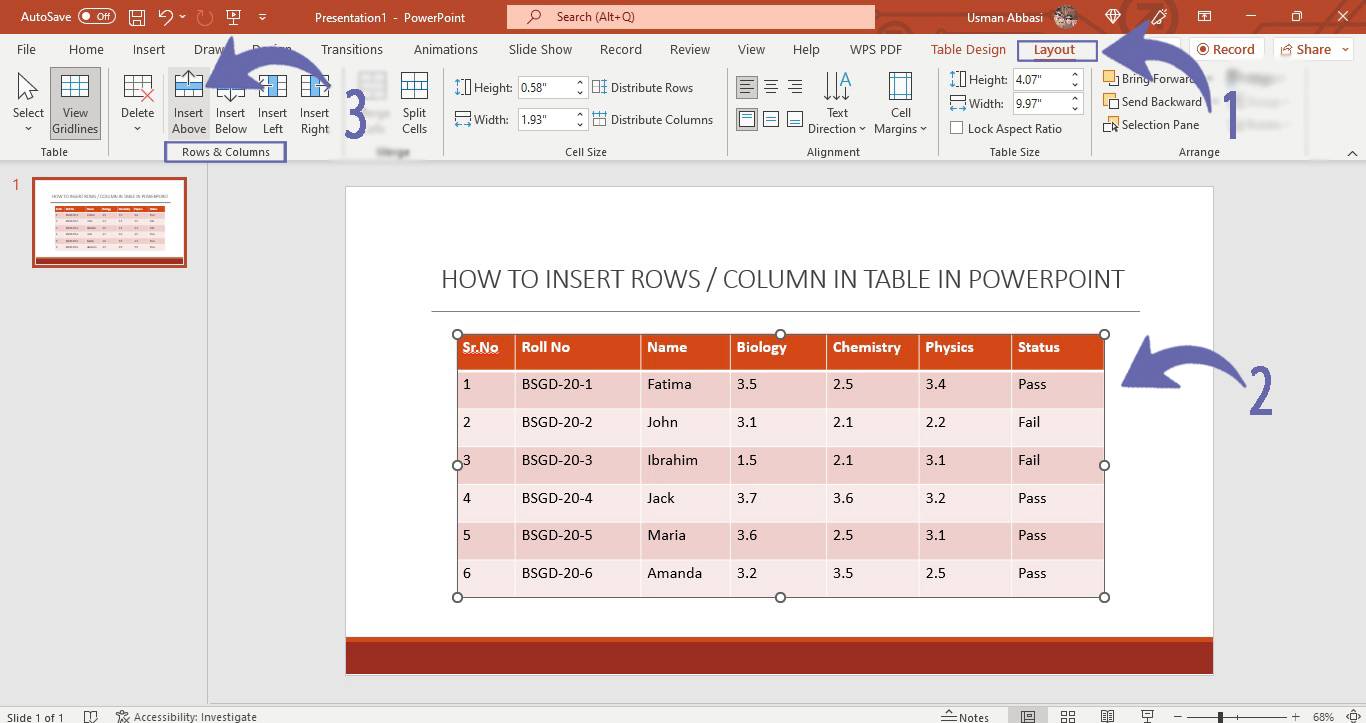
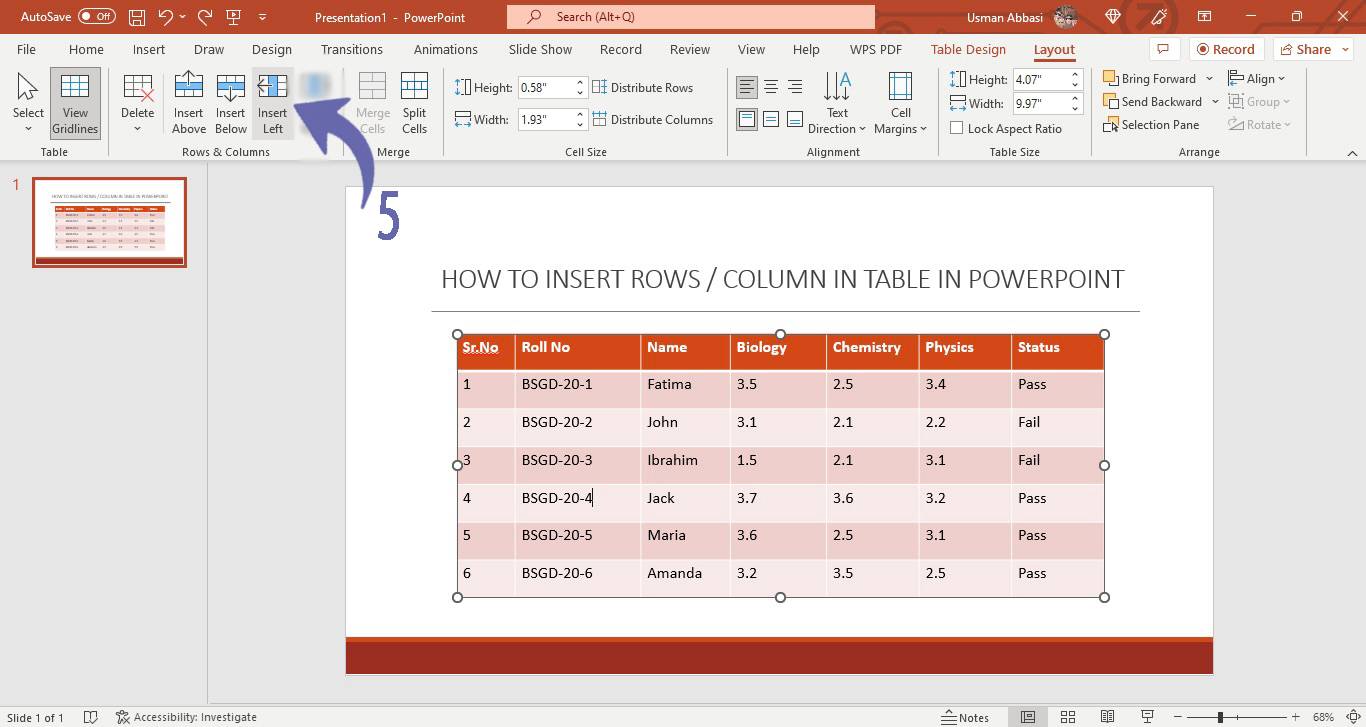
1.  Select the cell next/back to which you want to add a row or column
2.  From the “Layout tab”, go to the “Rows & Columns group” 
and a few options will appear i.e.,
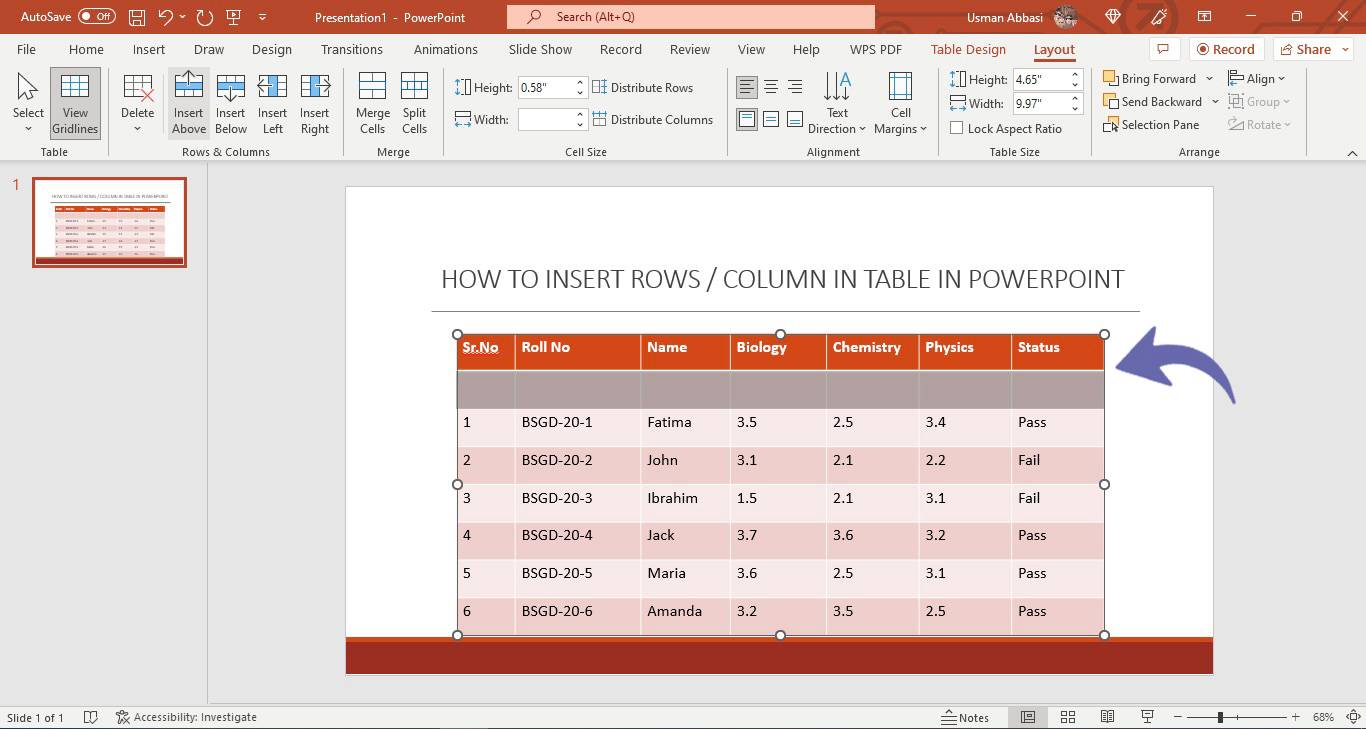
Insert Above (insert a new row above the selected cell)


Inserting /deleting row, column or the entire table in PowerPoint
Figure 2

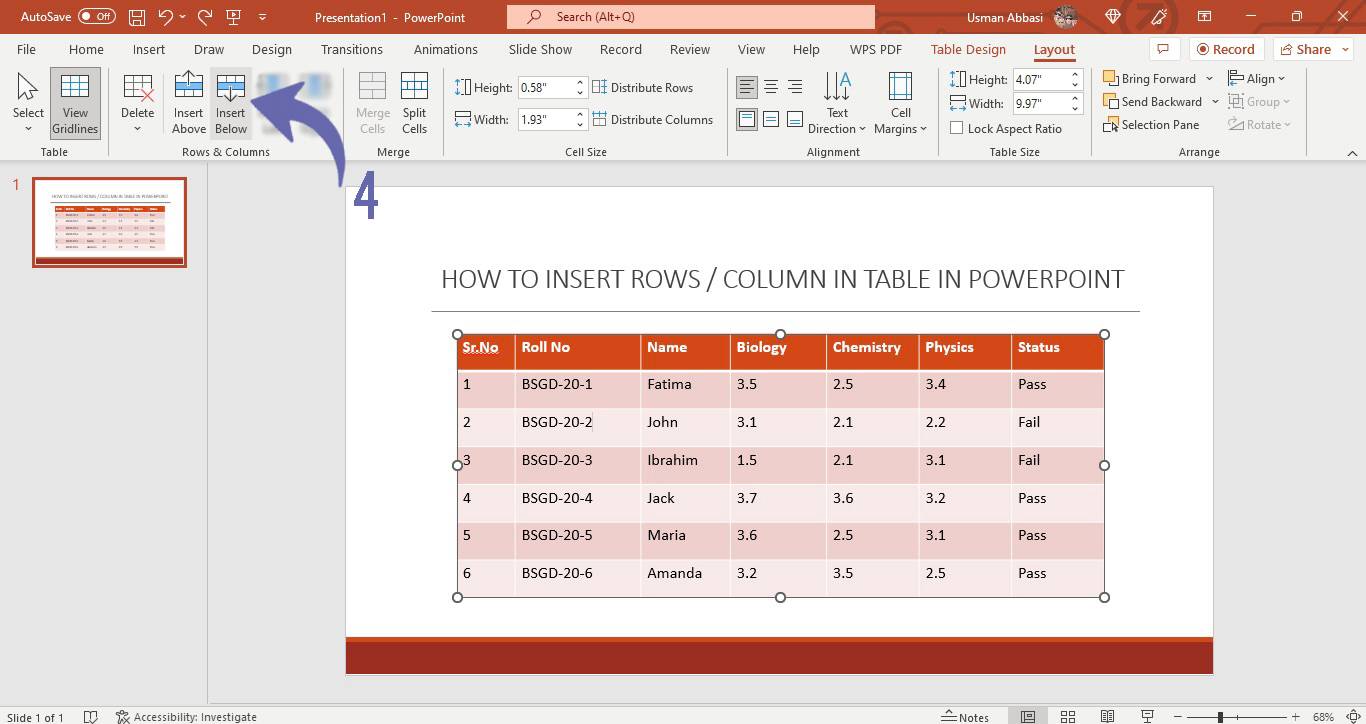
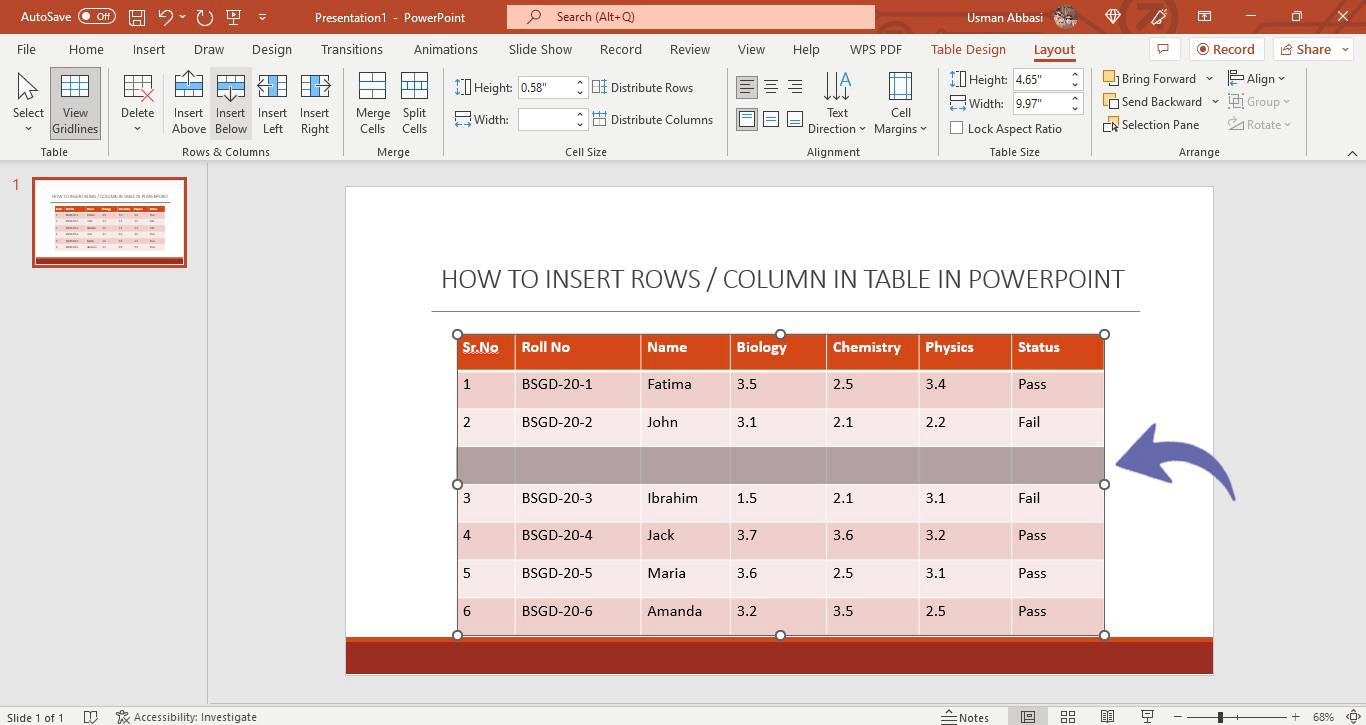
Insert Below (insert a new row below the selected cell)


Inserting /deleting row, column or the entire table in PowerPoint
Figure 3


Inserting /deleting row, column or the entire table in PowerPoint
Figure 4

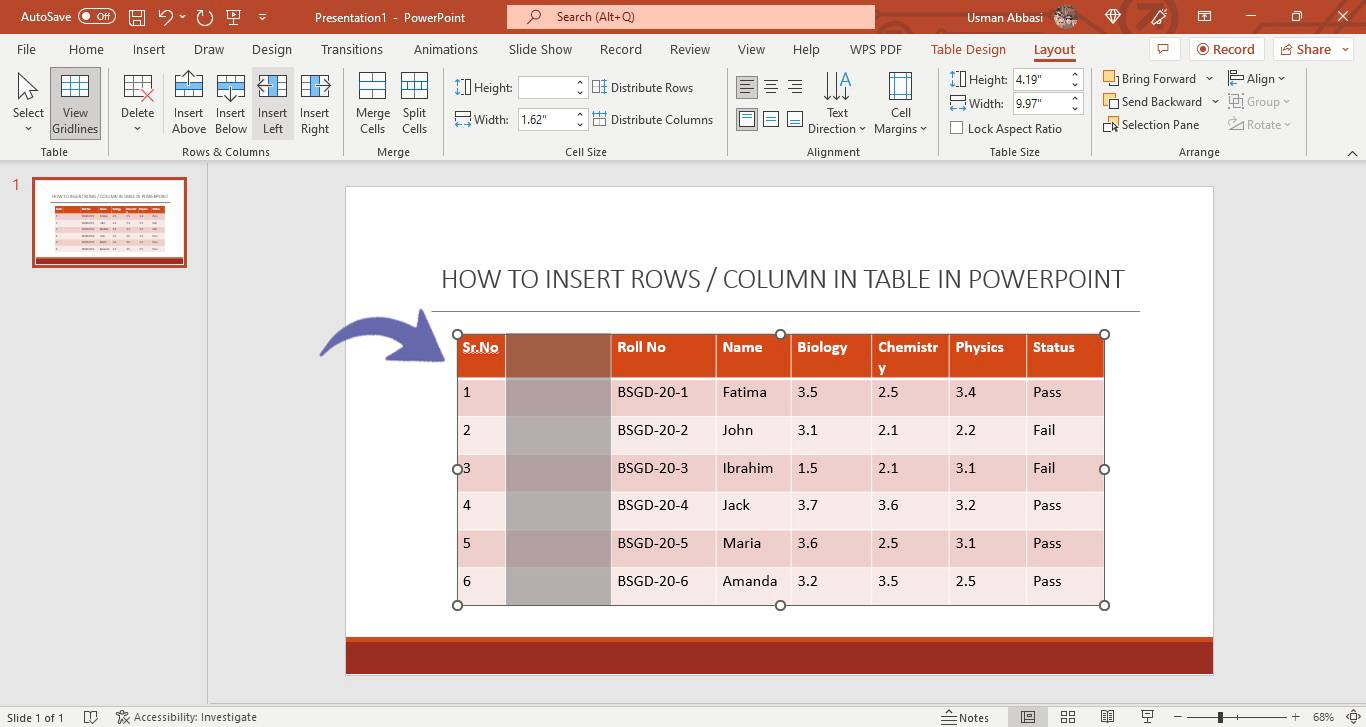
Insert left (insert a new column to the left of the select cell)


Inserting /deleting row, column or the entire table in PowerPoint
Figure 5


Inserting /deleting row, column or the entire table in PowerPoint
Figure 6

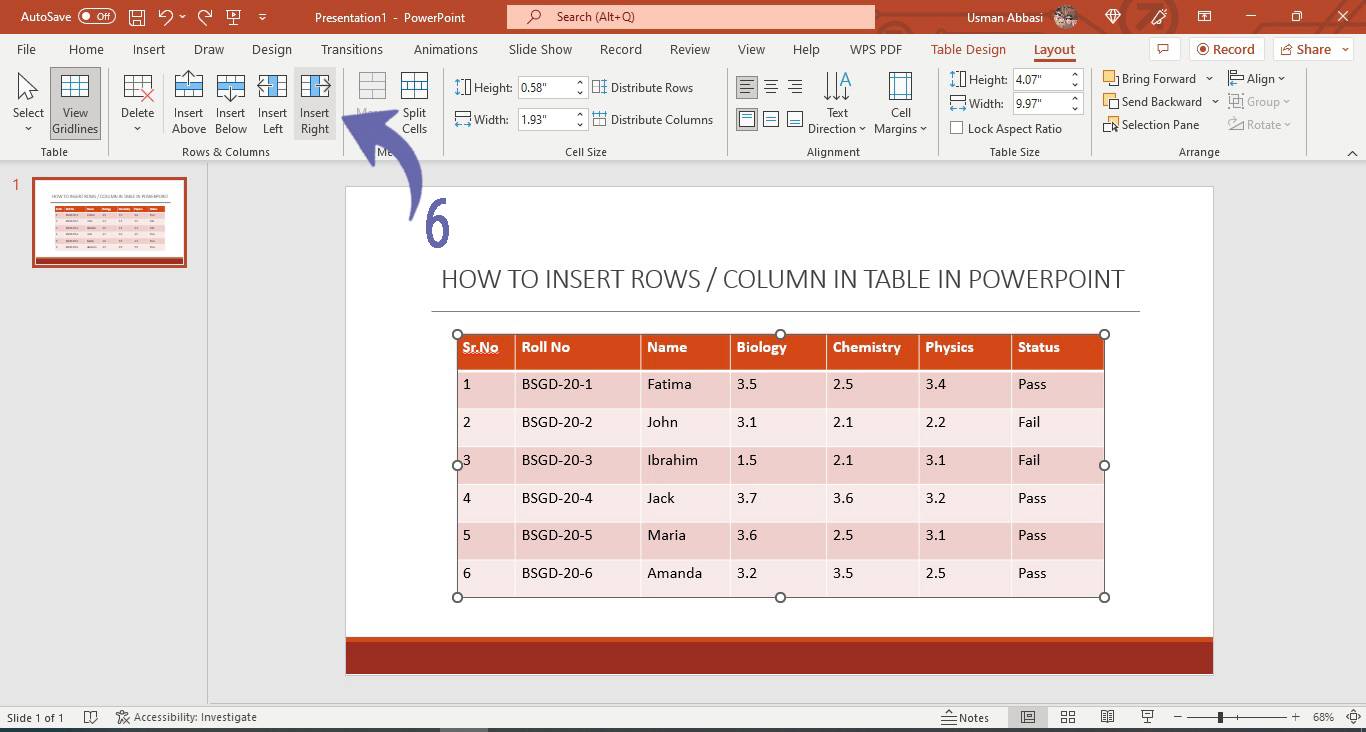
Insert Right (insert a new column to the right of the selected cell)


Inserting or deleting row, column or the entire table in PowerPoint
Figure 7


Inserting /deleting row, column or the entire table in PowerPoint
Figure 8

4.  pick your desired insert option

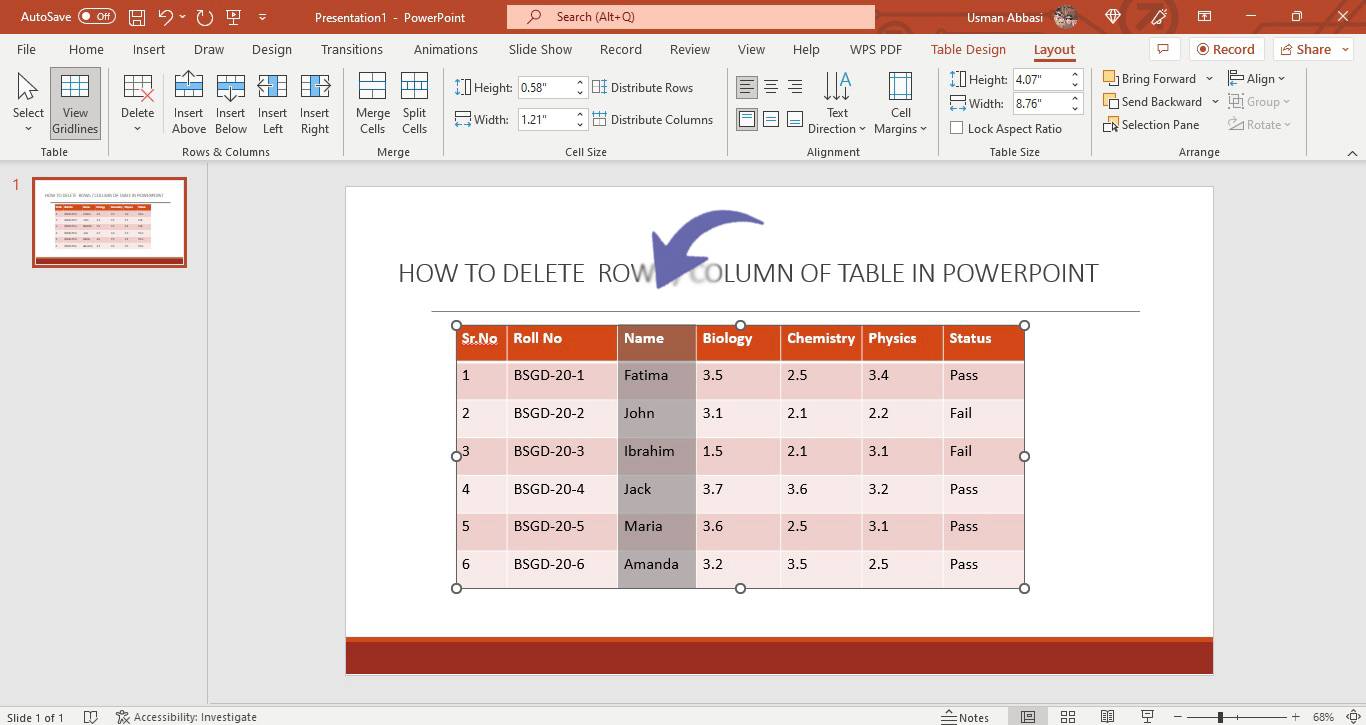
How to delete a row, column, or a whole table in PowerPoint

Deleting row, column or the entire table in PowerPoint
Figure 1

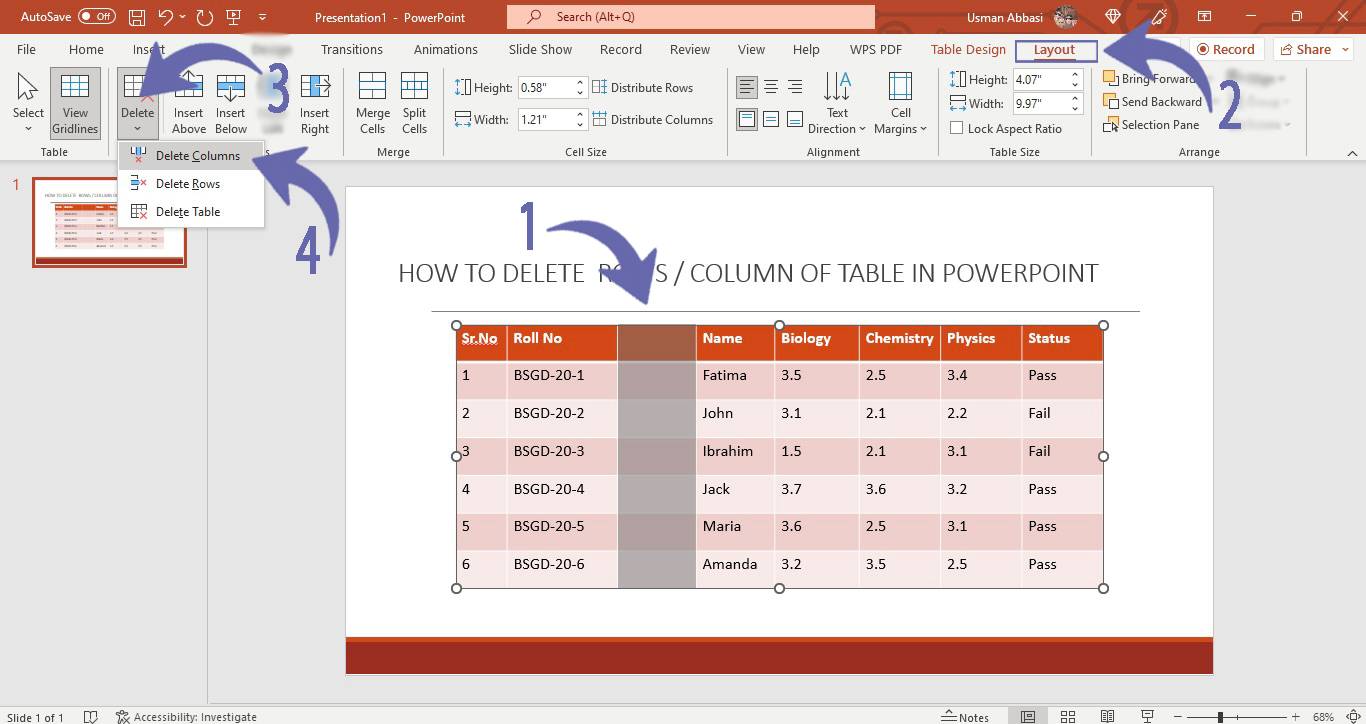
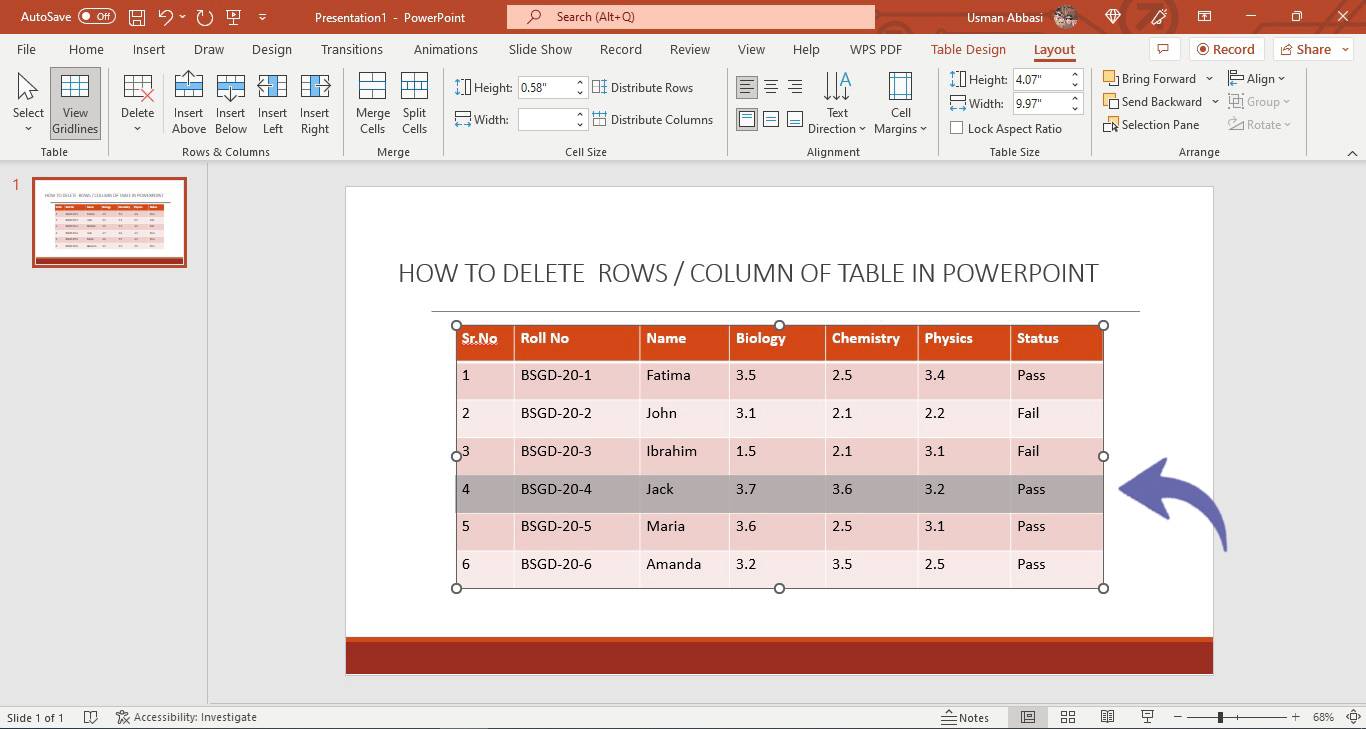
1. Select the row/s or column/s you want to delete
2.  From the “Layout tab”, click the “Delete” Command in the “Rows & Columns” group
3.  A  drop-down menu will appear with a few delete options i.e.,
Delete Columns (Click this option if you want to delete your selected column)

Inserting /deleting row, column or the entire table in PowerPoint
Figure 2

Delete Rows (To delete your selected rows, click this option)

Inserting /deleting row, column or the entire table in PowerPoint
Figure 3


Inserting /deleting row, column or the entire table in PowerPoint
Figure 4

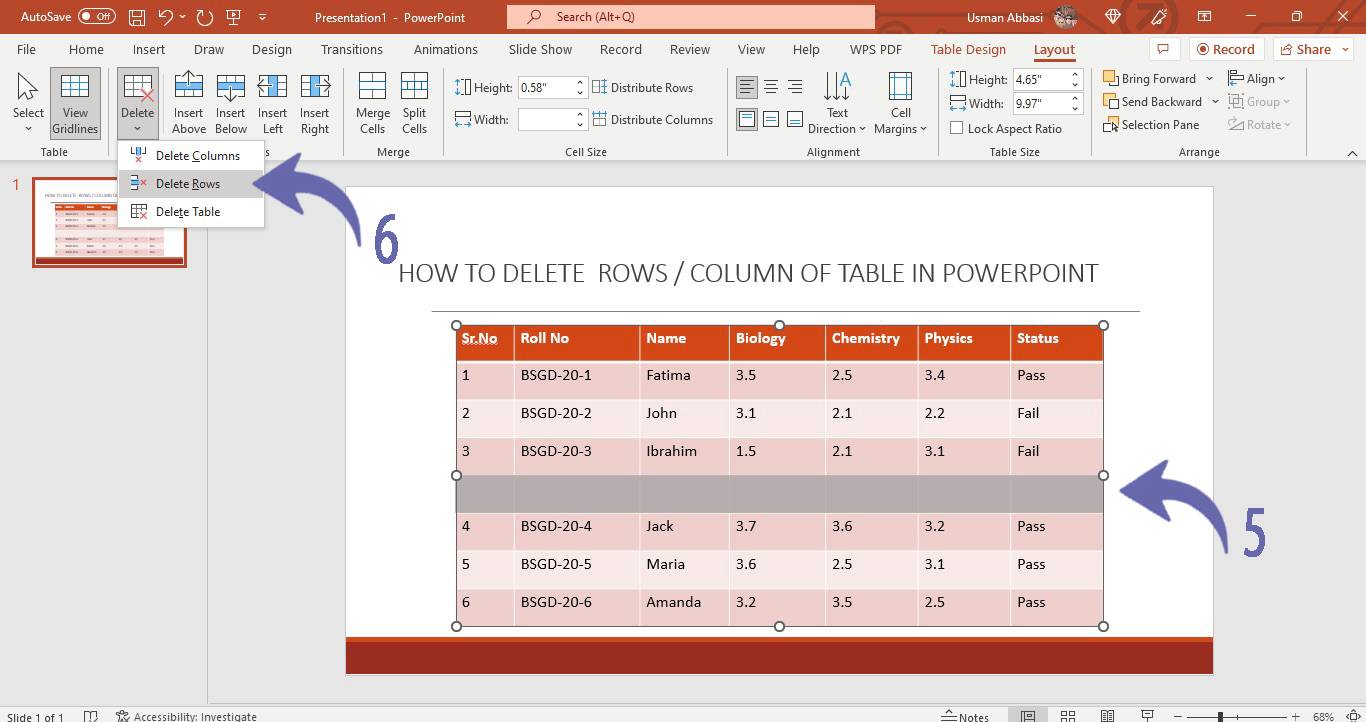
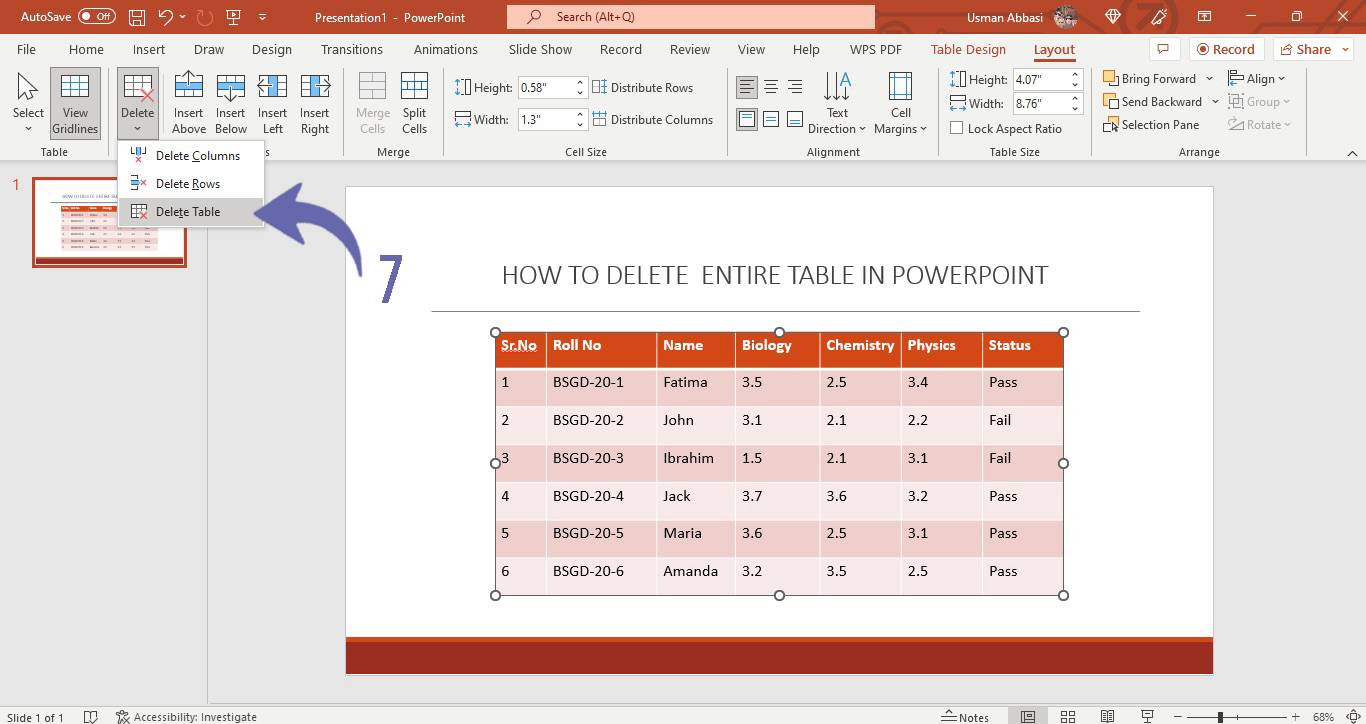
Delete Table (to delete an entire table, click this option)

Inserting /deleting row, column or the entire table in PowerPoint
Figure 5


deleting row, column or the entire table in PowerPoint
Figure 6

Method 2:
1.  By right-clicking on a table, a dropdown menu will appear
2.   From the dropdown menu, select the “Insert” and “Delete” buttons on the top tab to insert or delete row/s or column/s in PowerPoint
Method 3:
To Delete a table, click the edges of the table and Press the “Backspace”, or “Delete” button on your keyboard


Share This Post

Subscribe To Our Newsletter

Get updates and learn from the best

More To Explore

Top PowerPoint Presentation Design Trends for 2024
Presentation Skills

Top PowerPoint Presentation Design Trends for 2024

Gone are the days of static presentations filled with text-heavy slides and monotonous narration. PowerPoint presentations are now considered dynamic instruments in the field of

Inserting and customize an icon in PowerPoint
How to

PowerPoint Insert and Customize an Icon

    How to insert an icon in PowerPoint 1.  Select the icon , Go to the “insert” tab and click the “Icons” option 2.  Icons

Do You Want To Boost Your Business?

drop us a line and keep in touch

Join SlideGem

Get premium gems for your presentations