Outline
How to indent Paragraph in PowerPoint
How to align text horizontally in PowerPoint
How to add and customize bullet points in PowerPoint
How to customize Bullet Color in PowerPoint
How to change the bullet size in PowerPoint
How to make customized Bullets in PowerPoint
How to add numbering points to the text in PowerPoint
How to add a picture in bullet in PowerPoint
How to make customized Bullets in PowerPoint
How to change the bullet size in PowerPoint
How to adjust Line spacing between text in PowerPoint
How to change vertical text alignment in PowerPoint
How to change text direction in PowerPoint
How to add or remove columns in PowerPoint
How to convert simple Text to Smart Art in PowerPoint
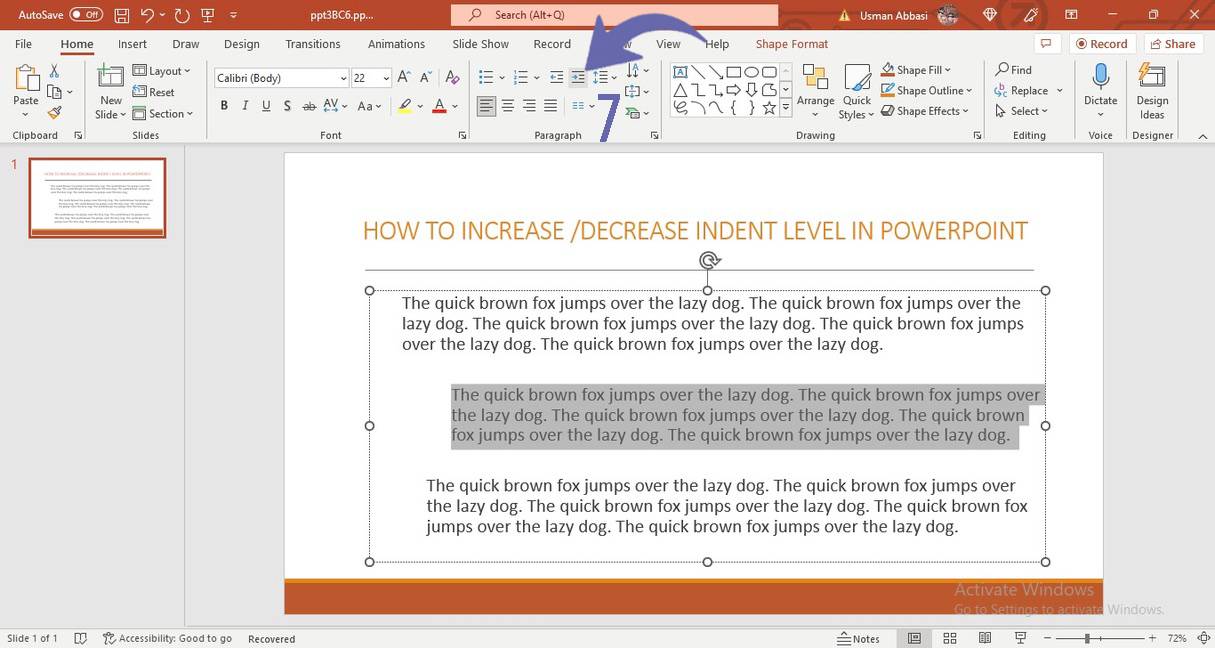
How to indent a paragraph in PowerPoint
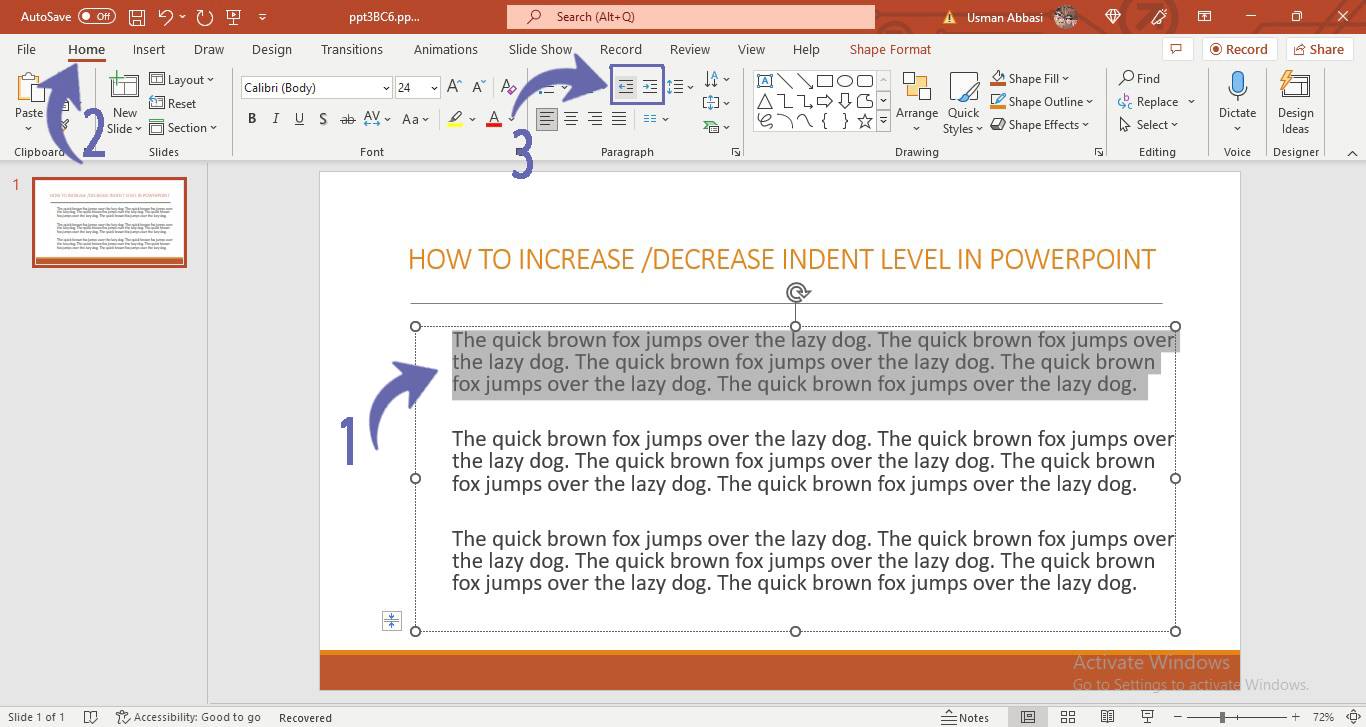
1. Select the paragraph text
2. Go to the “Home tab”
3. Go to the “Paragraph group”
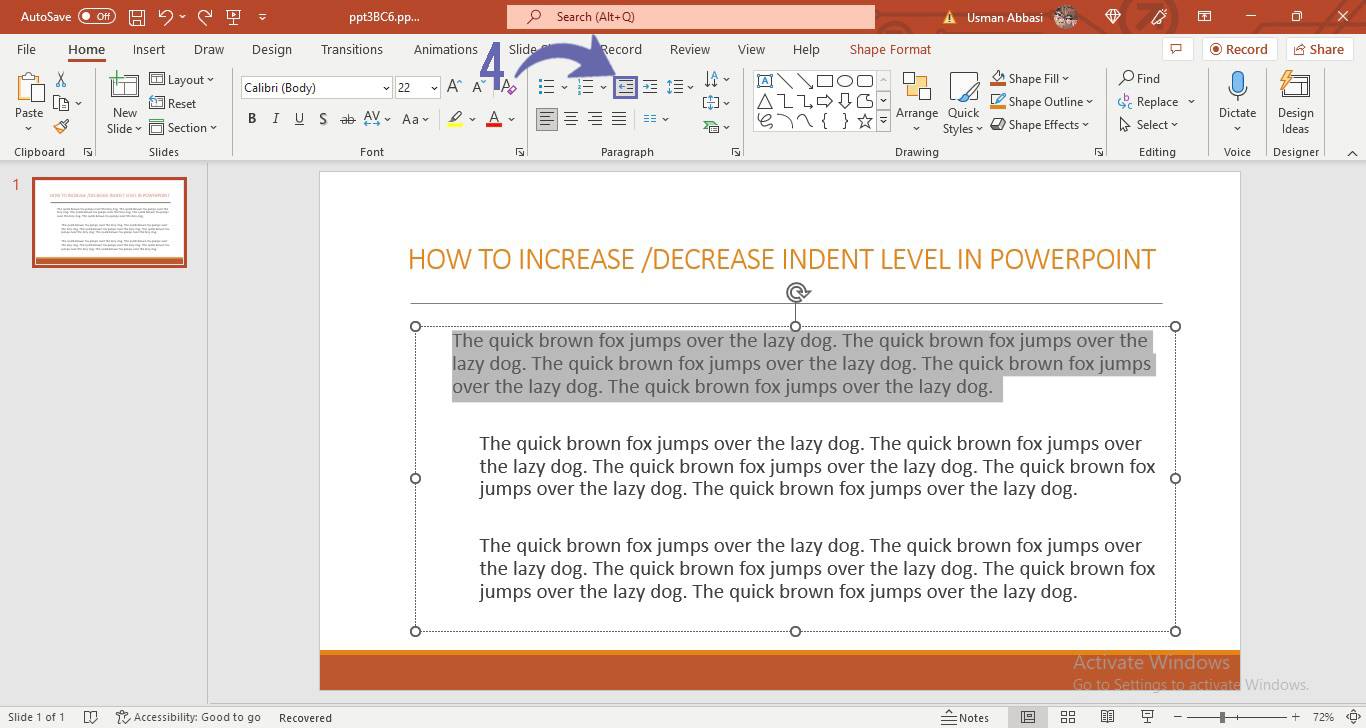
4. Select the “Indent less” and
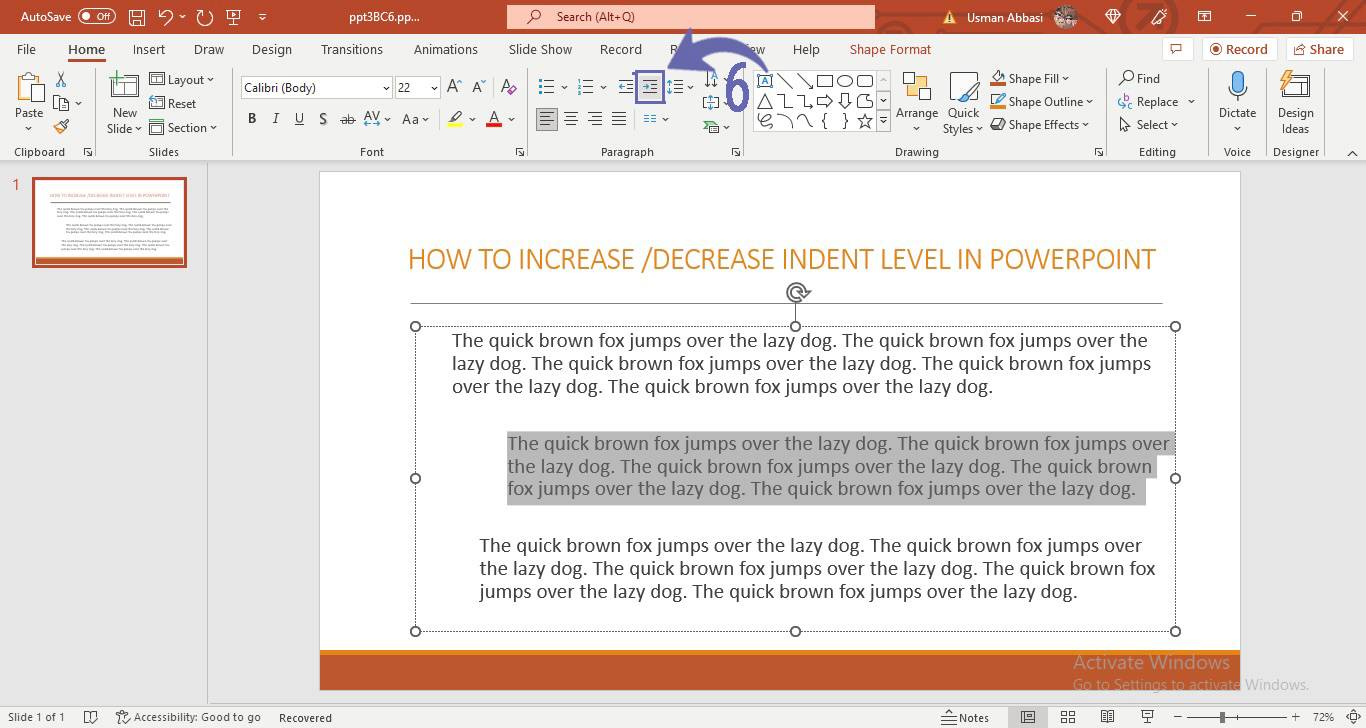
“Indent more” options, next to the “font numbering” command
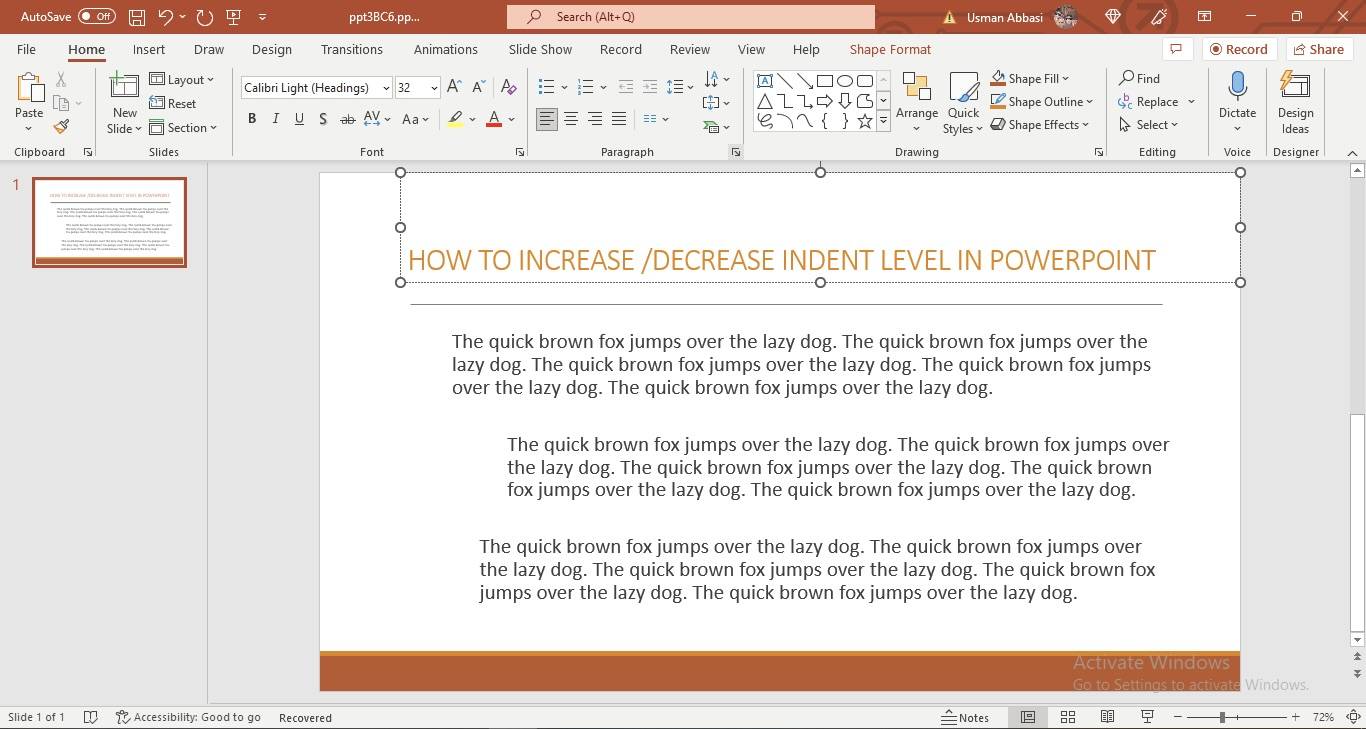
Shortcut Key:
Indent the paragraph :Ctrl + E
Remove a paragraph indent : Ctrl+Shift+M
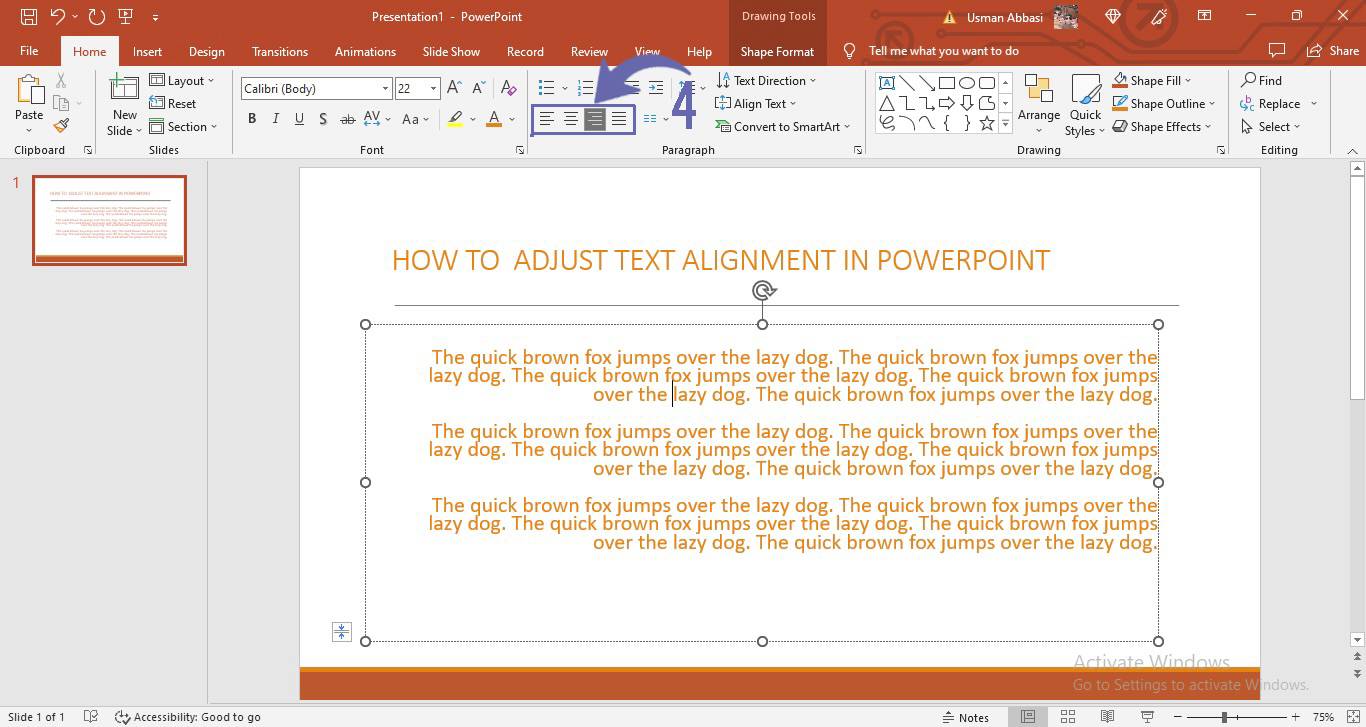
How to align text horizontally in PowerPoint
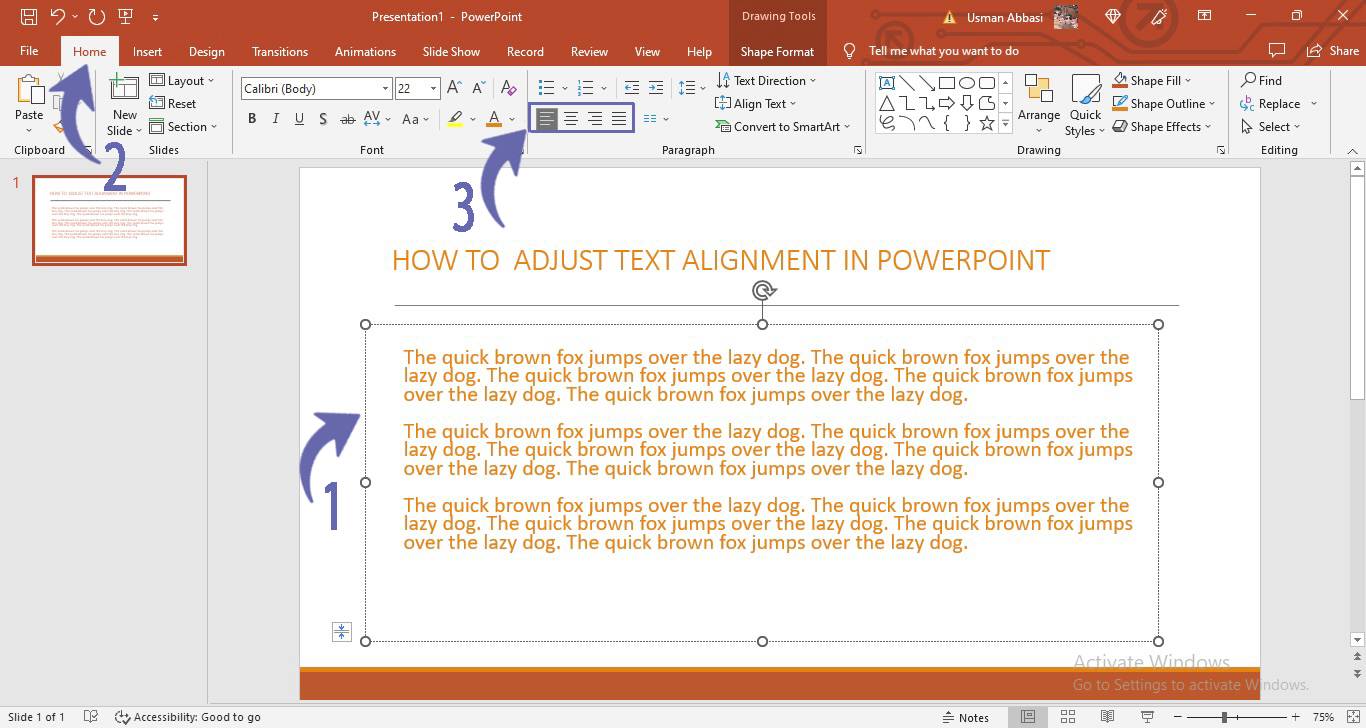
1. Select the paragraph text
2. Go to the “Home tab”
3. Go to “Paragraph Group”
4. Select the “horizontal text alignment” option, you want to add to your text. i.e.,
Align text to left (Ctrl+L)
Align text to the center ( Ctrl +E)
Align text to the right (Ctrl+ R)
or Justify text (Ctrl +J)
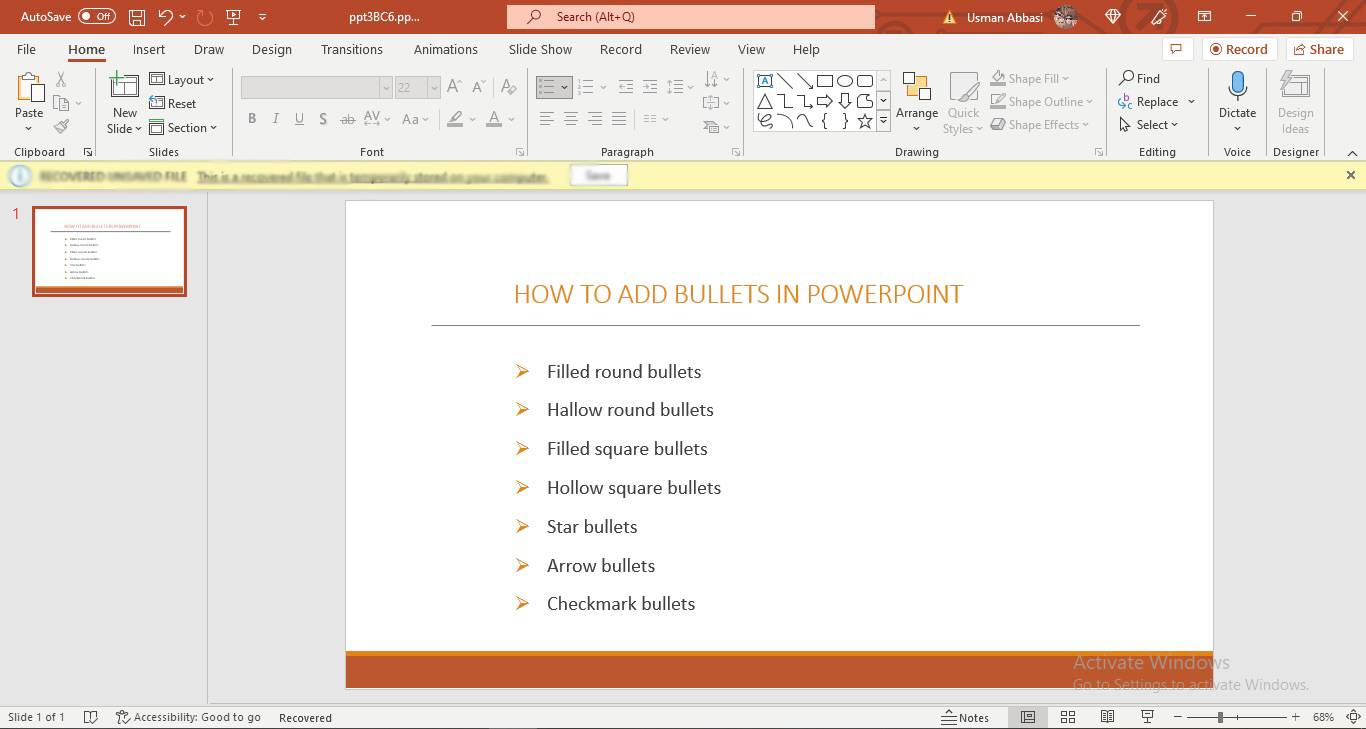
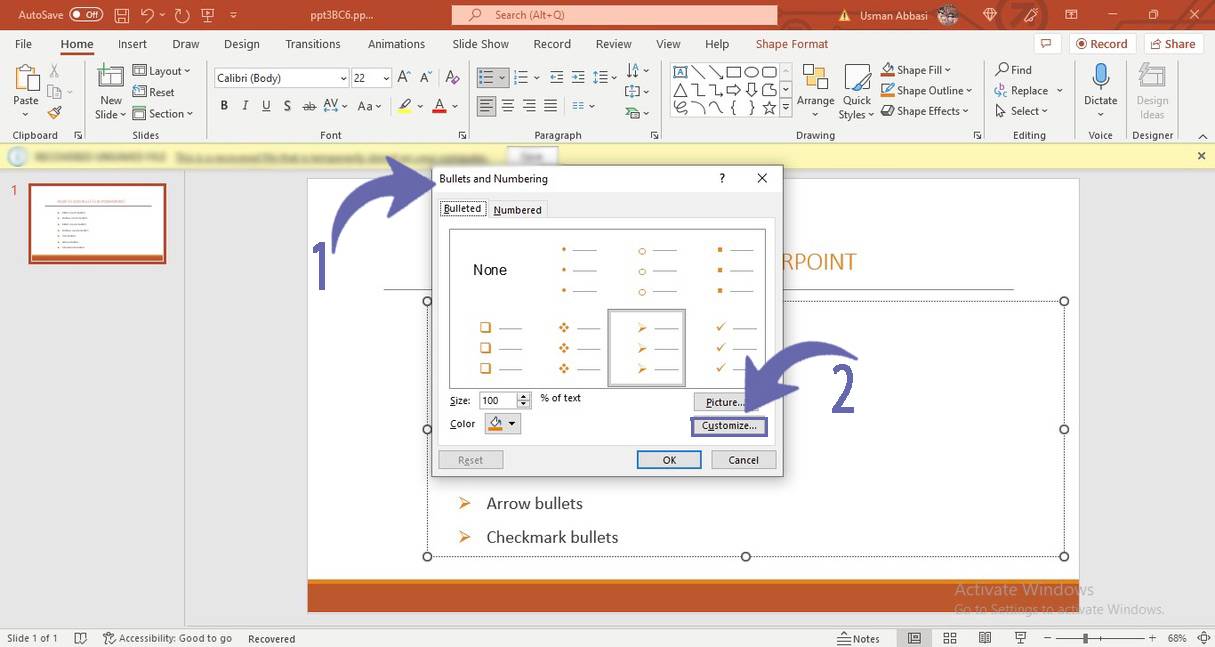
How to add and customize bullet points in PowerPoint
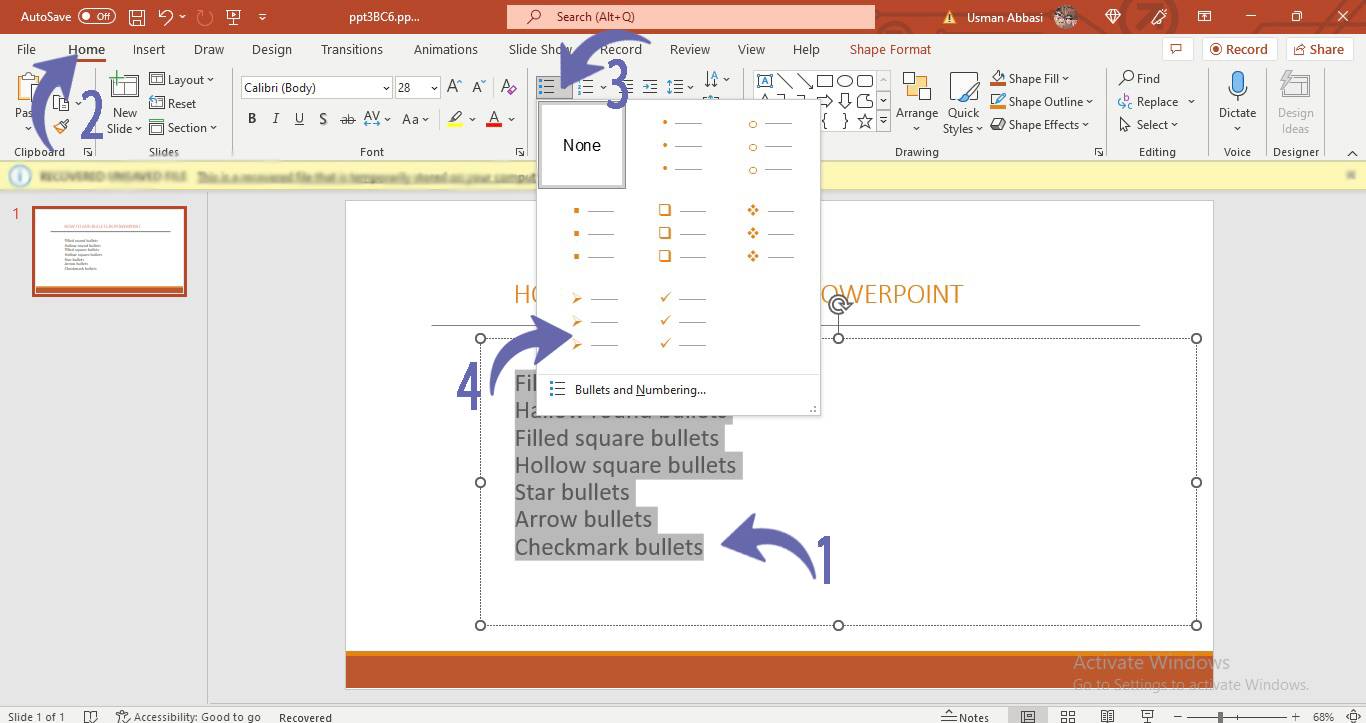
1. Go to the “Home tab”, in the “paragraph section”
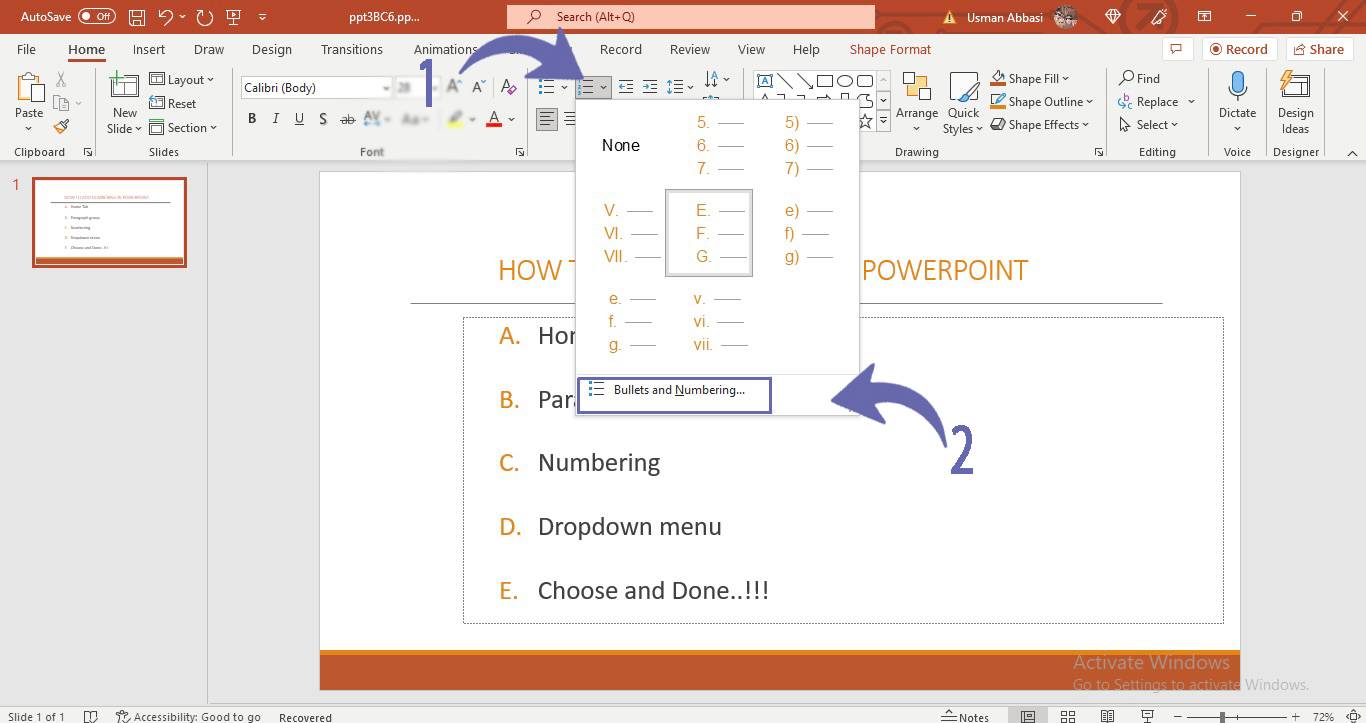
2. Click the bullet points option, and a dropdown menu of bullet point styles will appear
3. Select the style you want to add to your bullet point.
4. To customize your bullet point style, click the “Bullet points and Numbering” option from the dropdown menu
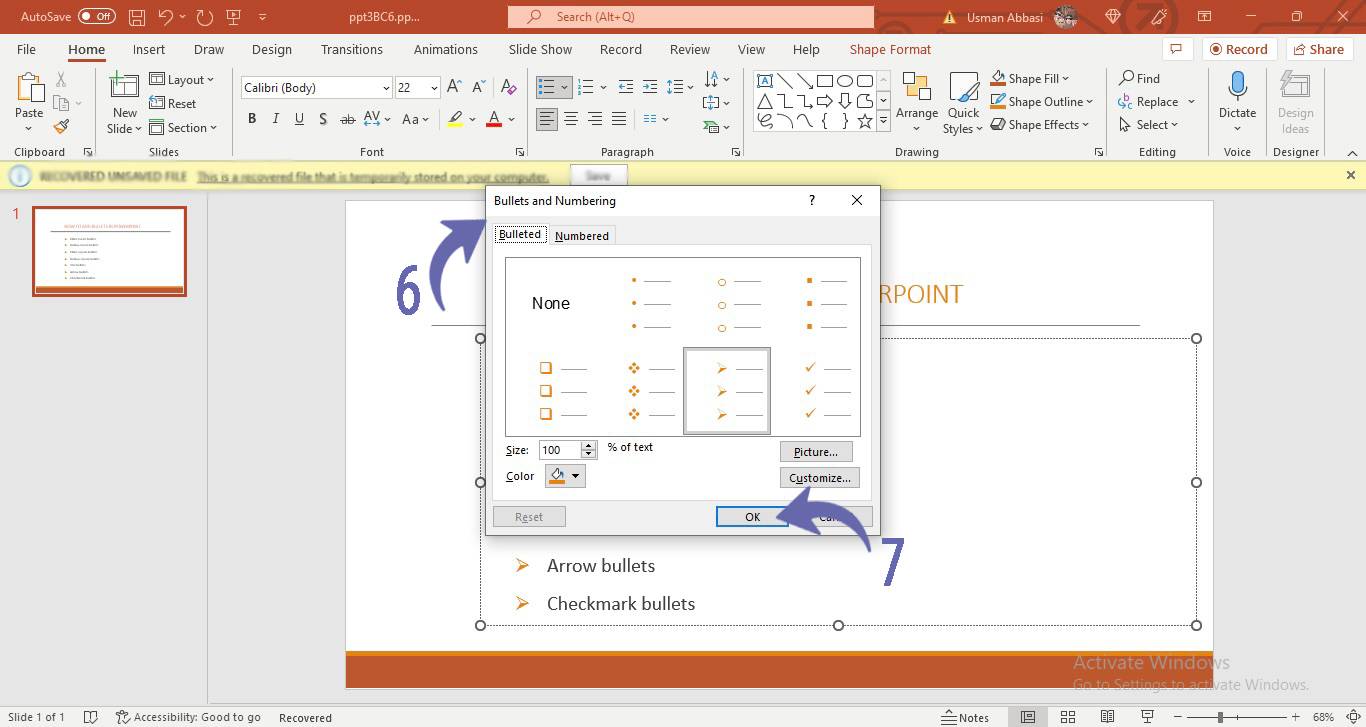
5. A bullet and numbering customization panel will appear with customization options i.e., Colour, Size and customize bullets and numbers
How to customize bullet points color in PowerPoint
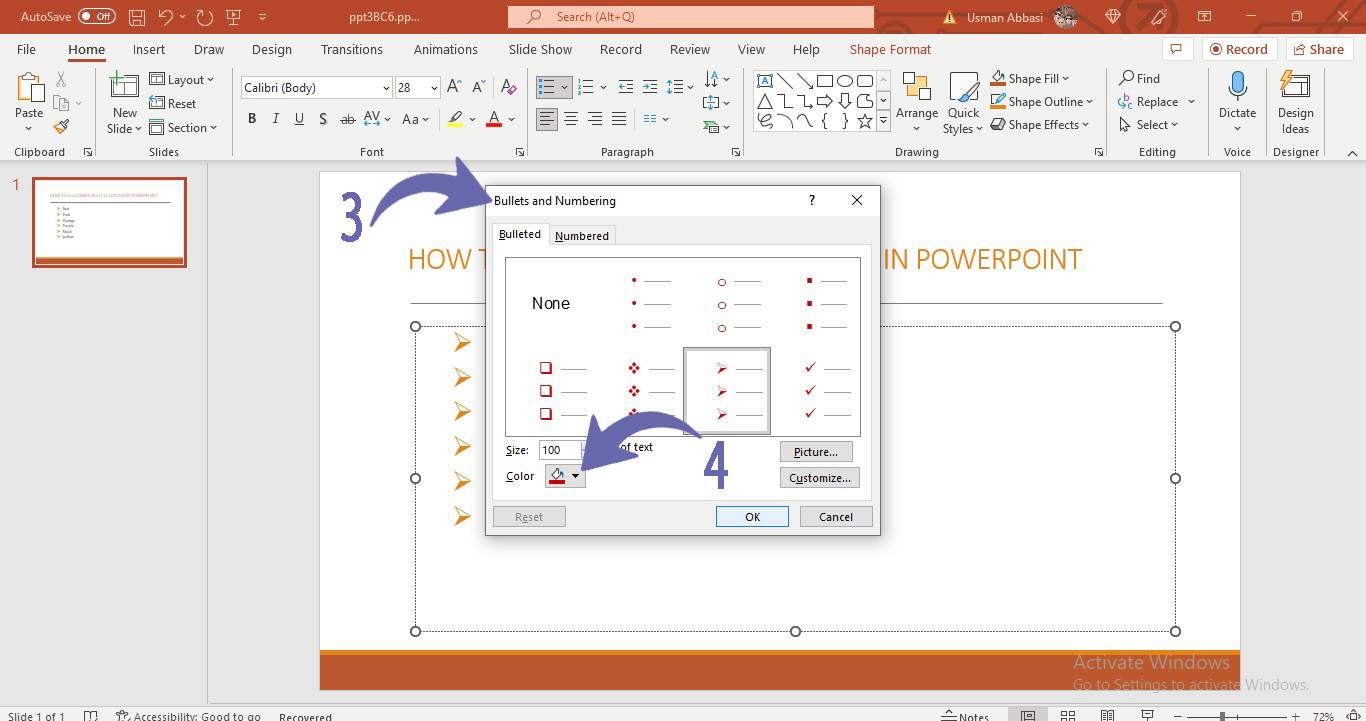
1. From the bullet dropdown menu, Click the last “Bullets and Numbering” dialogue box
2. From the given panel, Select the bullet to change its color
3. Click the “arrow” next to the color bucket icon
4. A color panel will appear with three color categories i.e.,
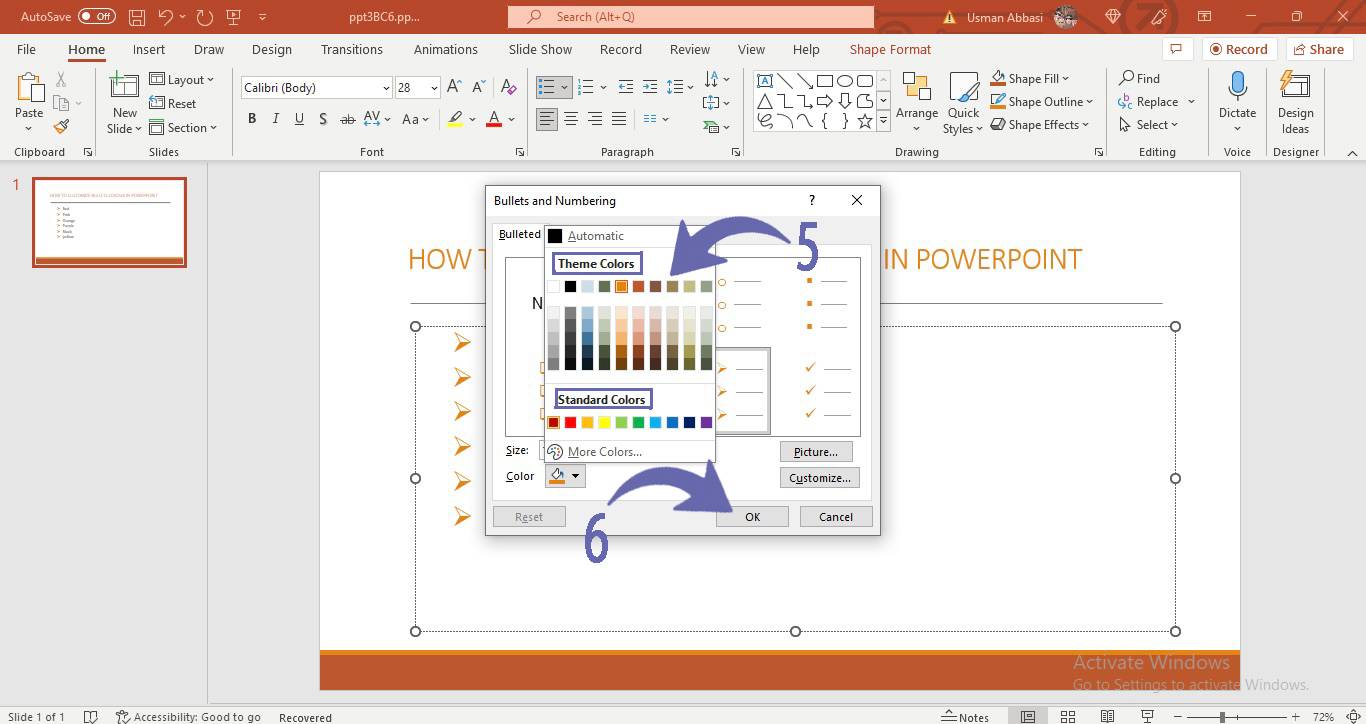
Theme Colour (automatically change according to the theme applied to the slide)
Standard Colours (Colours that are available with every theme)
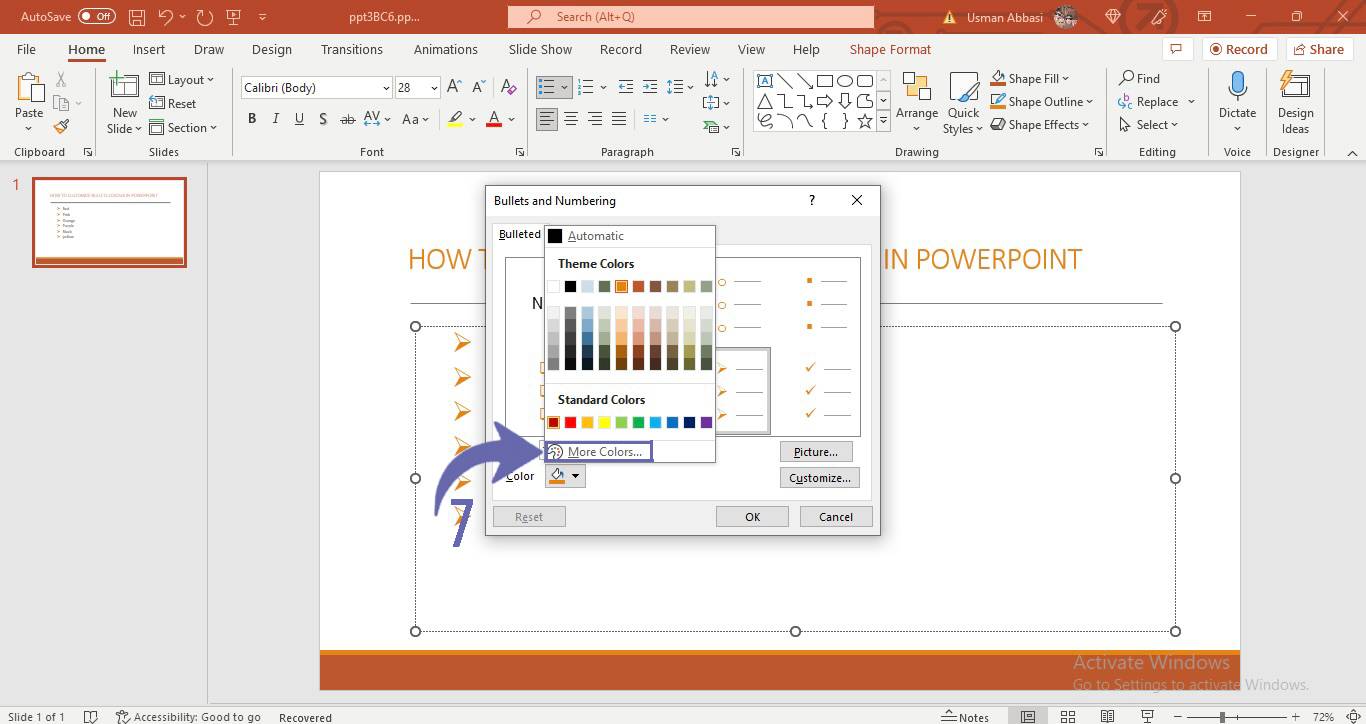
More Colours ( by clicking this option you can choose any of the colors you want to add from the color wheel)
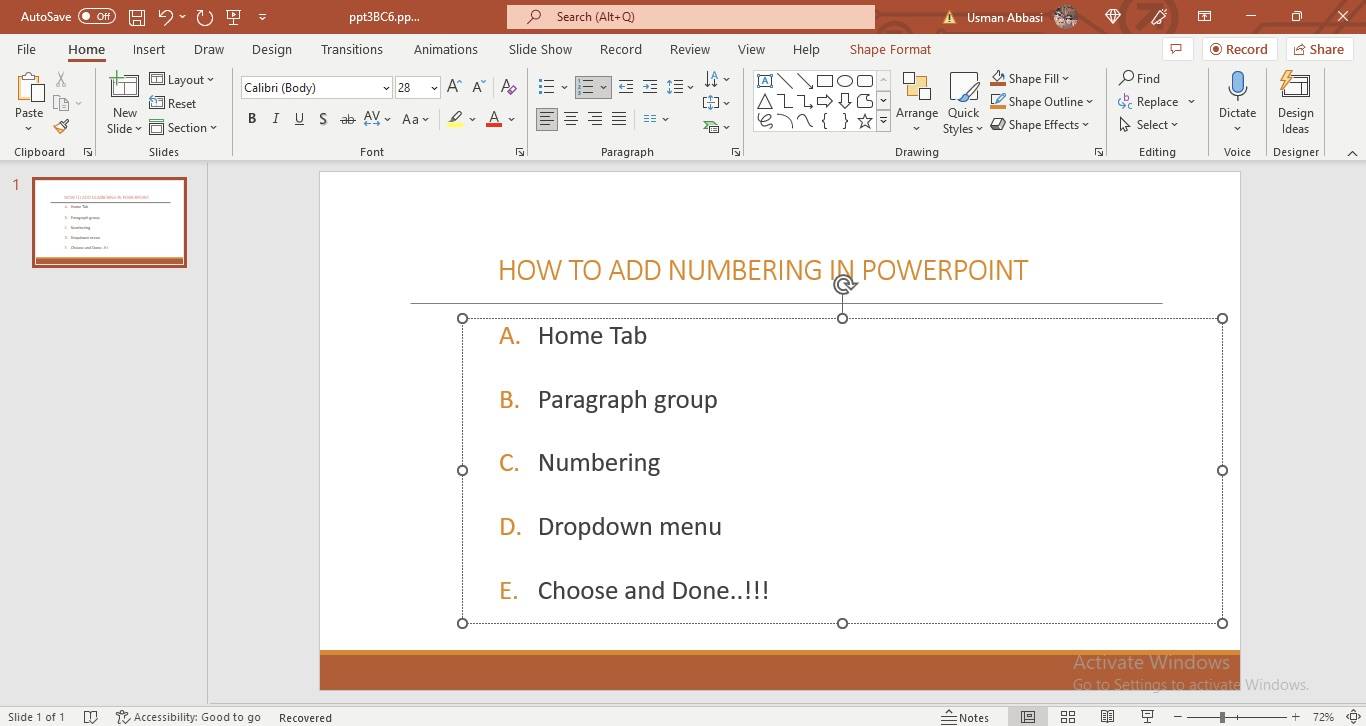
How to add numbering points to text in PowerPoint
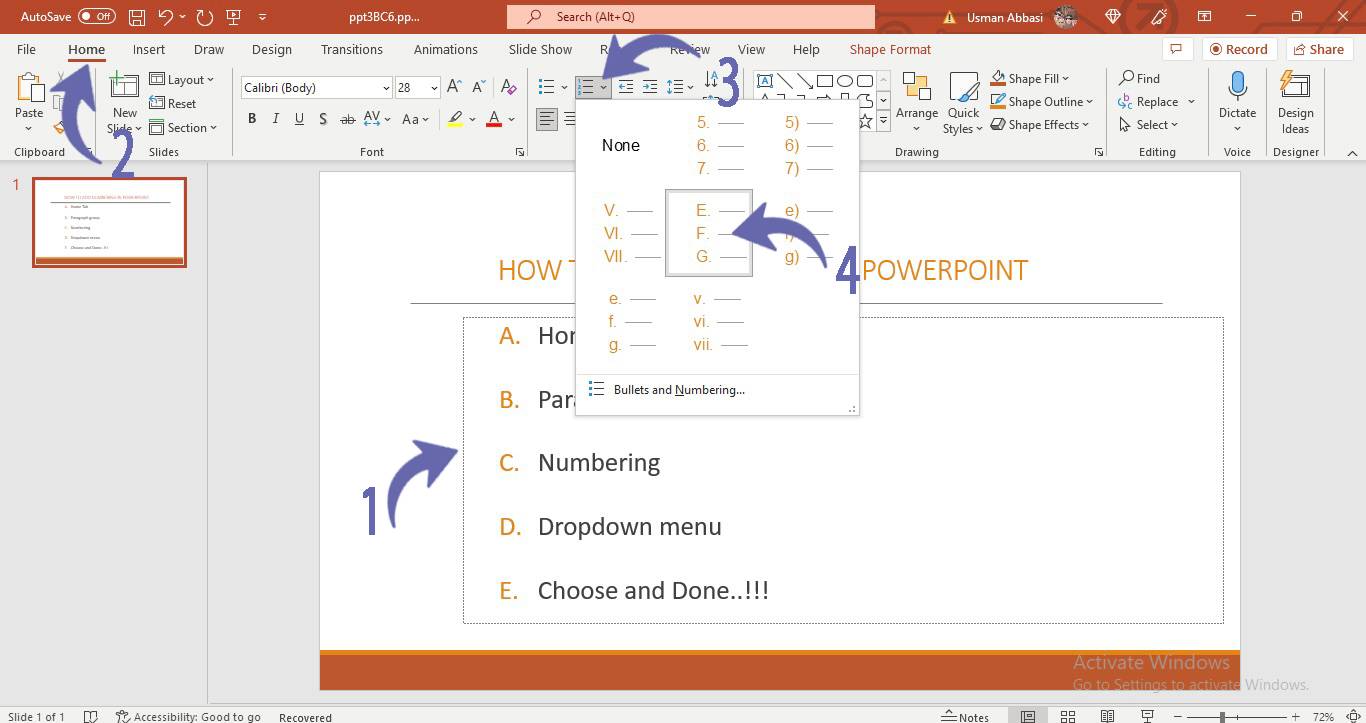
1. In the Bullets and Numbering panel, Click on the “Numbering option”
2. You can add a number from which you want to start bullets and click “ok”
How to add a picture in bullet in PowerPoint
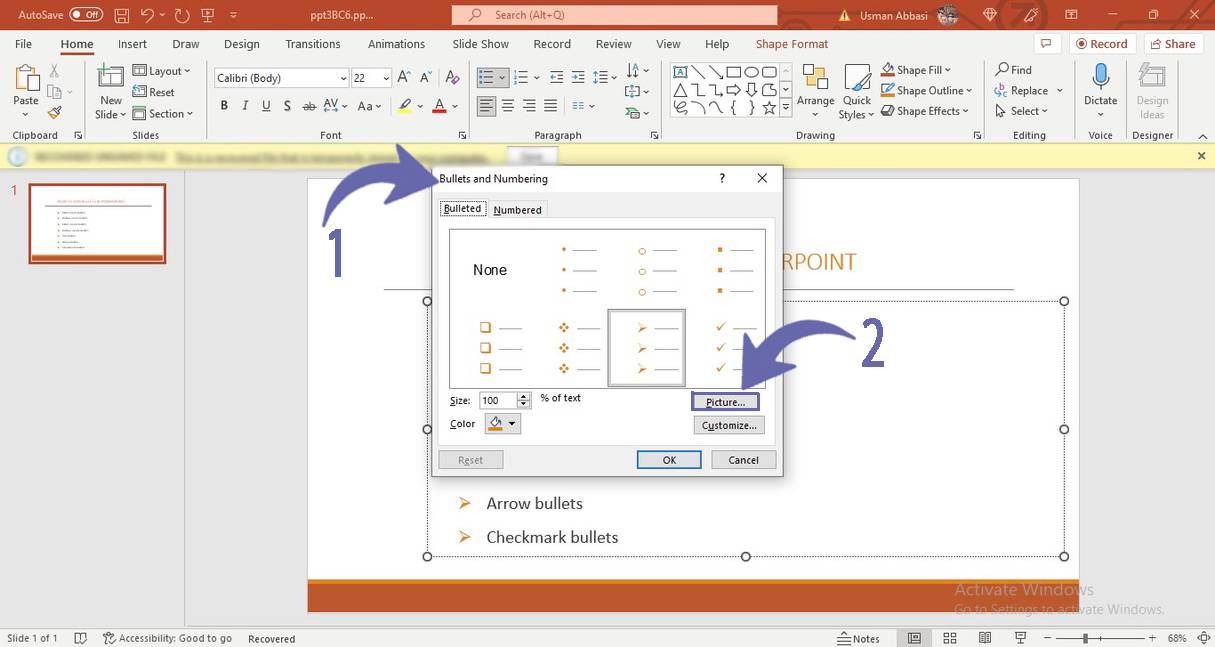
1. From the Bullets and Numbering panel, click on the “Picture” option
2. A dialogue box will appear with a few picture insert options i.e.,
From a File (Browse images on your computer )
Stock Images( Search from stock image library)
Online Images( Search images from online sources like Bing, Flickr, or OneDrive)
From Icons ( select and insert from the icon collection)
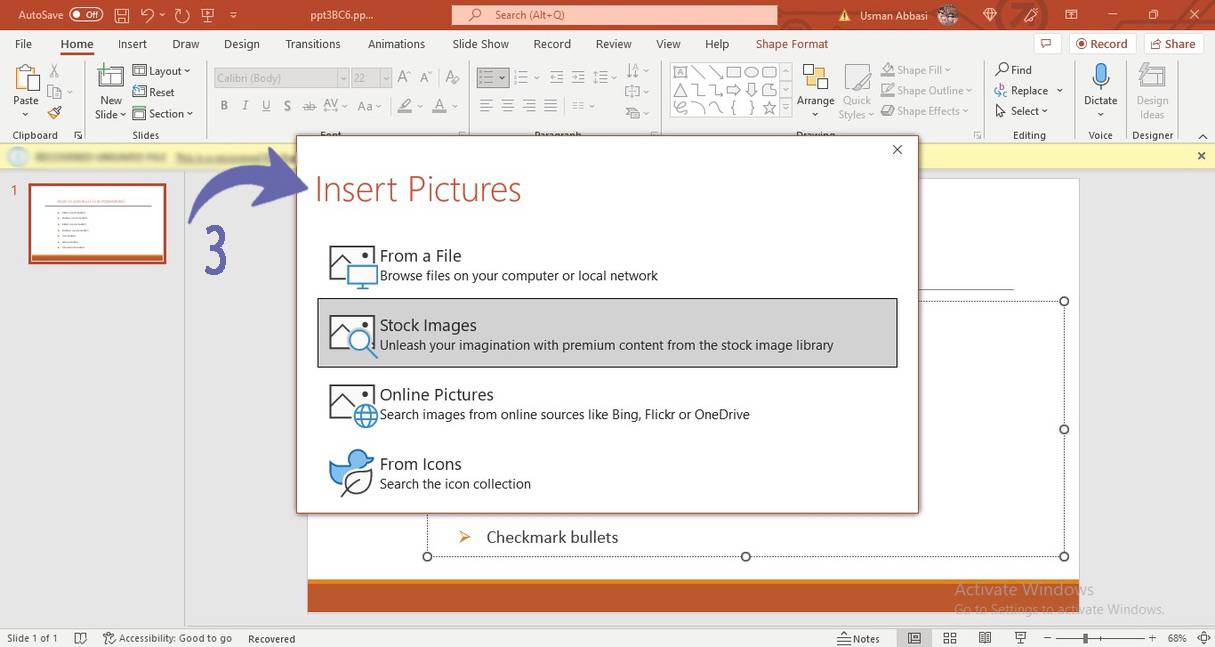
3. Select the picture insert option, browse and insert your desired image/icon in bullet points
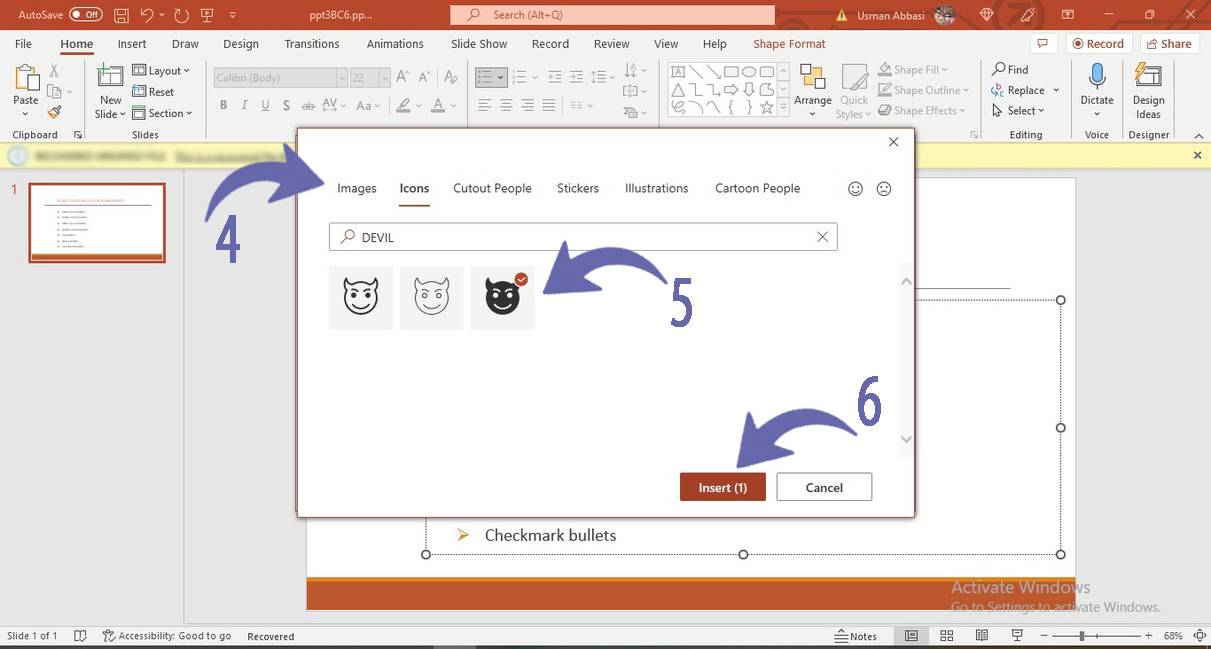

How to make customized Bullets in PowerPoint

1. From the Bullets and Numbering panel, Click the “picture” option
2. Select the icon you want to add to your text as bullet points
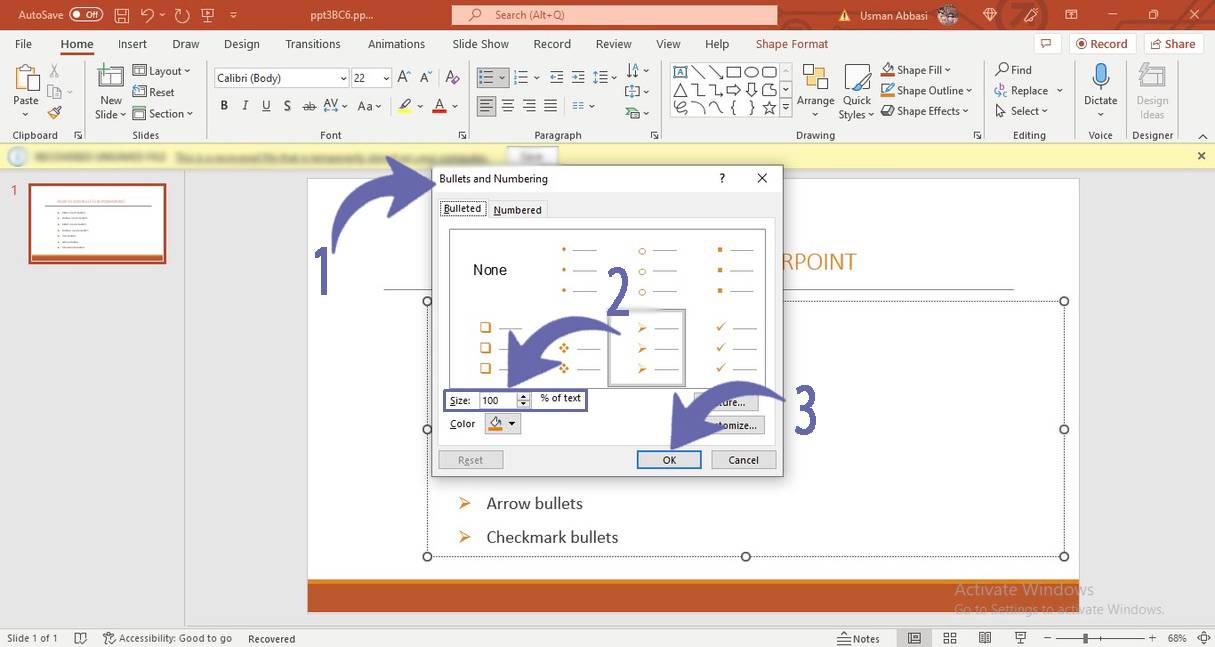
How to change the bullet size in PowerPoint
1. From the Bullets and Numbering panel, click on the “Size” option and enter your required size percentage of your text
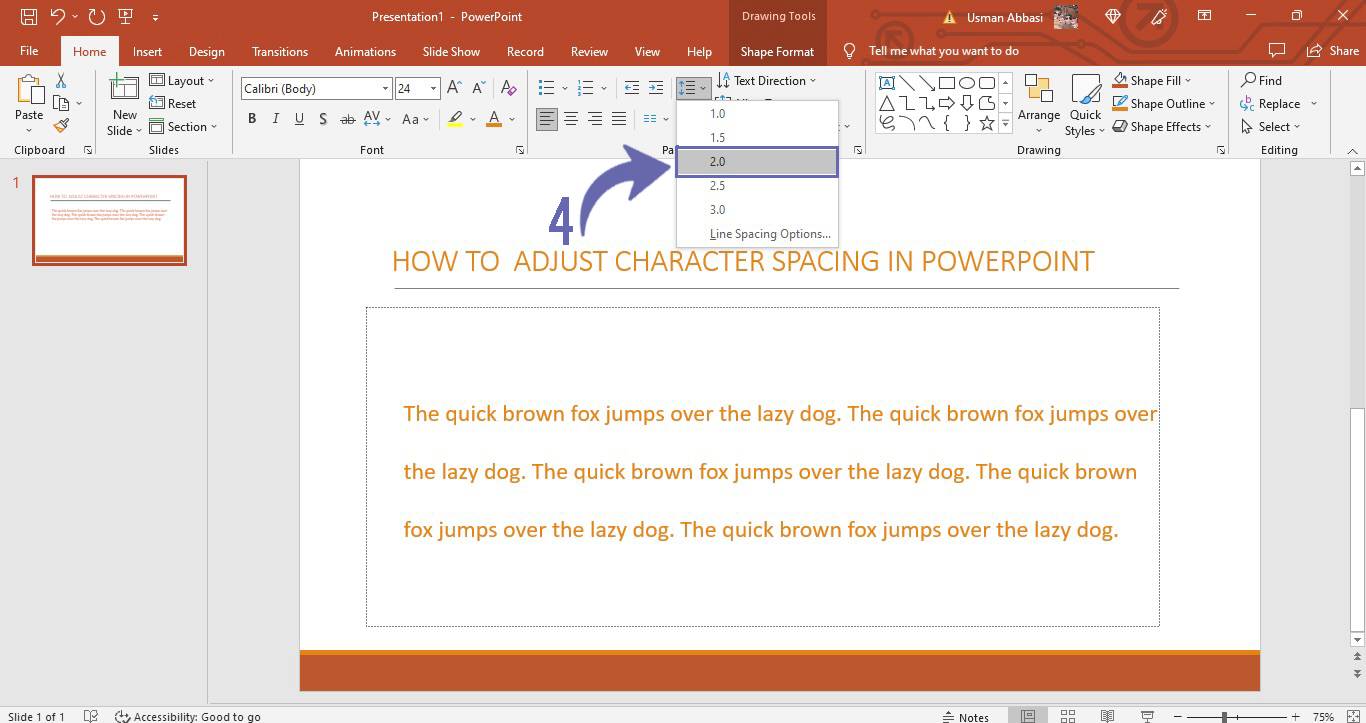
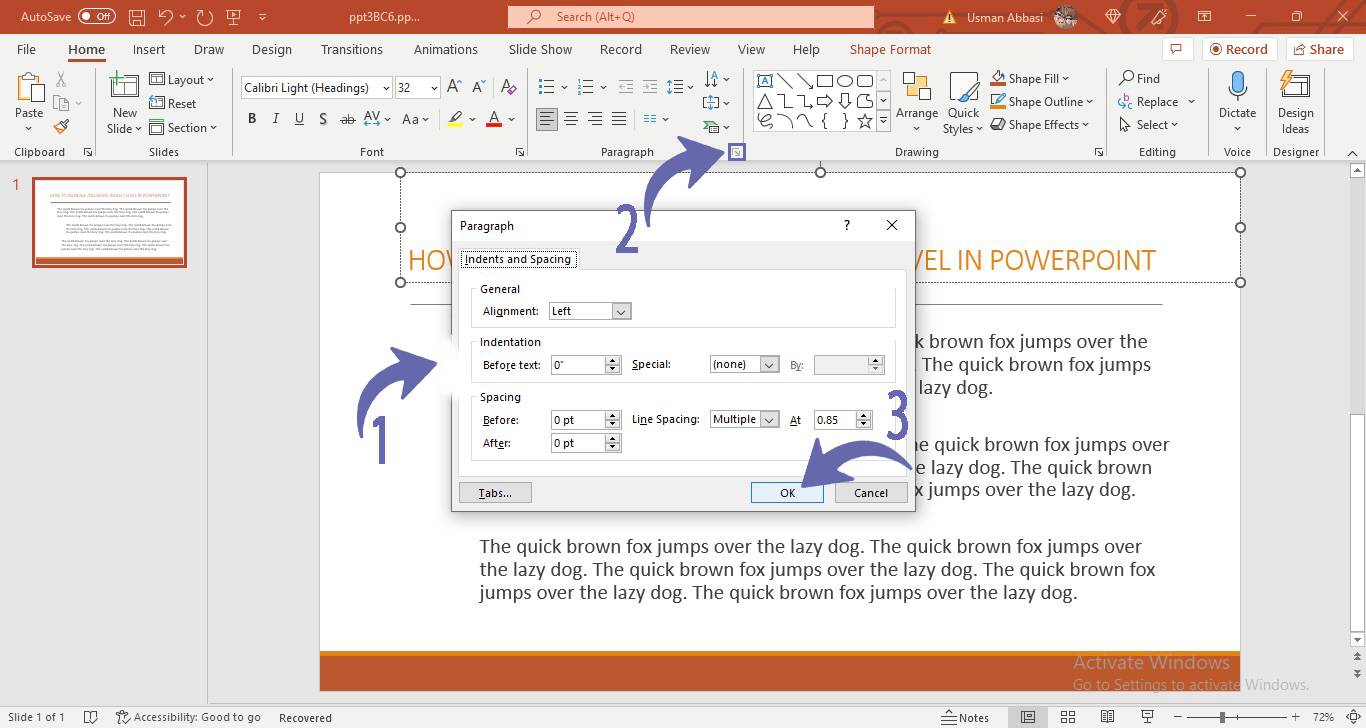
How to adjust line spacing between text in PowerPoint
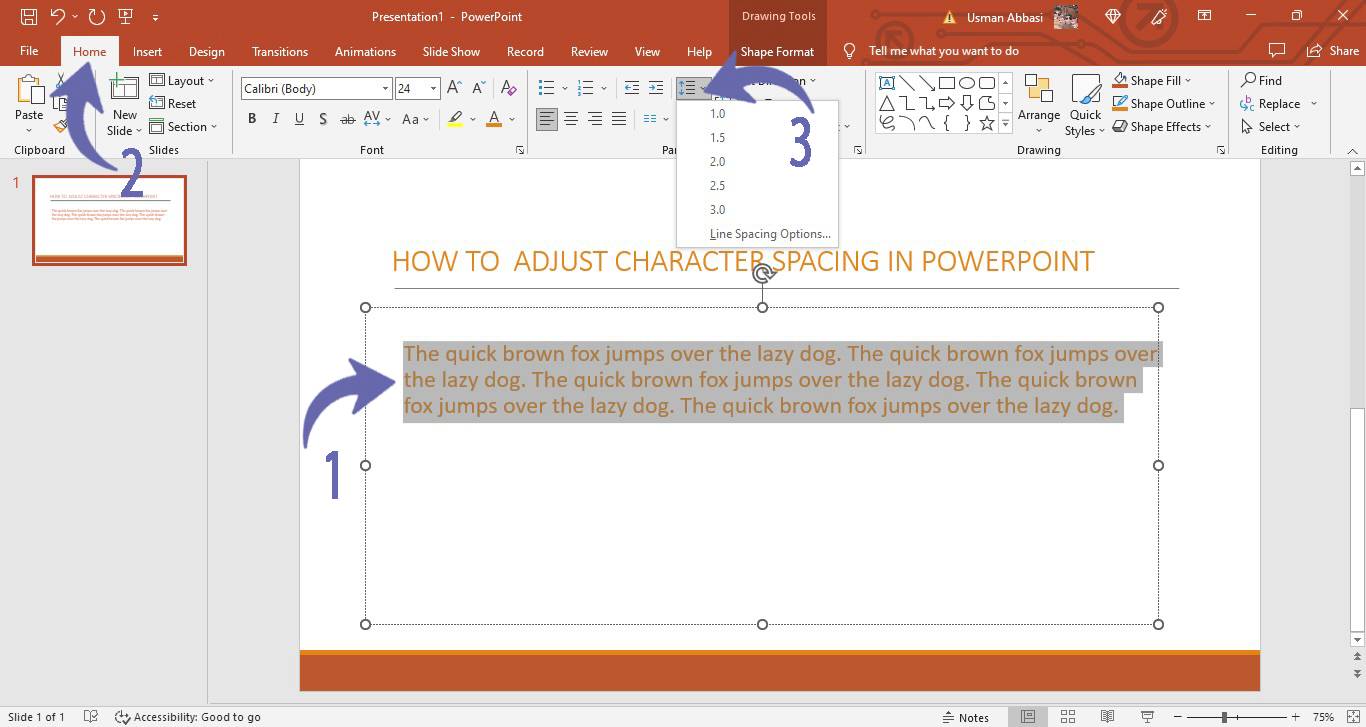
1. Select the paragraph text and go to “Home Tab”
2. Go to the “Paragraph” section
3. Click the “arrow” next to the “Line spacing” option
4. A drop-down menu will appear, select your required “line spacing ”value
5. To customize your Line spacing value
6. Line spacing panel will appear, you can now customize your text spacing
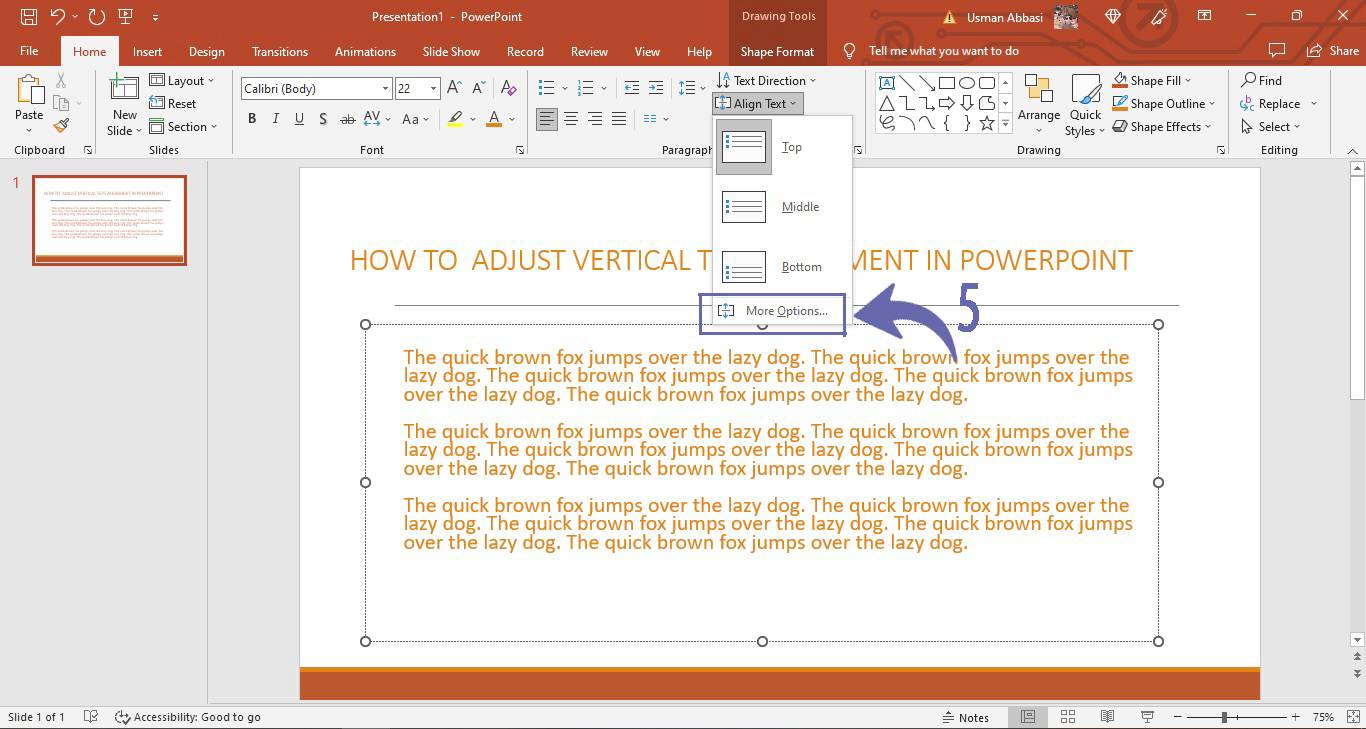
How to change vertical text alignment in PowerPoint
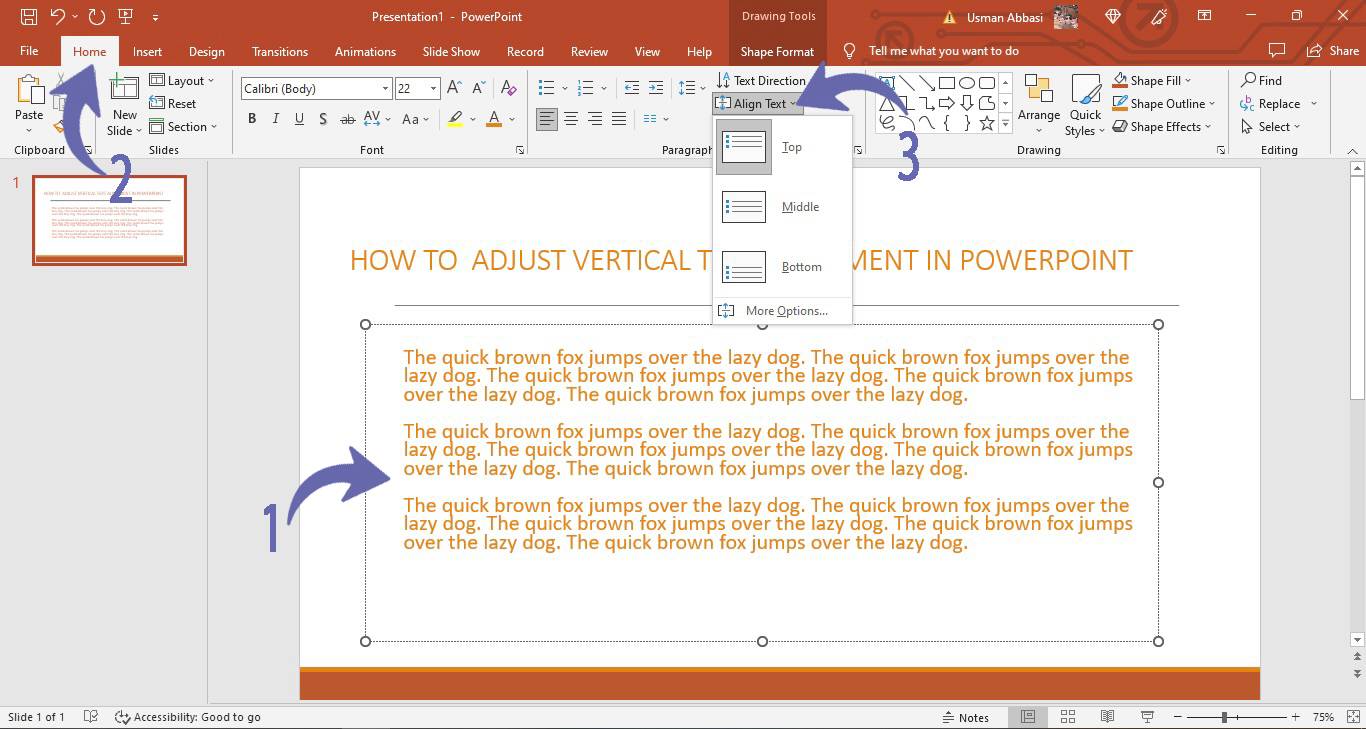
1. Select paragraph text and Go to “Home Tab”
2. In paragraph group, go to the “Vertical Text Alignment ” option
3. Click the “arrow” next to it, and a drop-down menu will appear
4. From the Dropdown menu, you can select your required text alignment option
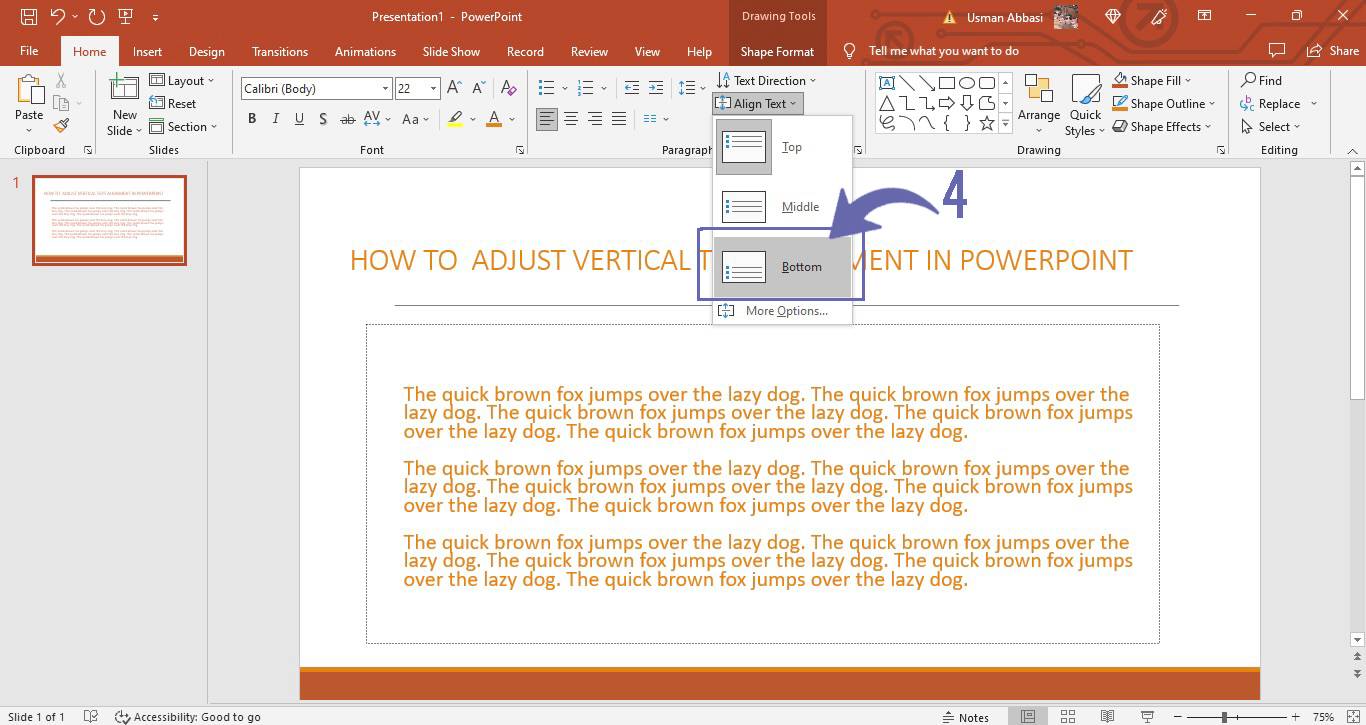
5. To customize your vertical text alignment, Click the “More option” from the dropdown menu
6. On the right side, the adjustment panel will appear
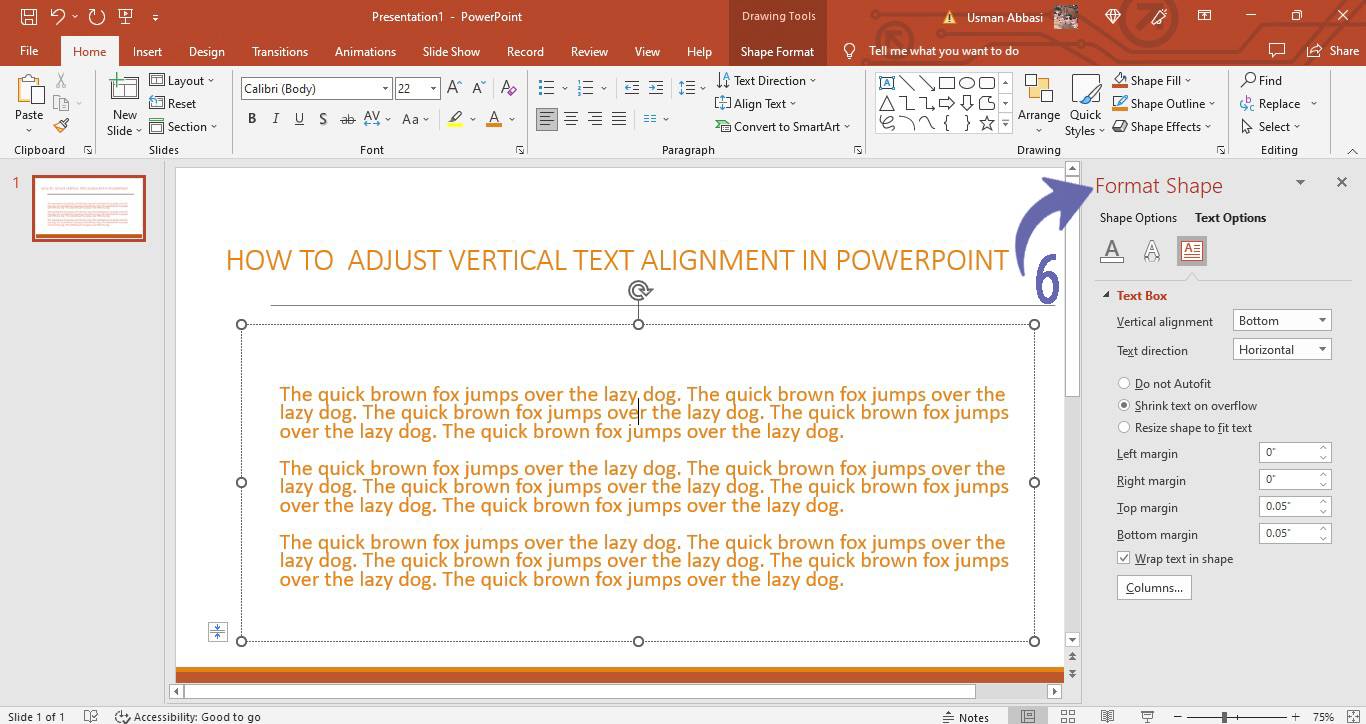
7. You can now customize your vertical text alignment according to your requirements
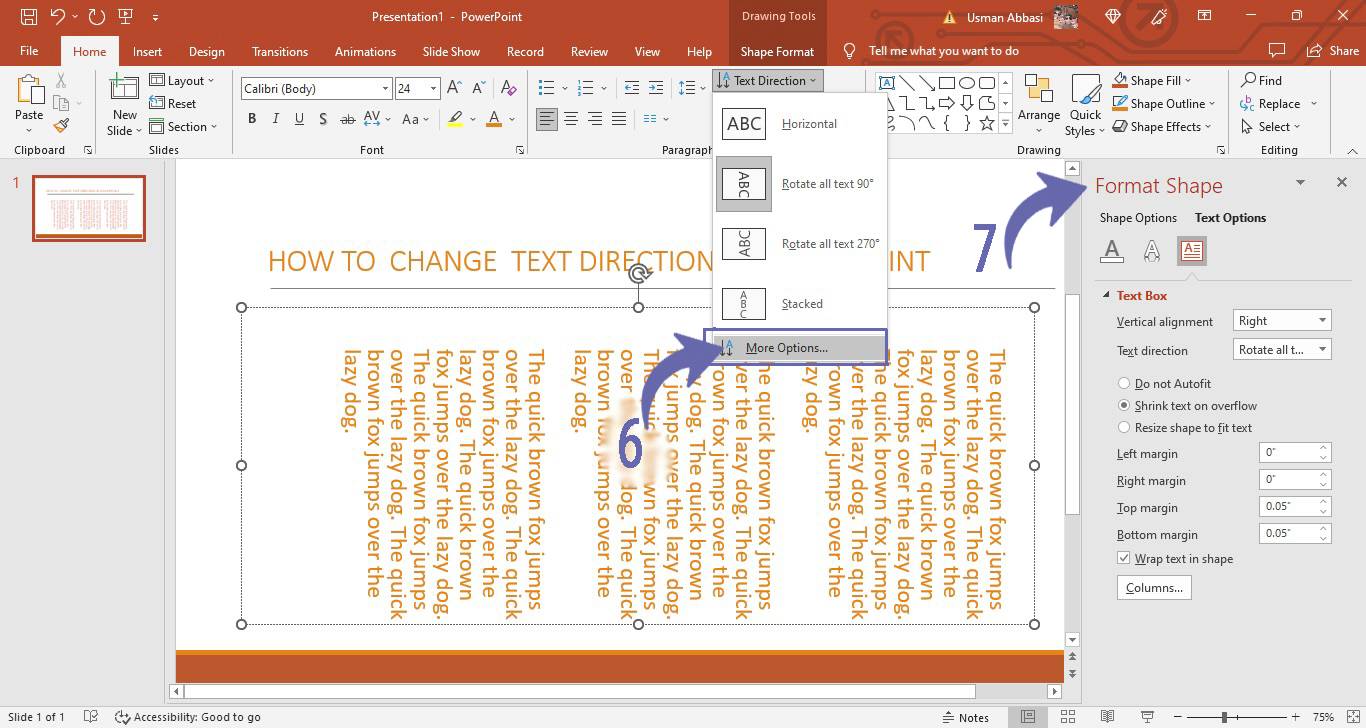
How to change text direction in PowerPoint
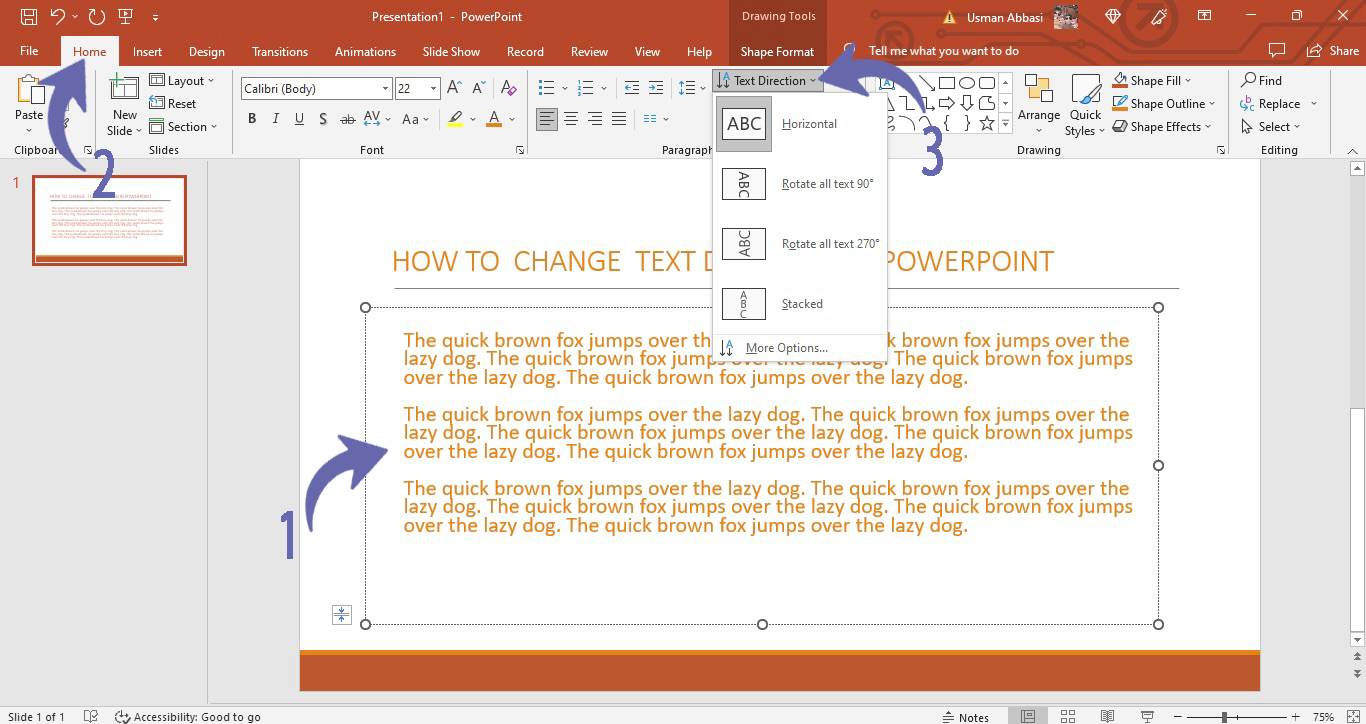
1. Select paragraph text and Go to “Home Tab”
2. In the “Paragraph group”, go to the “text direction” option
3. Click the “arrow” next to it and from the dropdown menu, Select your “text direction” option
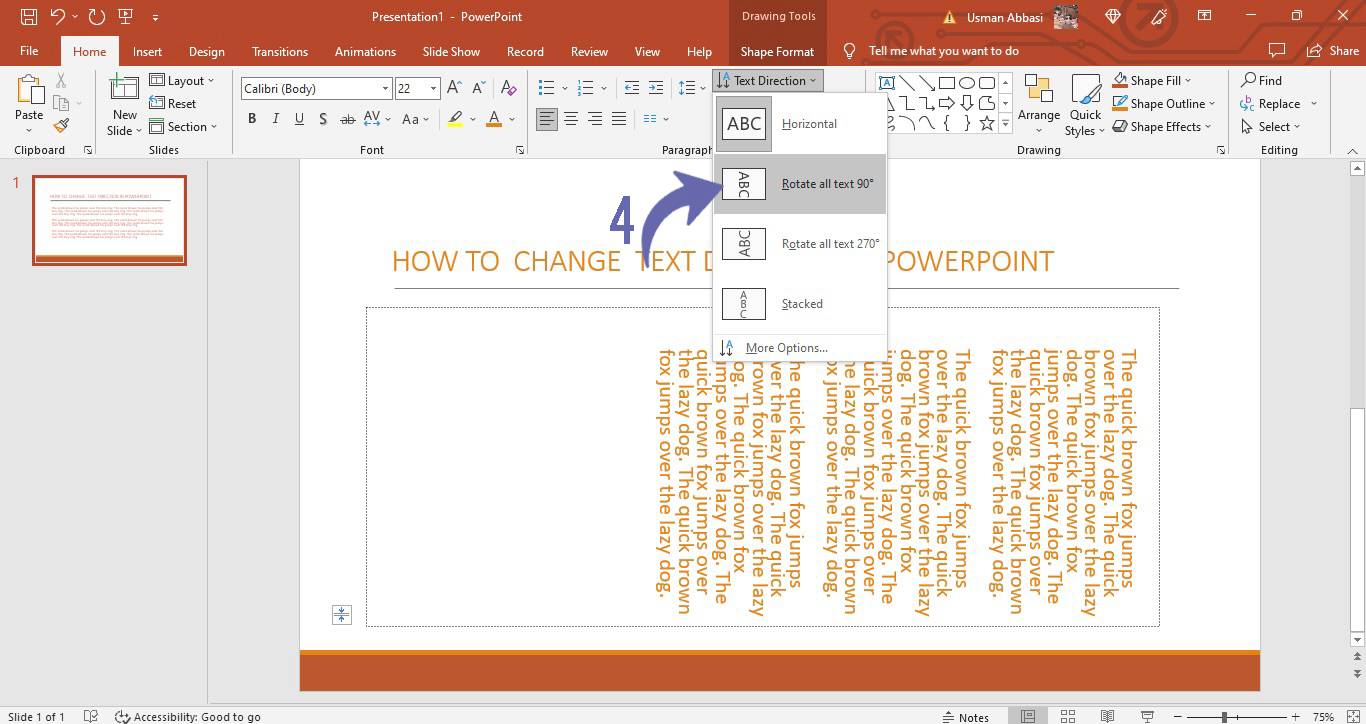
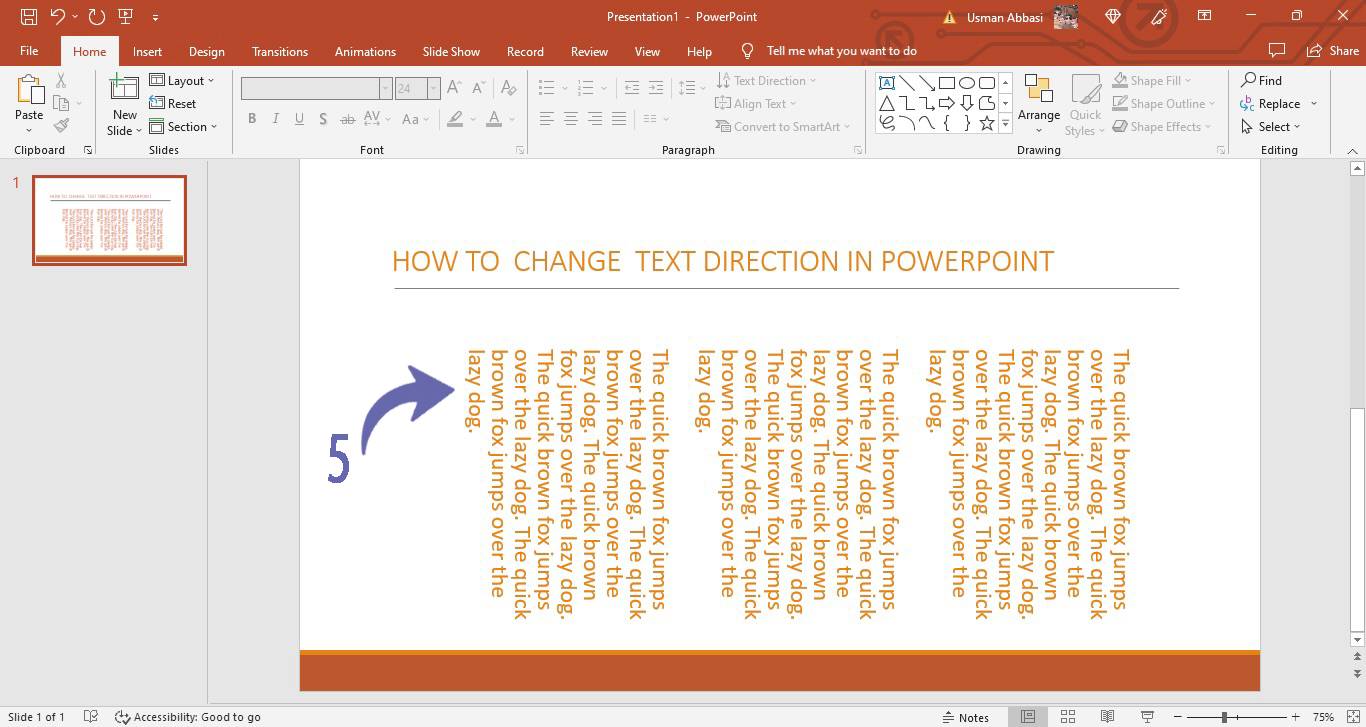
4. To customize your text direction, click the “Text direction” option from the dropdown menu
5. On the right, the adjustment panel will appear, you can now customize your text direction according to your requirements
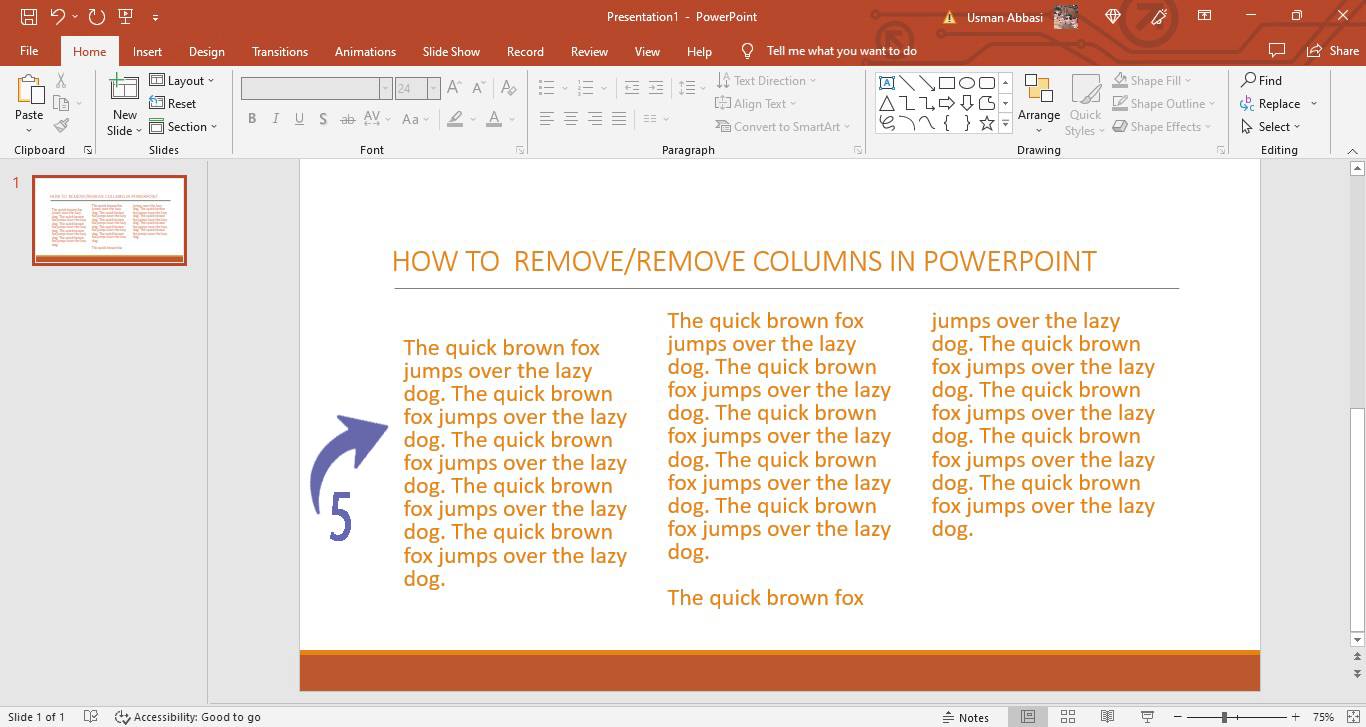
How to add or Remove Columns in PowerPoint
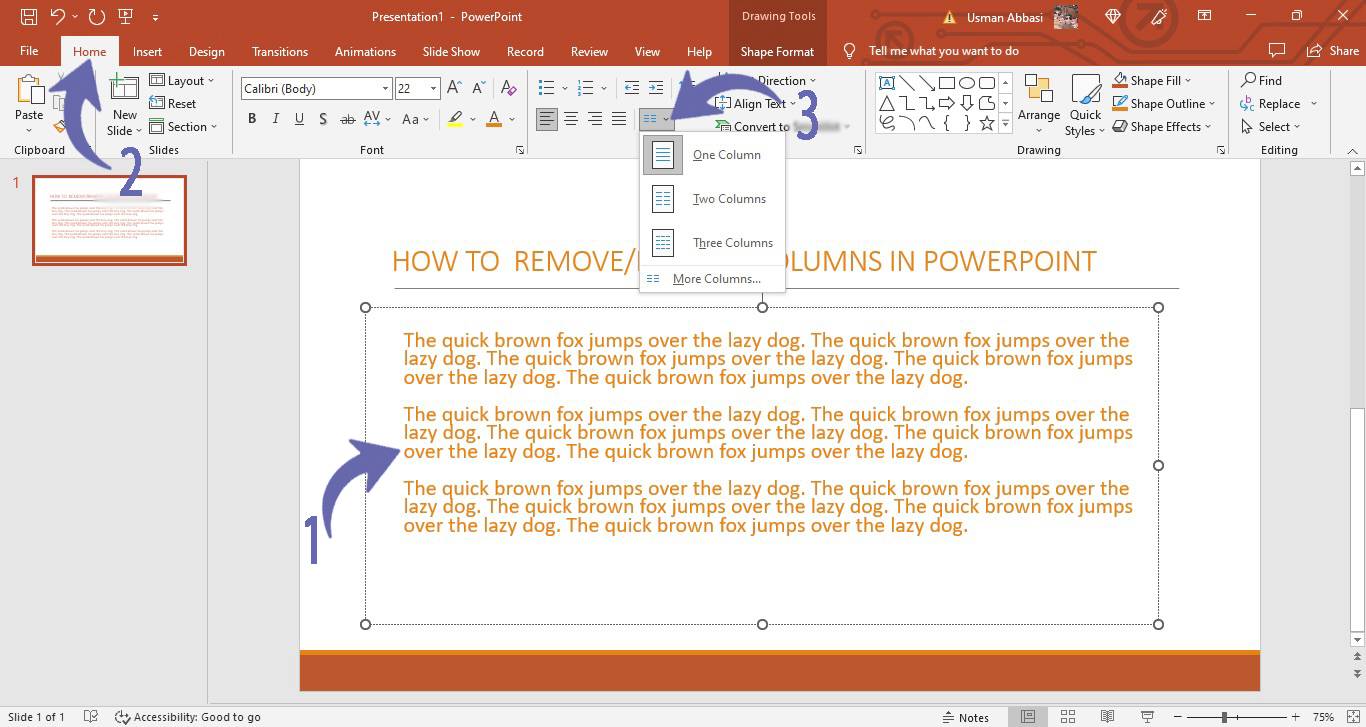
1. Select paragraph text and Go to “Home Tab”
2. In the paragraph group, go to the “Add or Remove Columns ” option
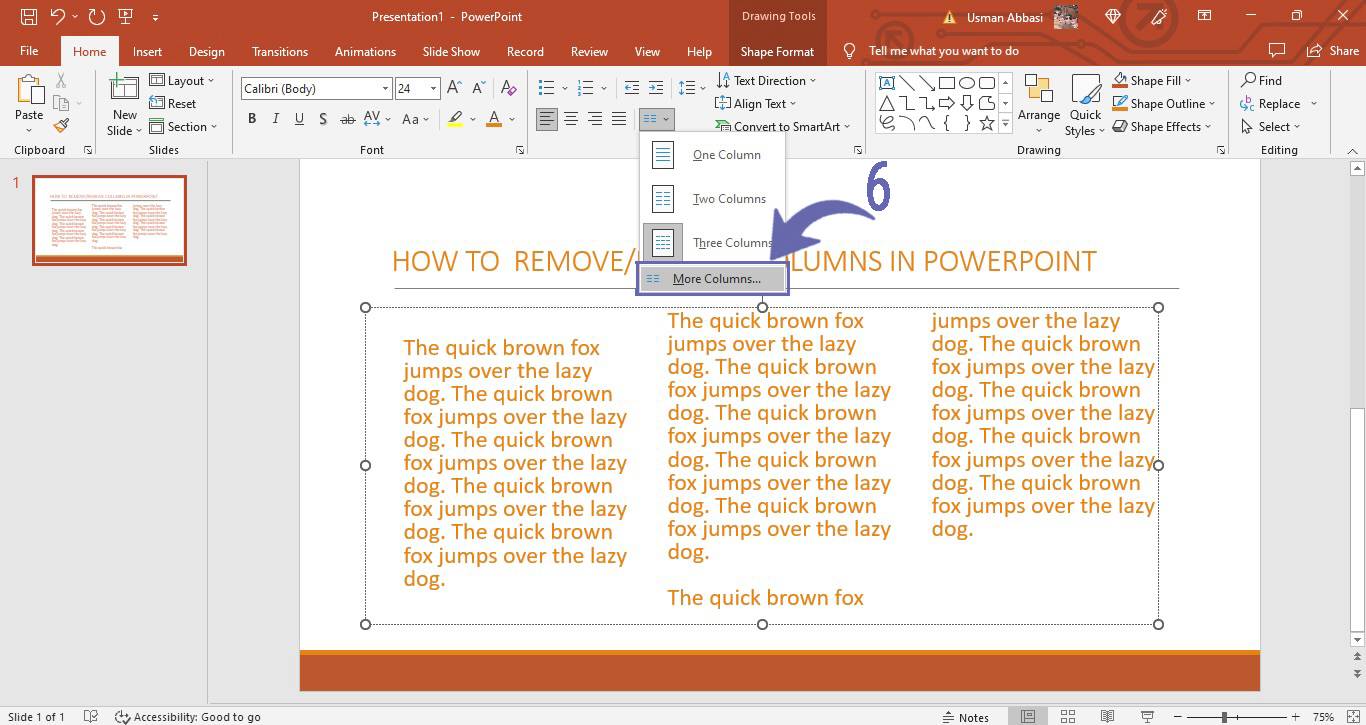
3. Click the “arrow” next to it and a dropdown menu will appear
4. From the dropdown menu, select the number of columns you want to add or remove
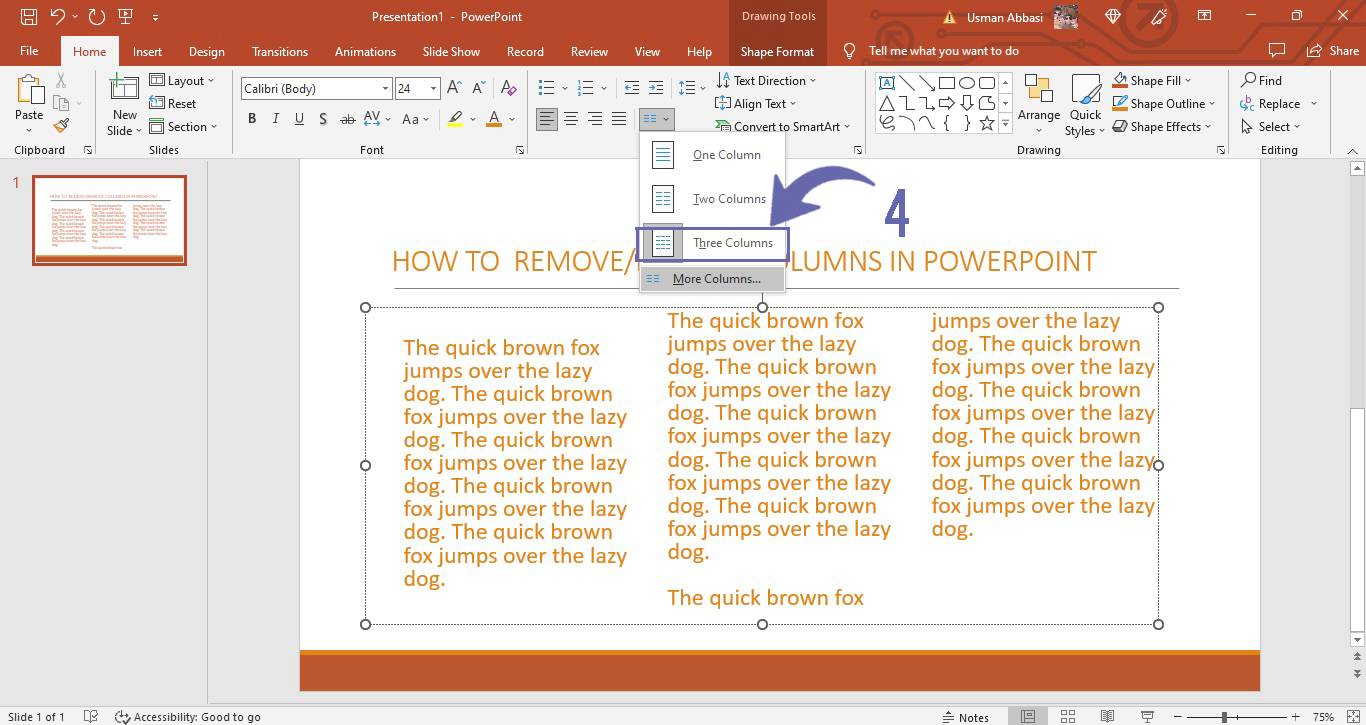
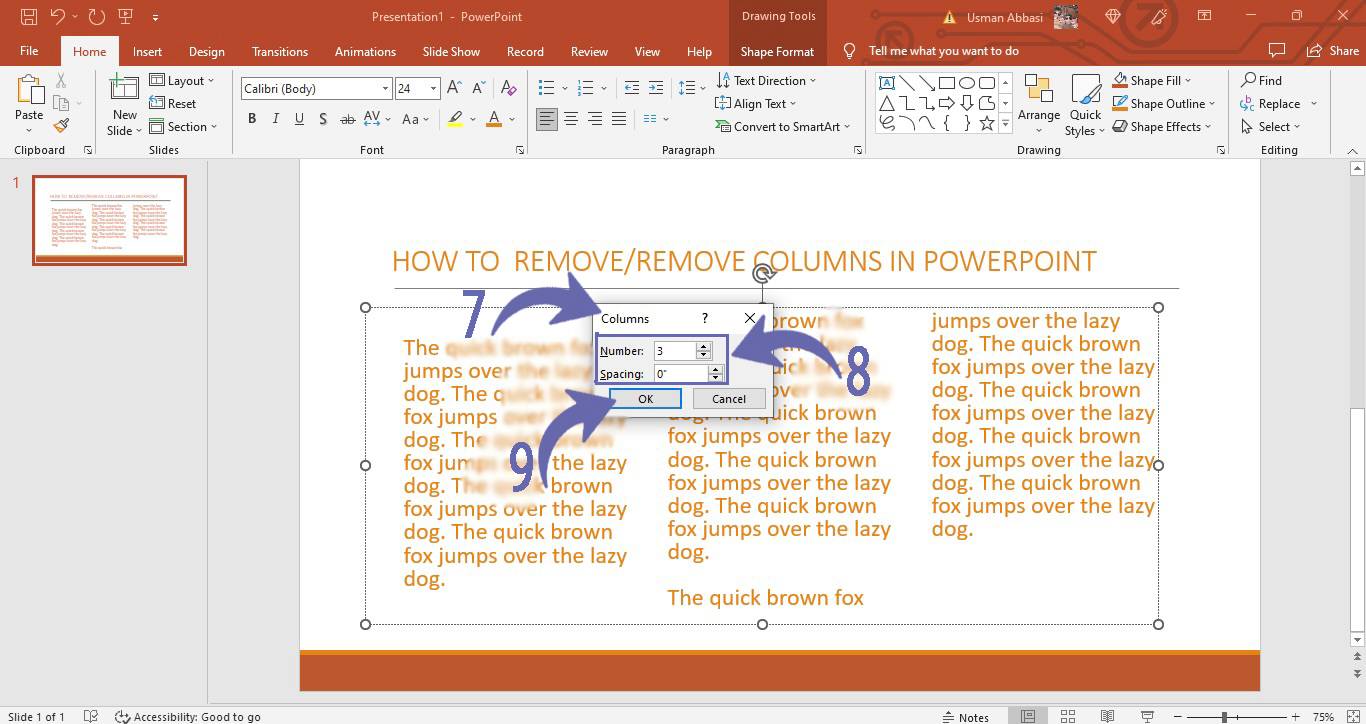
5. To add more columns and adjust the spacing between columns, click “More Columns Option” from the dropdown menu
6. A panel will appear, enter the number of columns you want to add and adjust the spacing between them
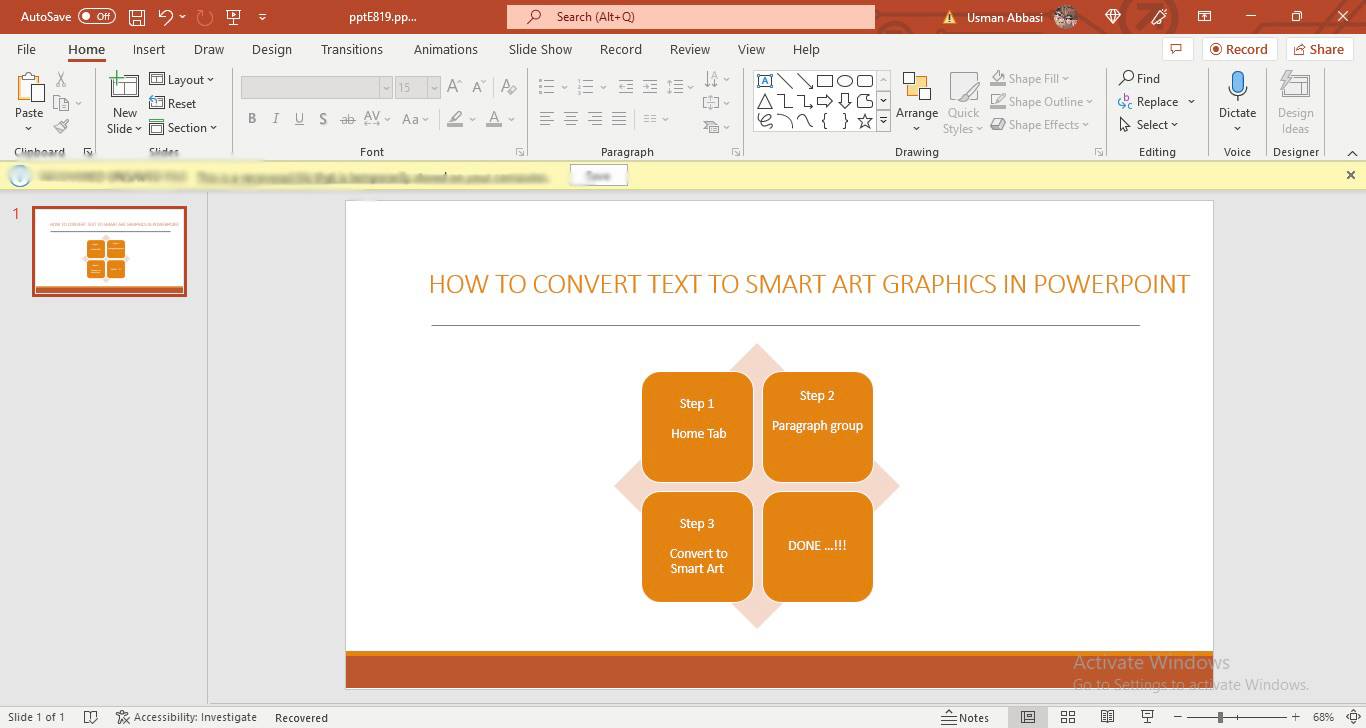
How to convert simple Text to Smart Art in PowerPoint
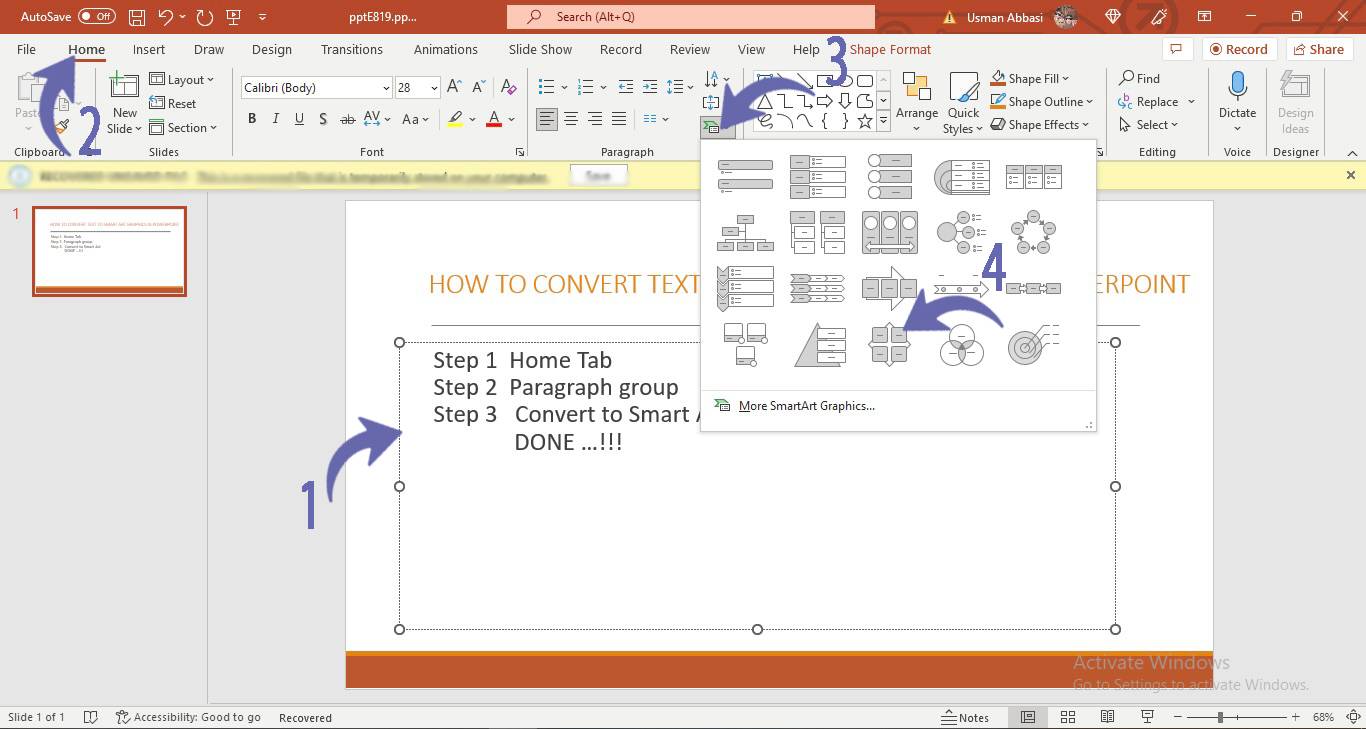
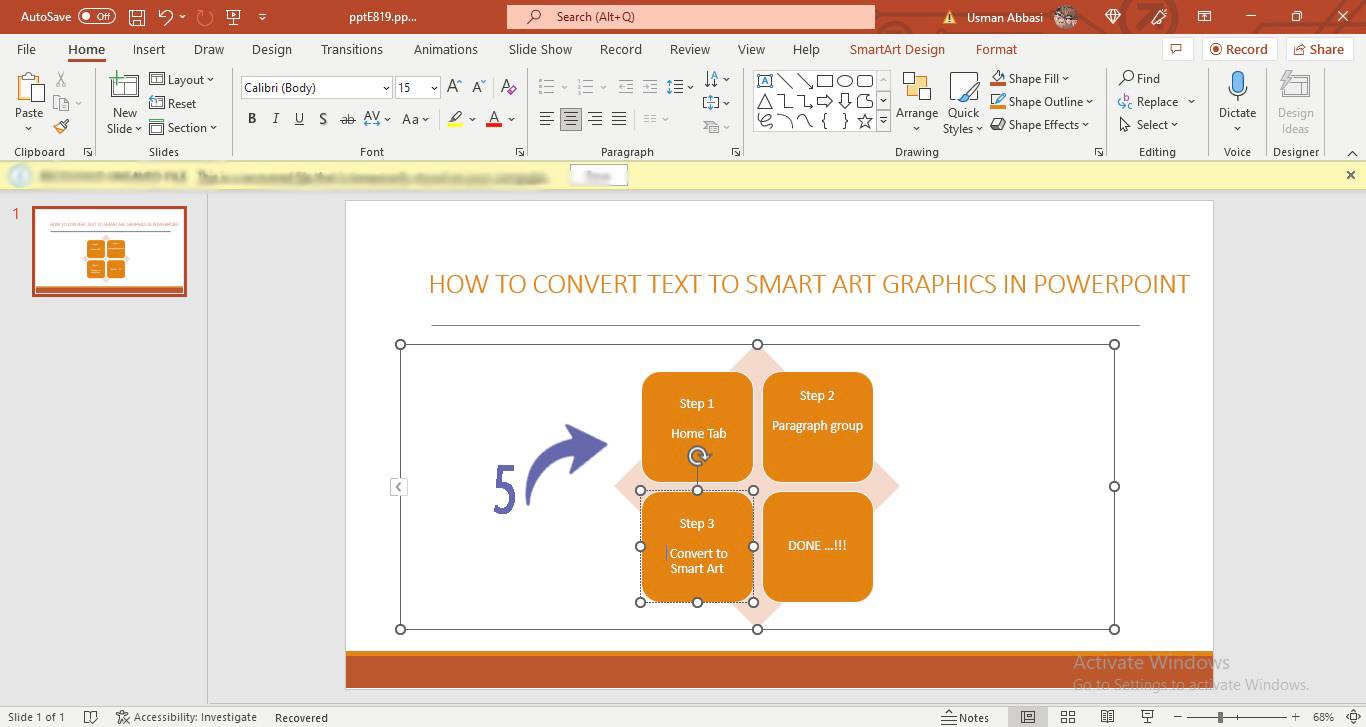
1. Select paragraph text and Go to “Home Tab”
2. In the “Paragraph group”, go to the “ SmartArt Graphics ” option
3. Click the “arrow” next to it
4. Select your desired smart art graphic to convert the text into it