Outline
How to add a shape in PowerPoint
How to rearrange the order of objects in PowerPoint
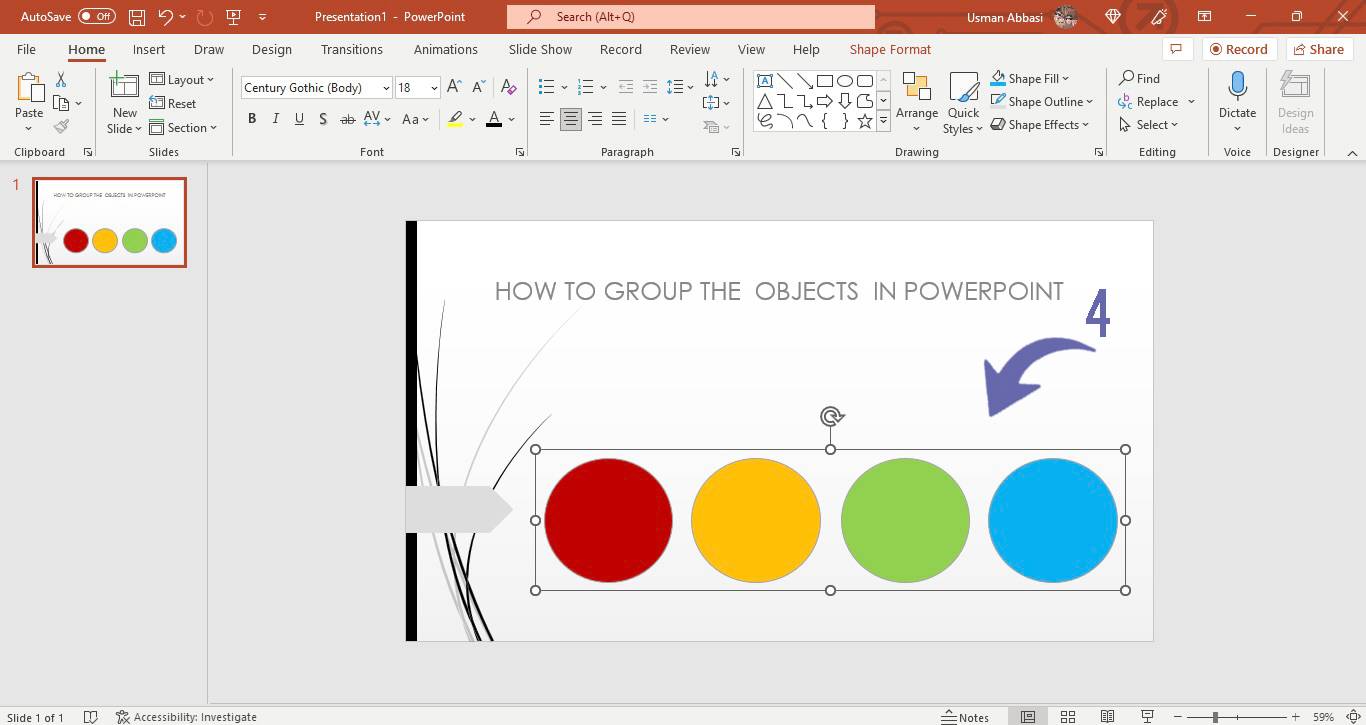
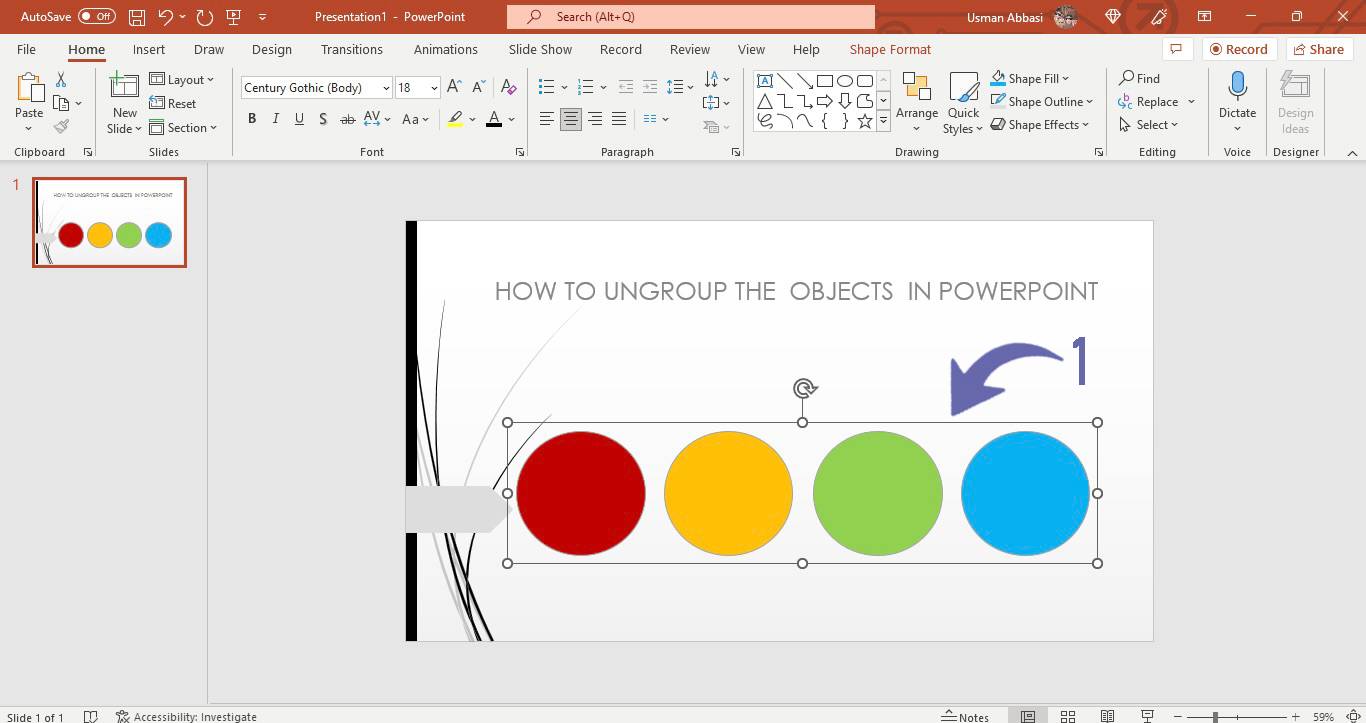
How to Reorder (Group, Ungroup and Regroup) objects in PowerPoint
How to change the position of objects in PowerPoint
How to Hide, Show and Lock, Unlock object layers in PowerPoint
How to Add quick style to the shape in PowerPoint
How to fill color in a shape in PowerPoint
How to remove the color fill of the Shape in PowerPoint
How to insert a picture in shape in PowerPoint
How to add texture to the shape in PowerPoint
How to add a gradient to the shape in PowerPoint
How to change the outline color of Shape in PowerPoint
How to change the outline weight of a shape in PowerPoint
How to Change shape outline sketched with the style in PowerPoint
How to Change shape outline Dashes style in PowerPoint
How to change the arrow style of Lines in PowerPoint
How to adjust the Shadow effect of a Shape in PowerPoint1
How to adjust the reflection effect of the Shape in PowerPoint
How to adjust the glow effect of a Shape in PowerPoint
How to adjust the Soft edges effects of Shape in PowerPoint
How to adjust bevel shape in PowerPoint
How to adjust the 3-D shape rotation effect in PowerPoint
How to add a shape in PowerPoint
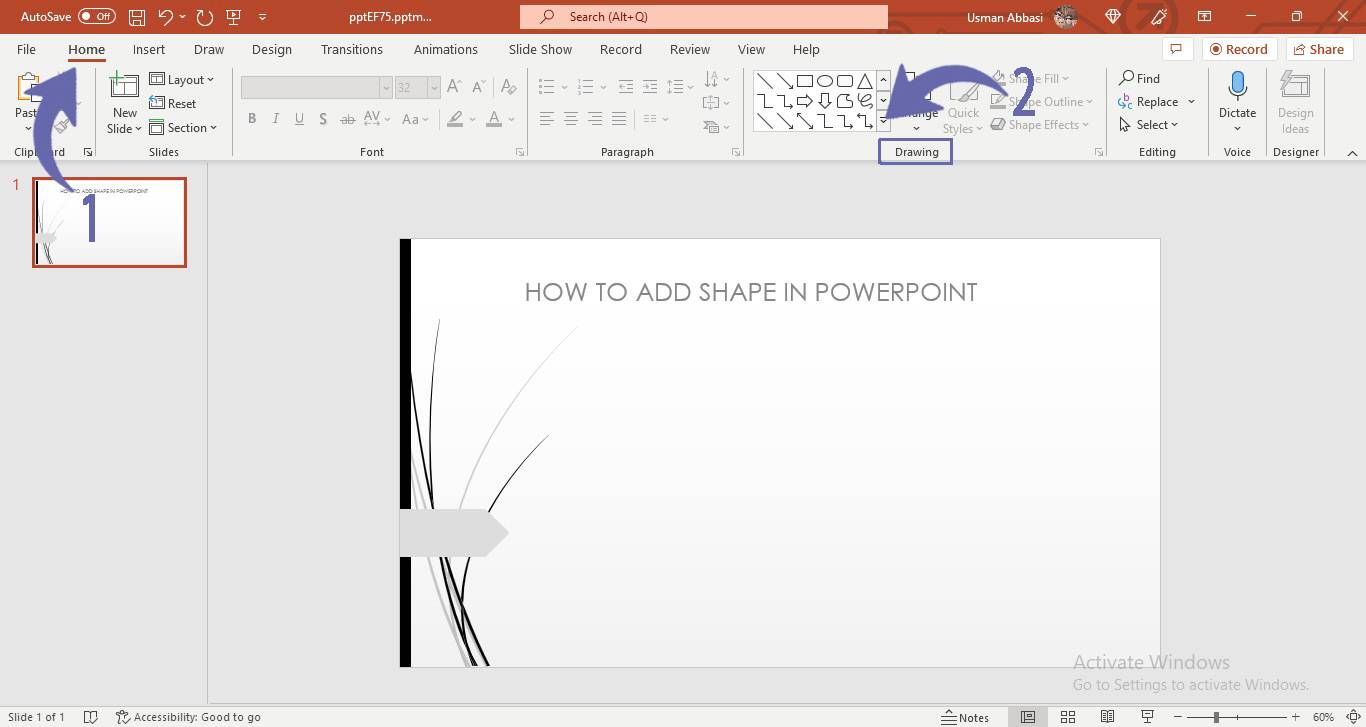
1. Go to the “Home Tab”
2. In the “Drawing group”, Go to the “ Shapes ” option
3. Click the “arrow” next to it
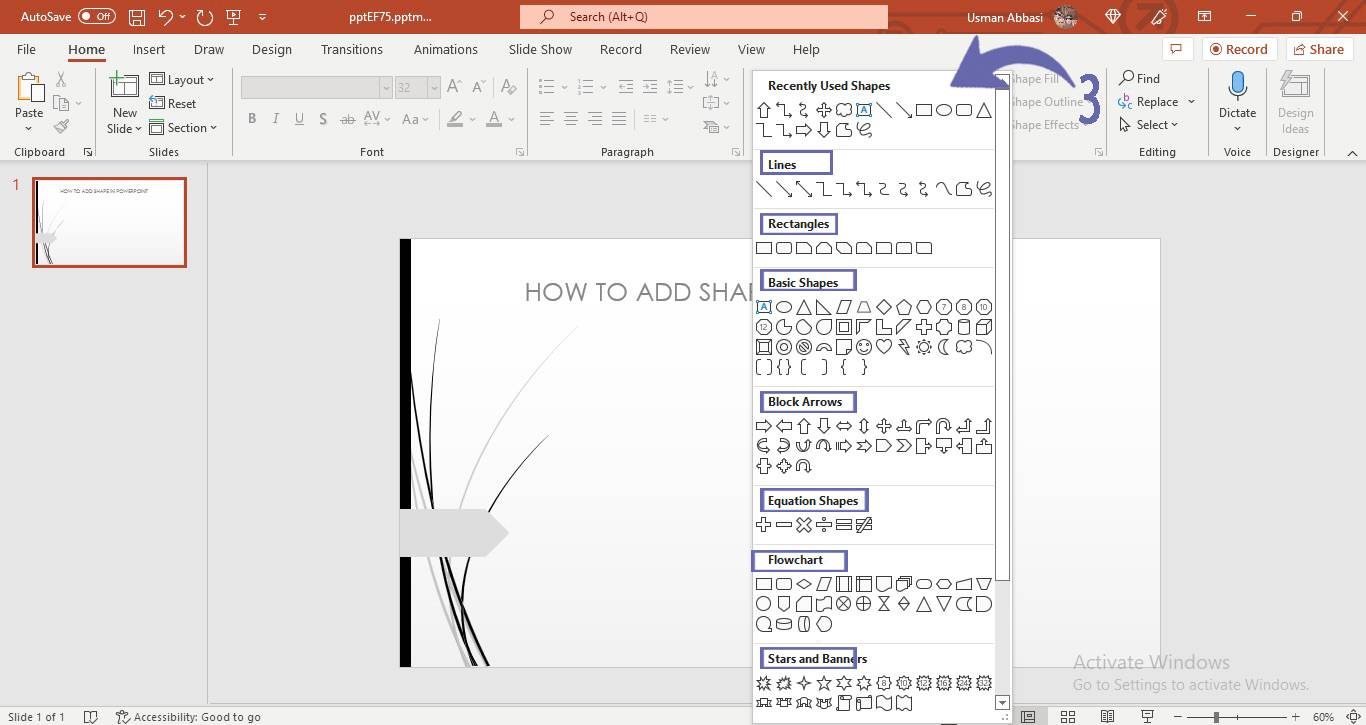
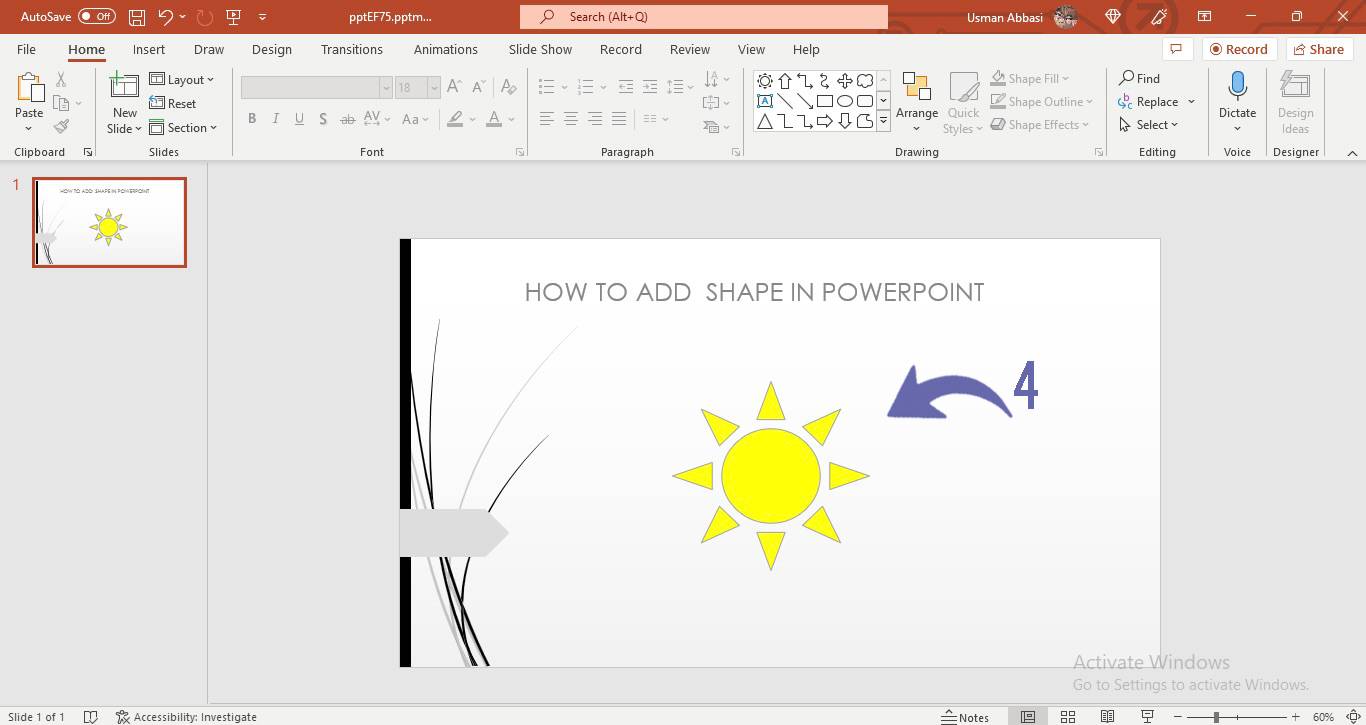
4. A drop-down menu will appear with a variety of shapes and categories i.e.,
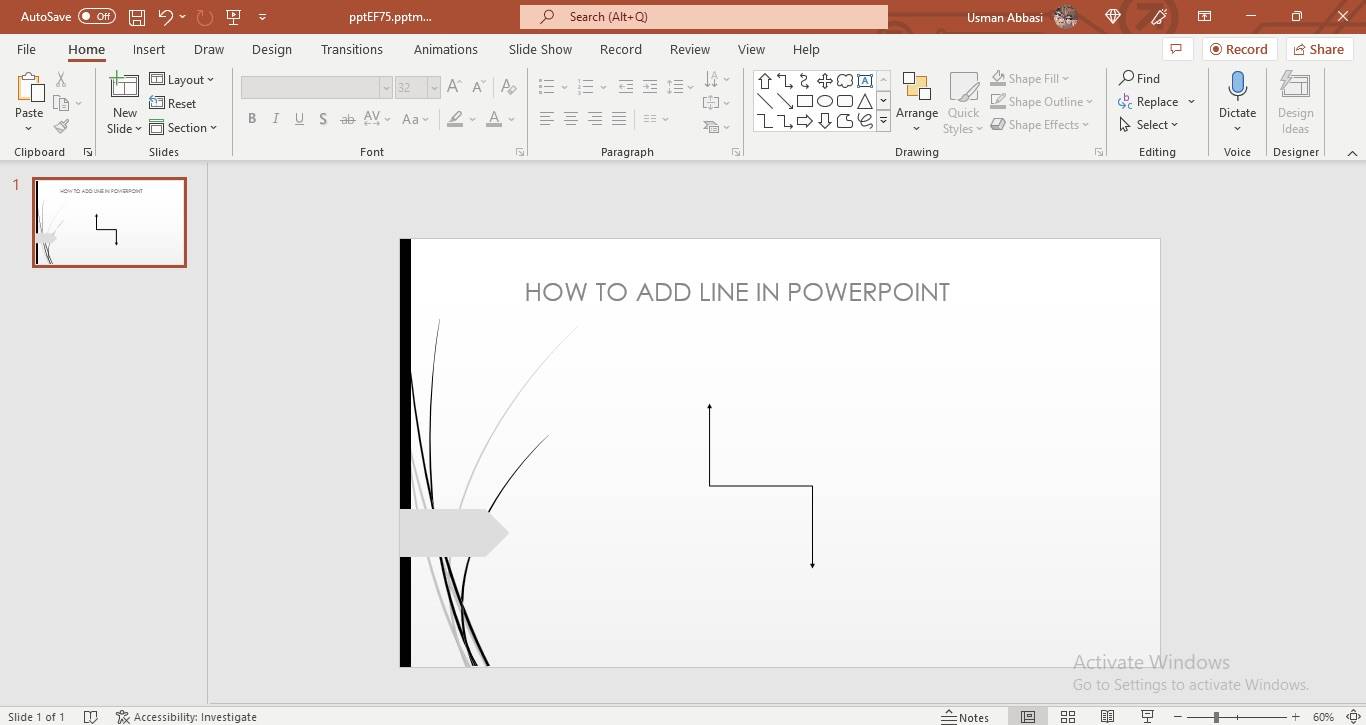
LINES ( also known as connectors, these lines are used to connect different shapes and other designs with each other, every line has its own use )
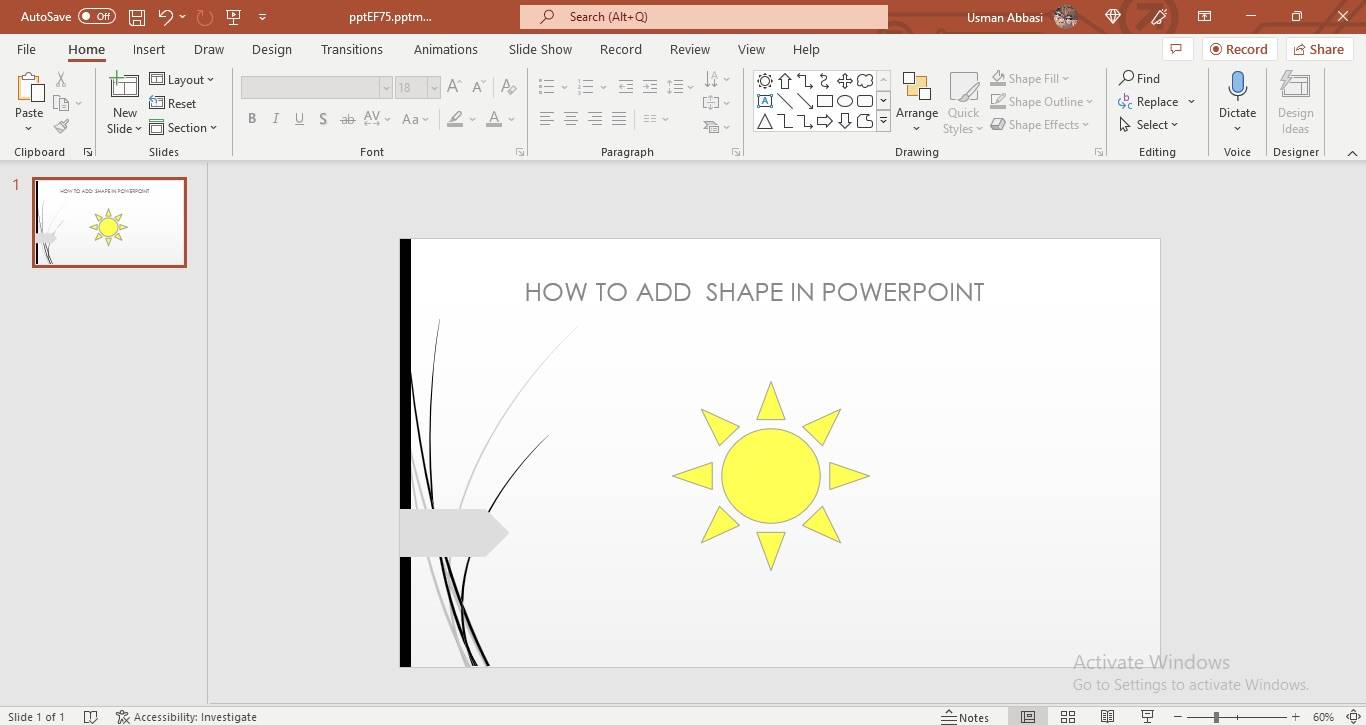
SHAPES
BLOCK ARROWS (these arrows are used to indicate or point something. These can be used in different Presentations and in designing slides)
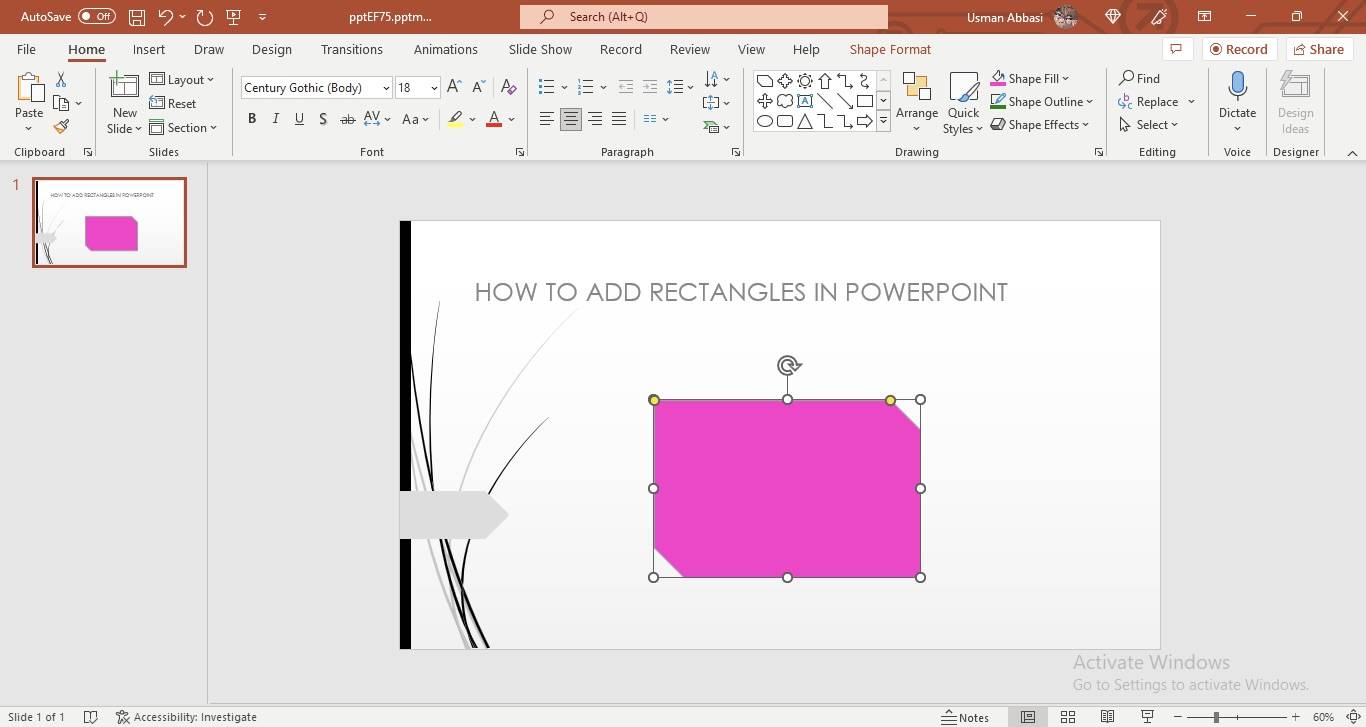
RECTANGLES
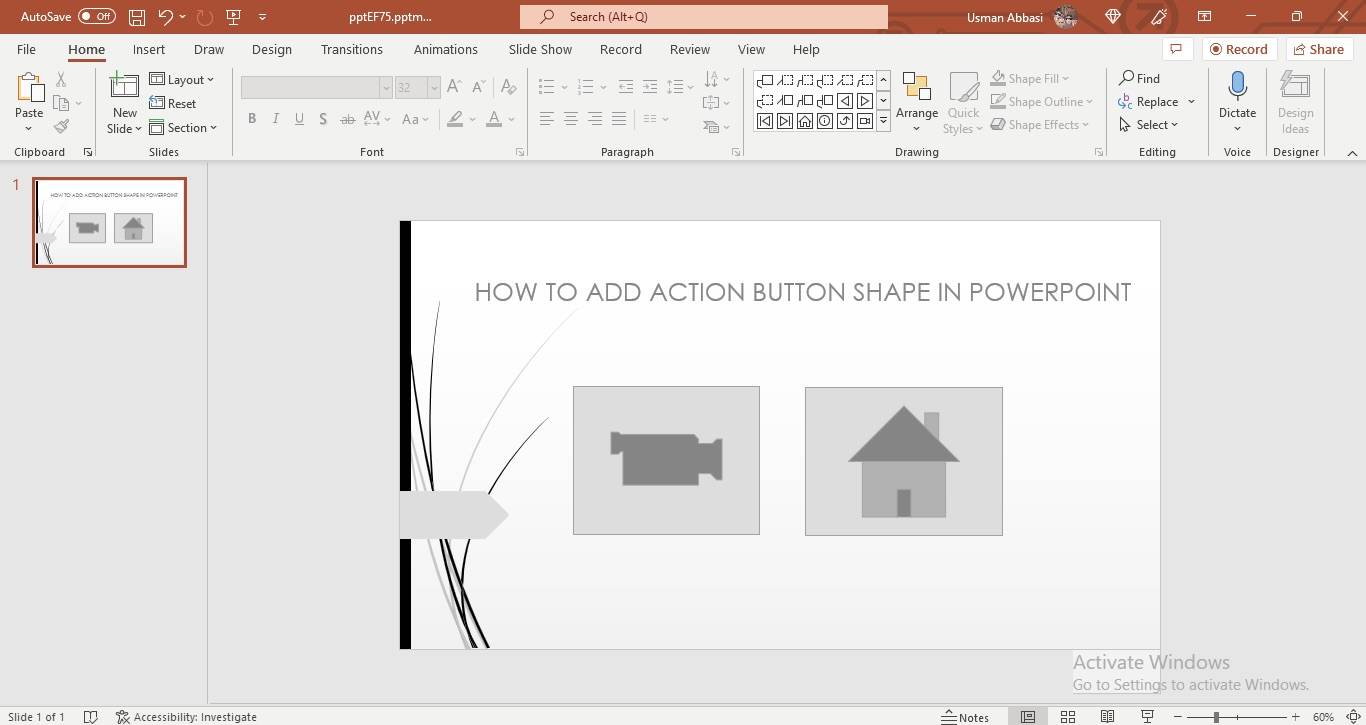
ACTION BUTTONS
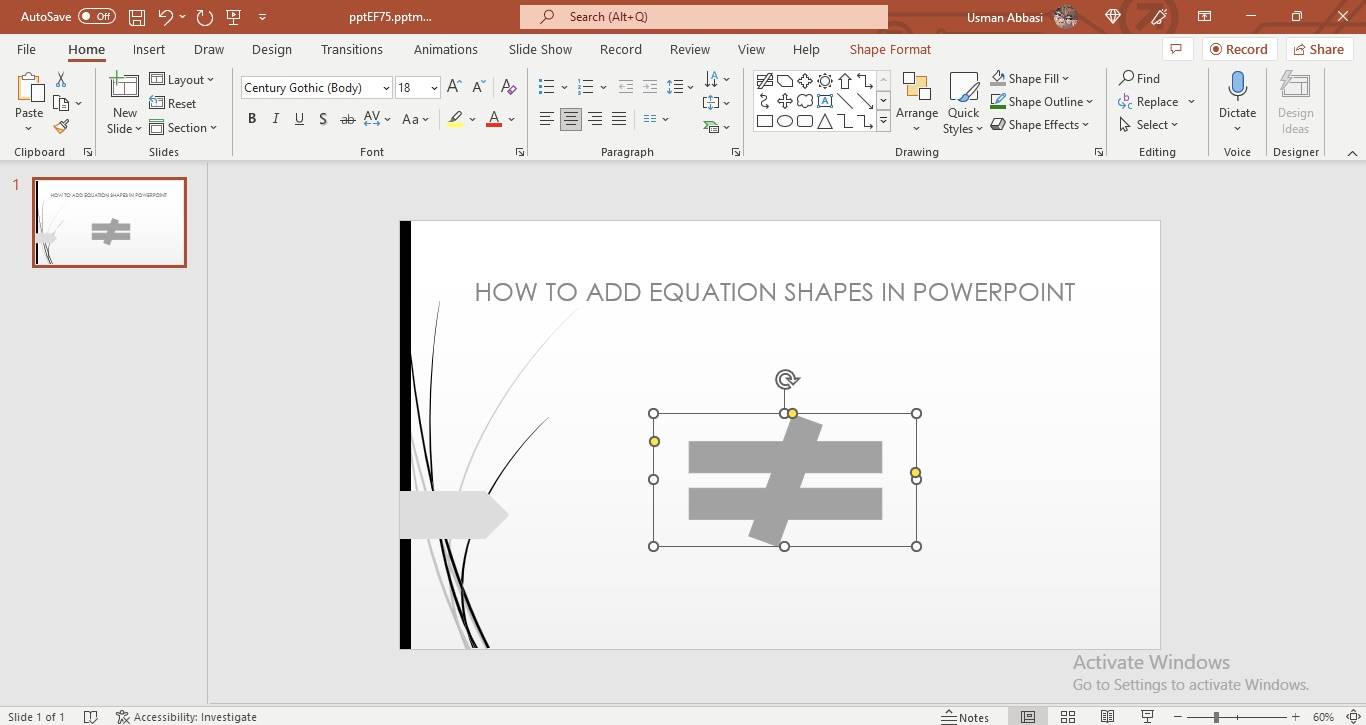
EQUATIONS
FLOWCHART

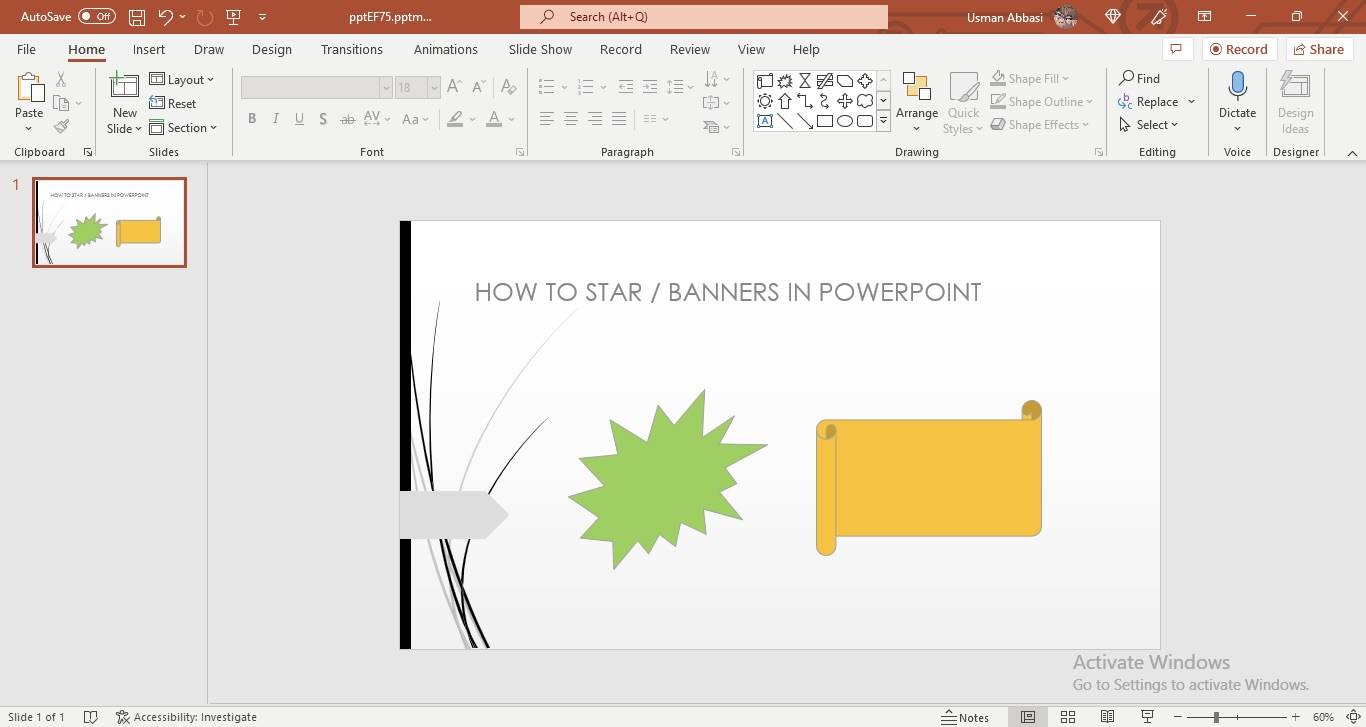
STAR AND BANNERS
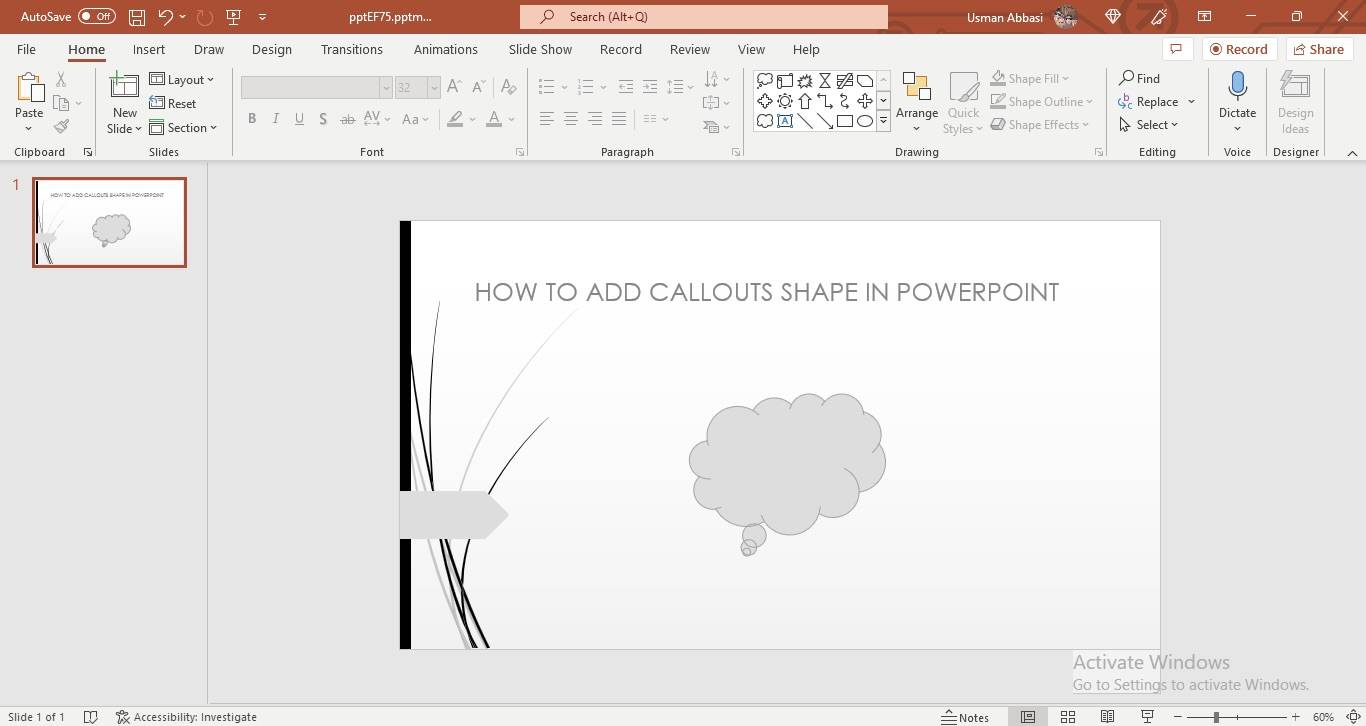
CALLOUT SHAPES
How to rearrange the order of objects in PowerPoint
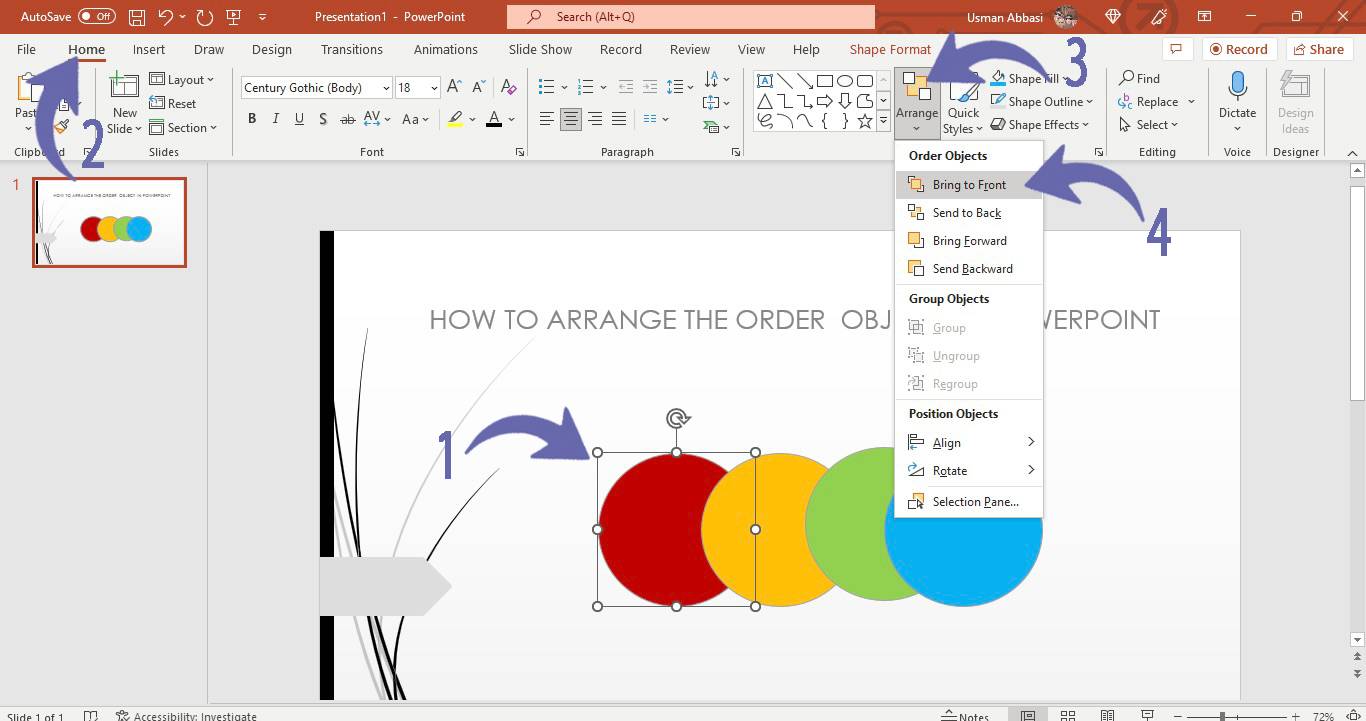

1. Select the object and Go to “Home Tab”
2. In the “Drawing group”, Go to the “ Rearrange ” option
3. Click the “arrow” next to it, and a dropdown menu will appear with many Reordering options that are,
bring to front ( bring the object on the top layer)
bring to back ( bring the object on the bottom layer)
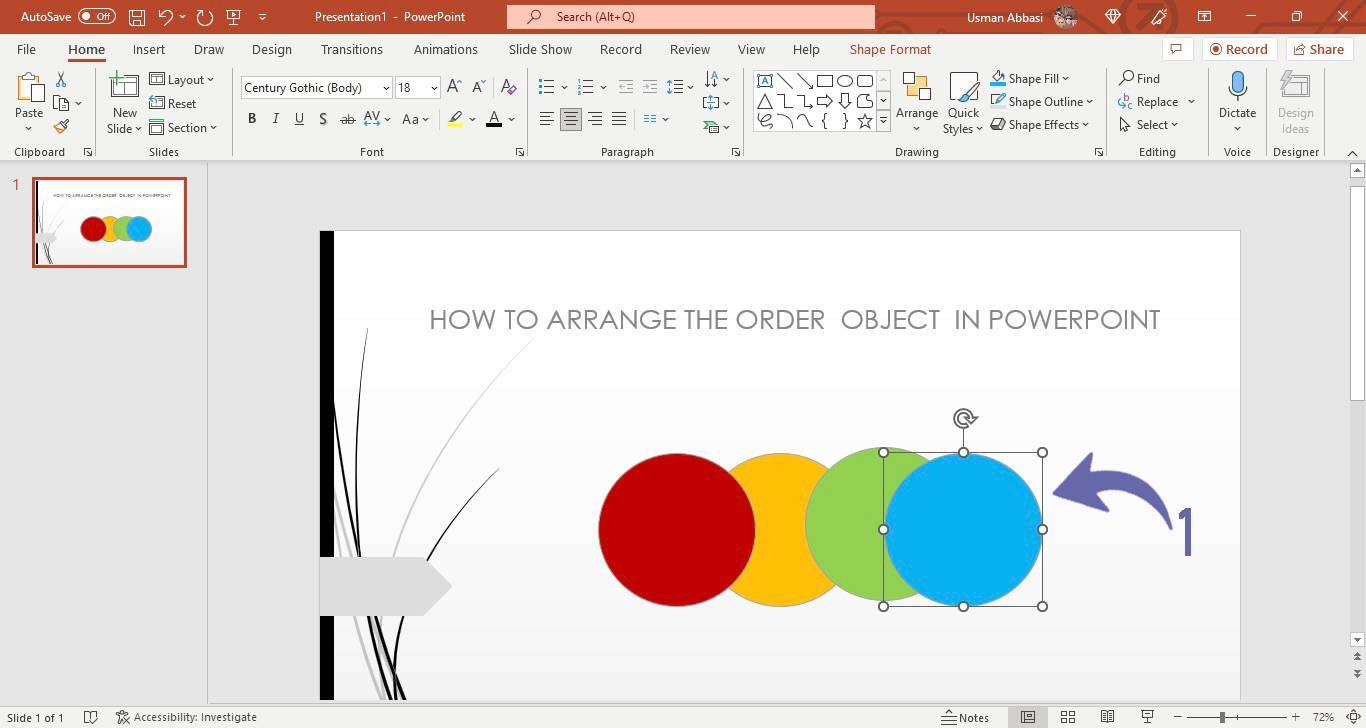
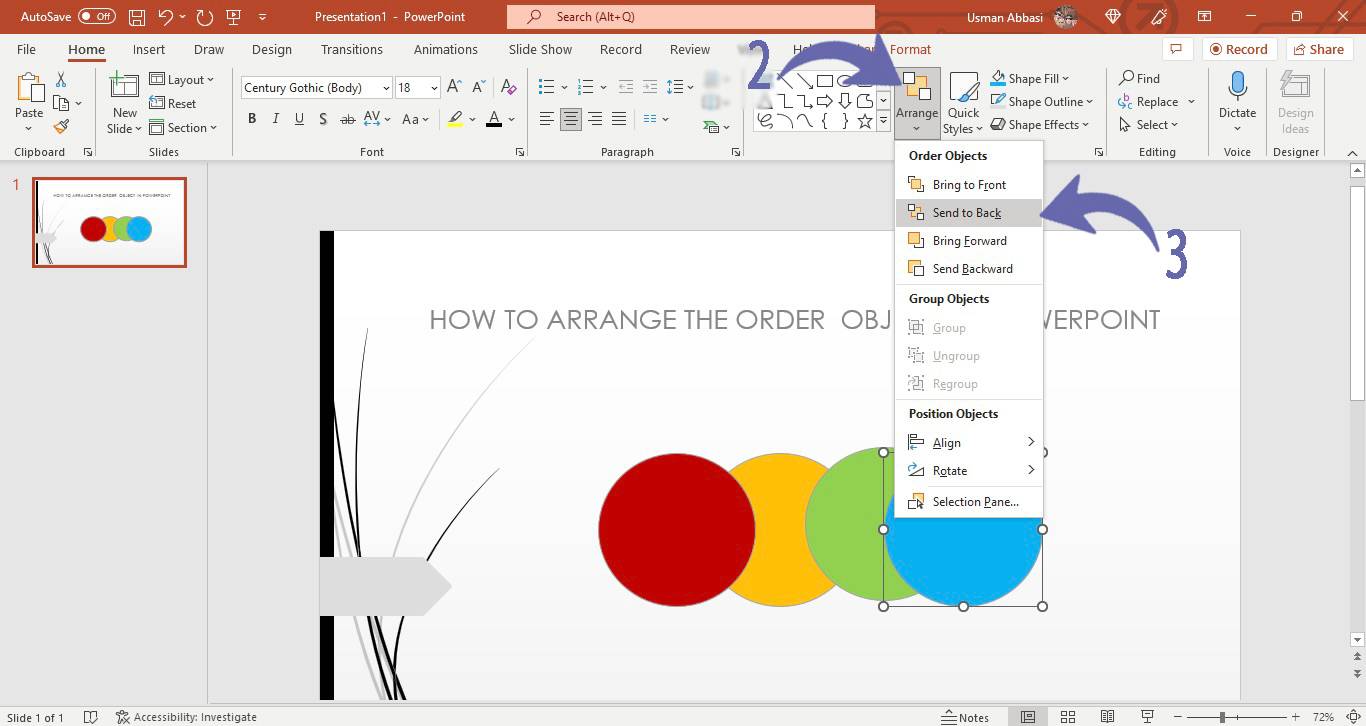
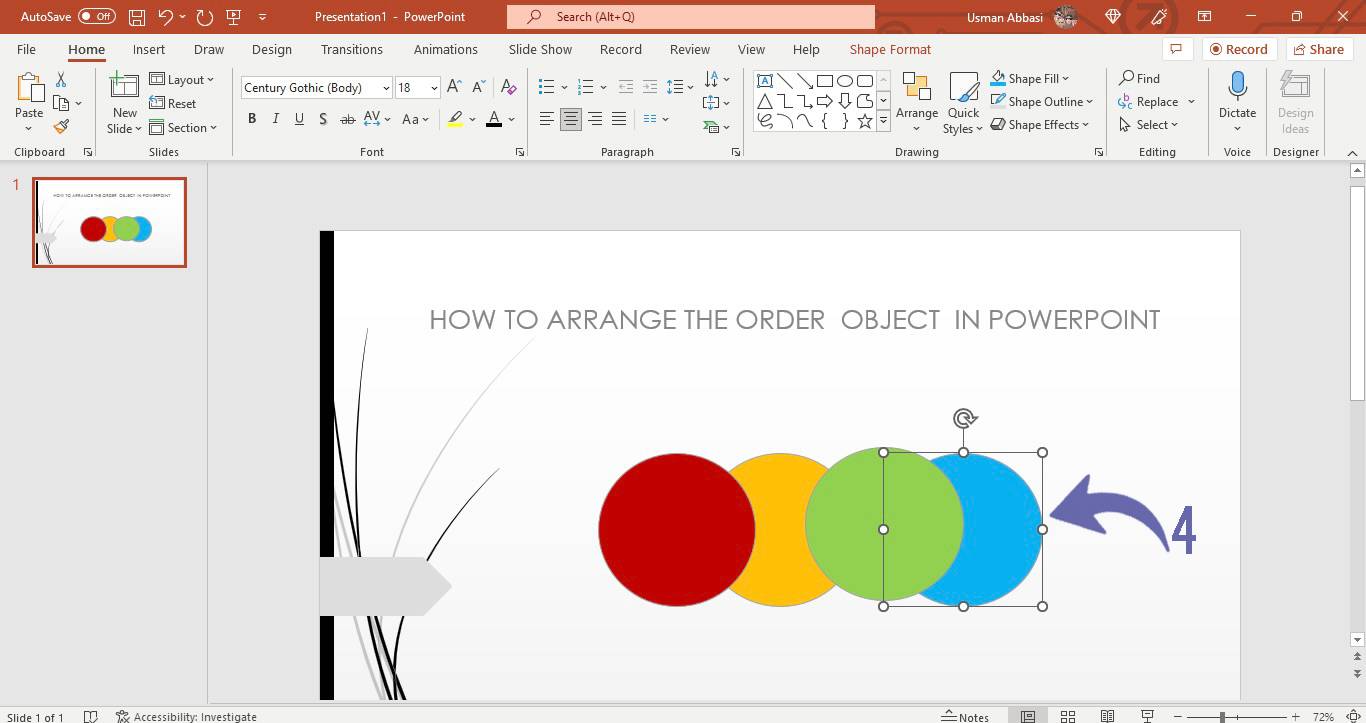
forward (bring the object one layer forward )

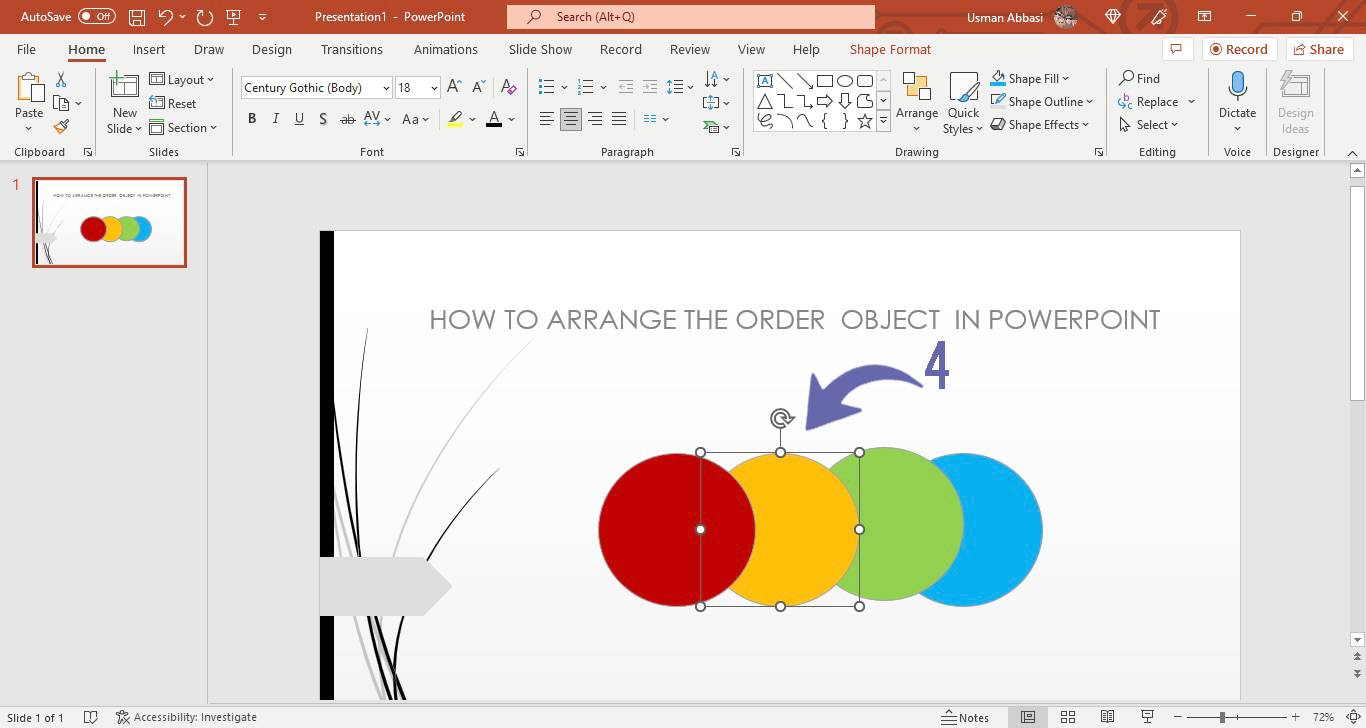
backward ( bring the object one layer backward)
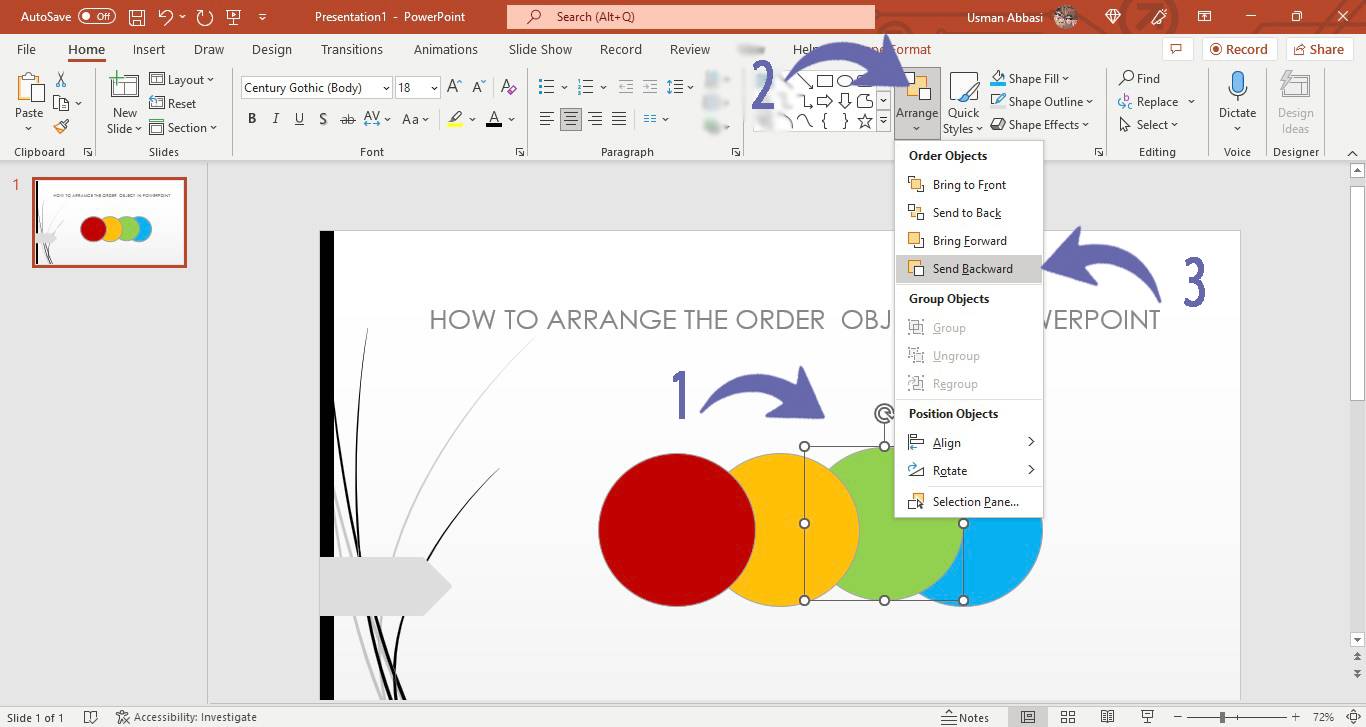
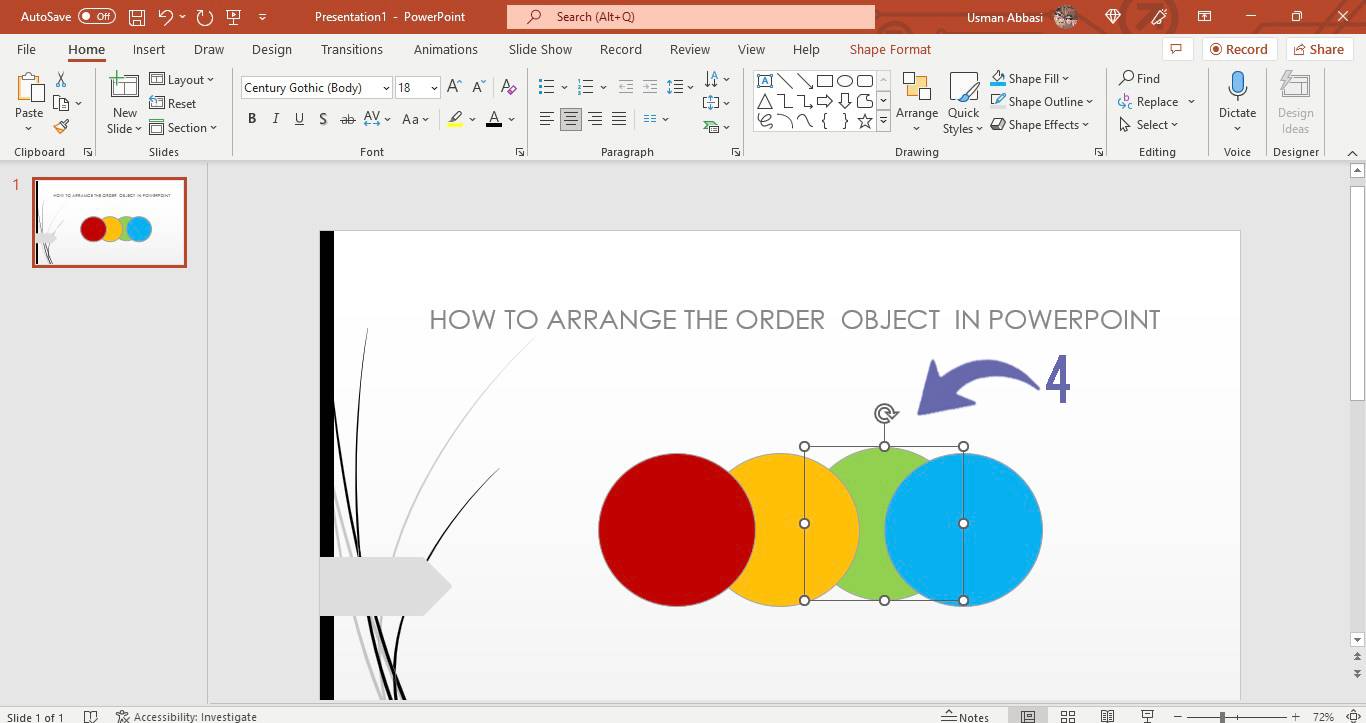
4. Select the option you want to apply to your object
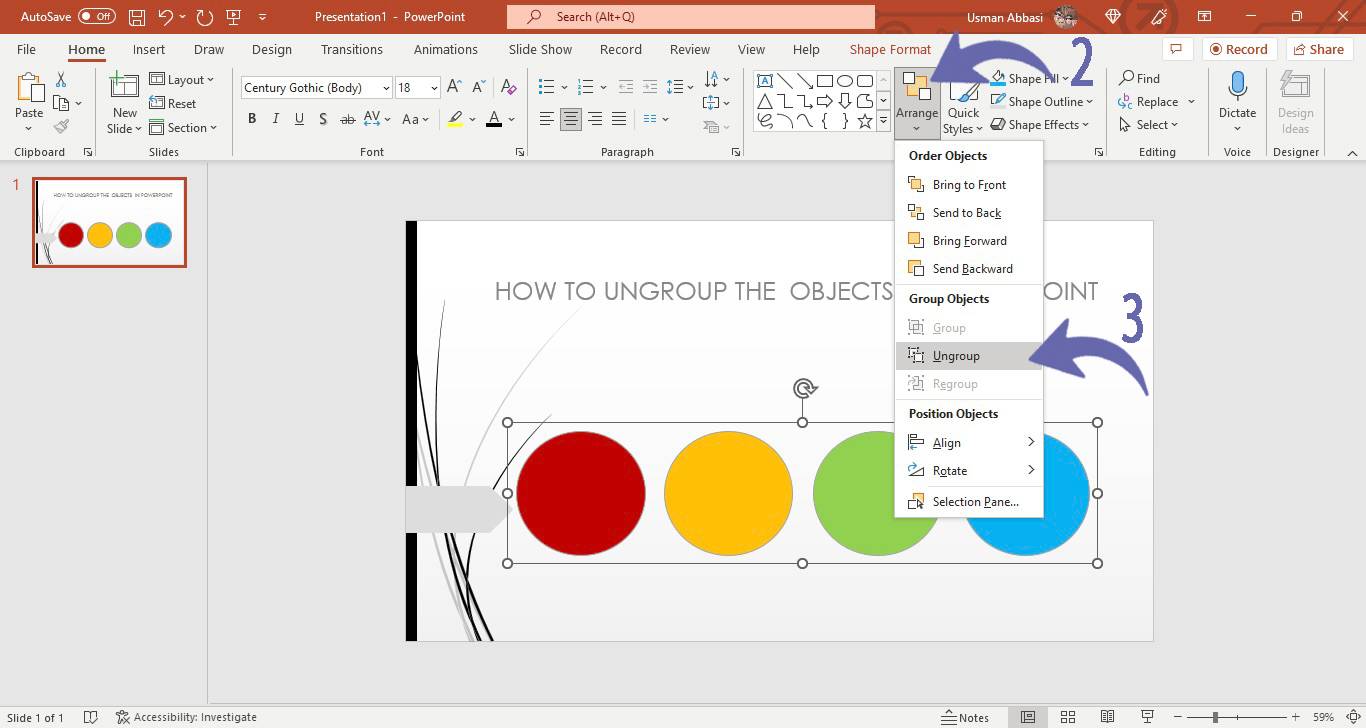
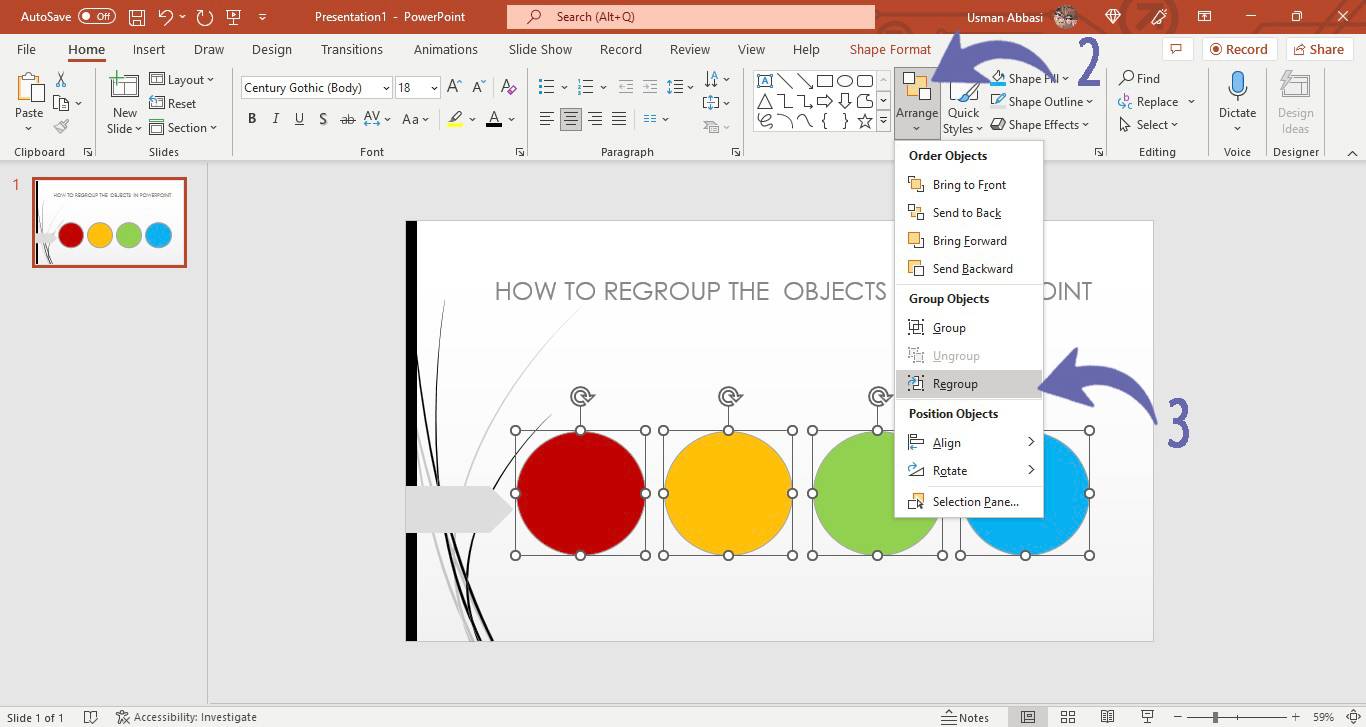
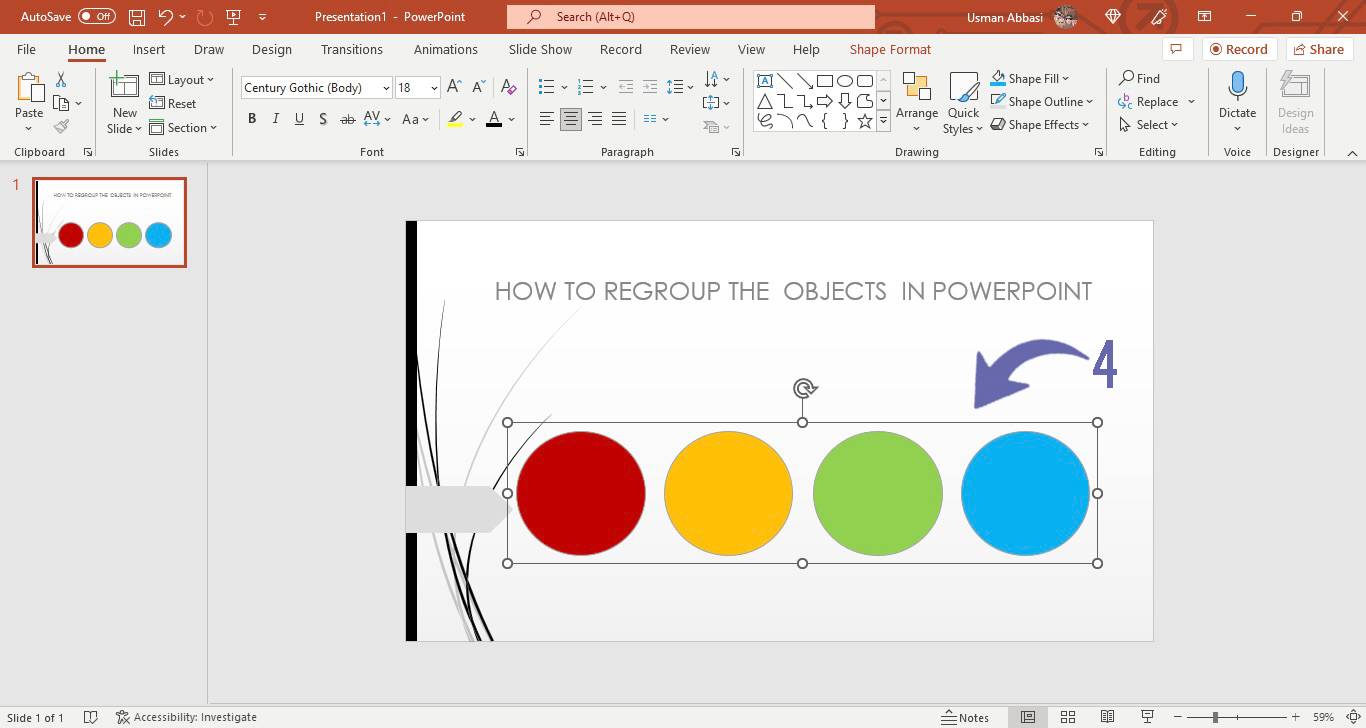
How to Reorder (Group, Ungroup and Regroup) objects in PowerPoint
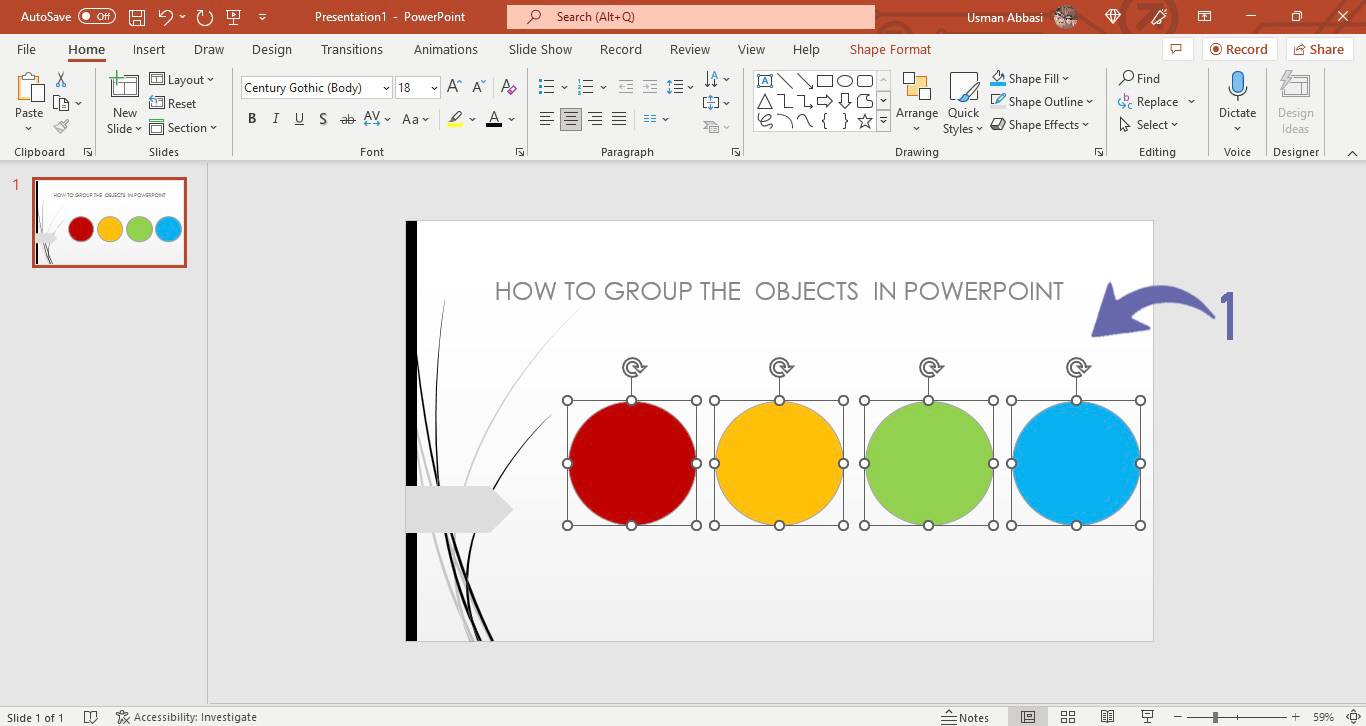
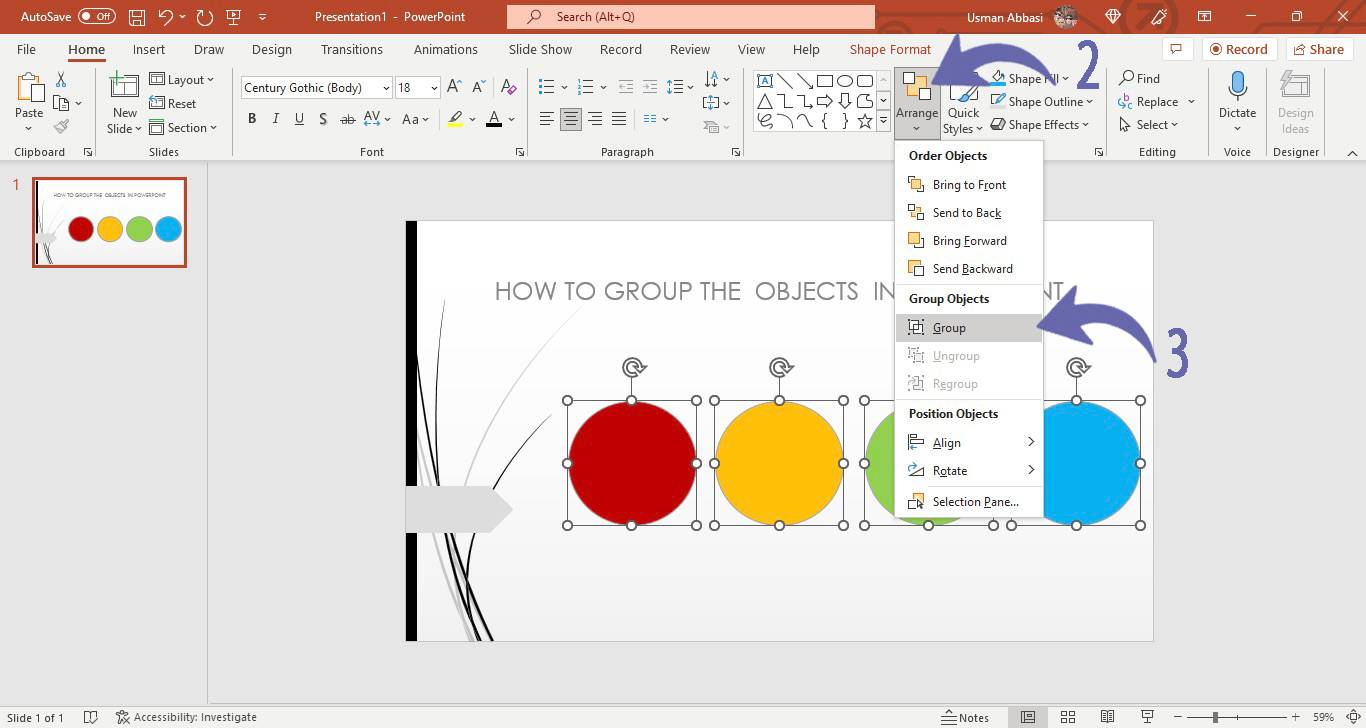
1. Select the objects and Go to “Home Tab”
2. In the “Drawing group”, Go to the “ Rearrange ” option
3. Click the “arrow” next to it, and a dropdown menu will appear with three Reordering options that are,
Group ( you can group the objects, it makes it easier to move and add effects to more than one object at a time )
Ungroup ( you can ungroup the object that you grouped before )

Regroup (this option is used to regroup the objects that you have ungroup )

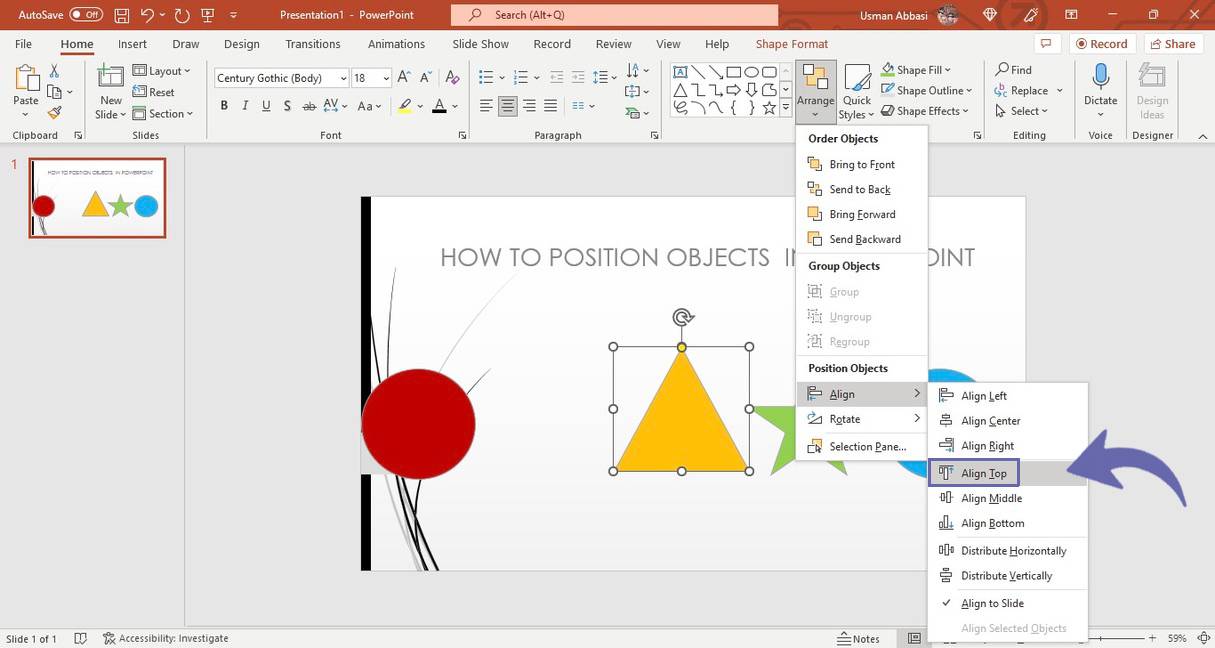
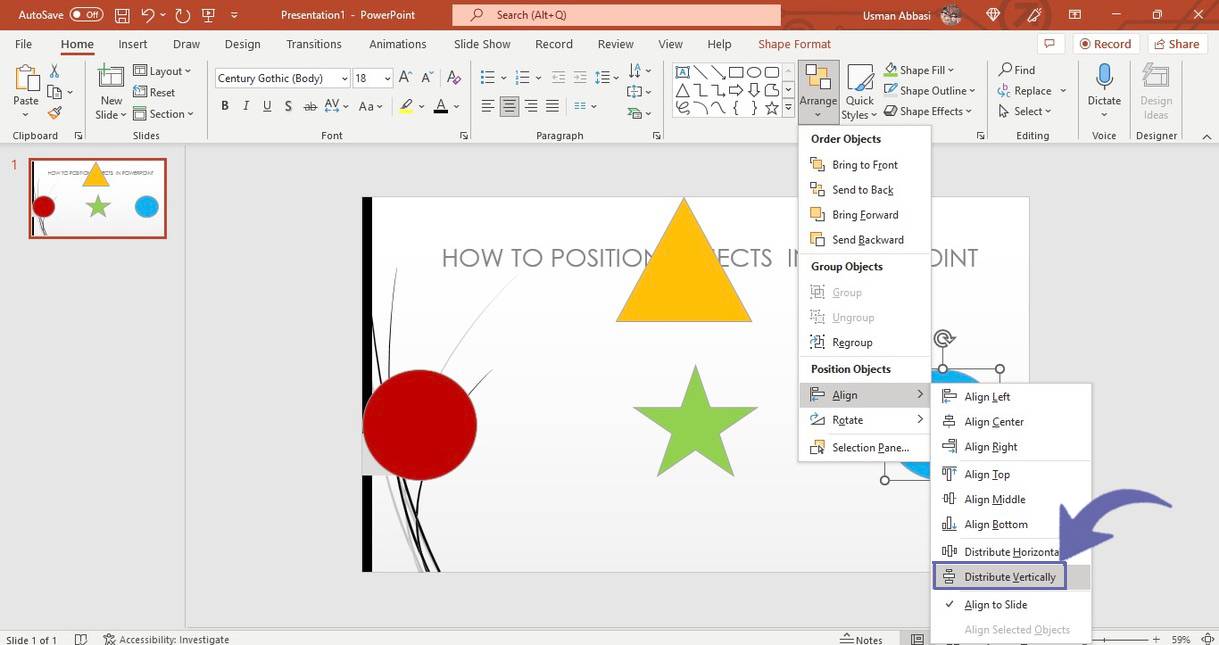
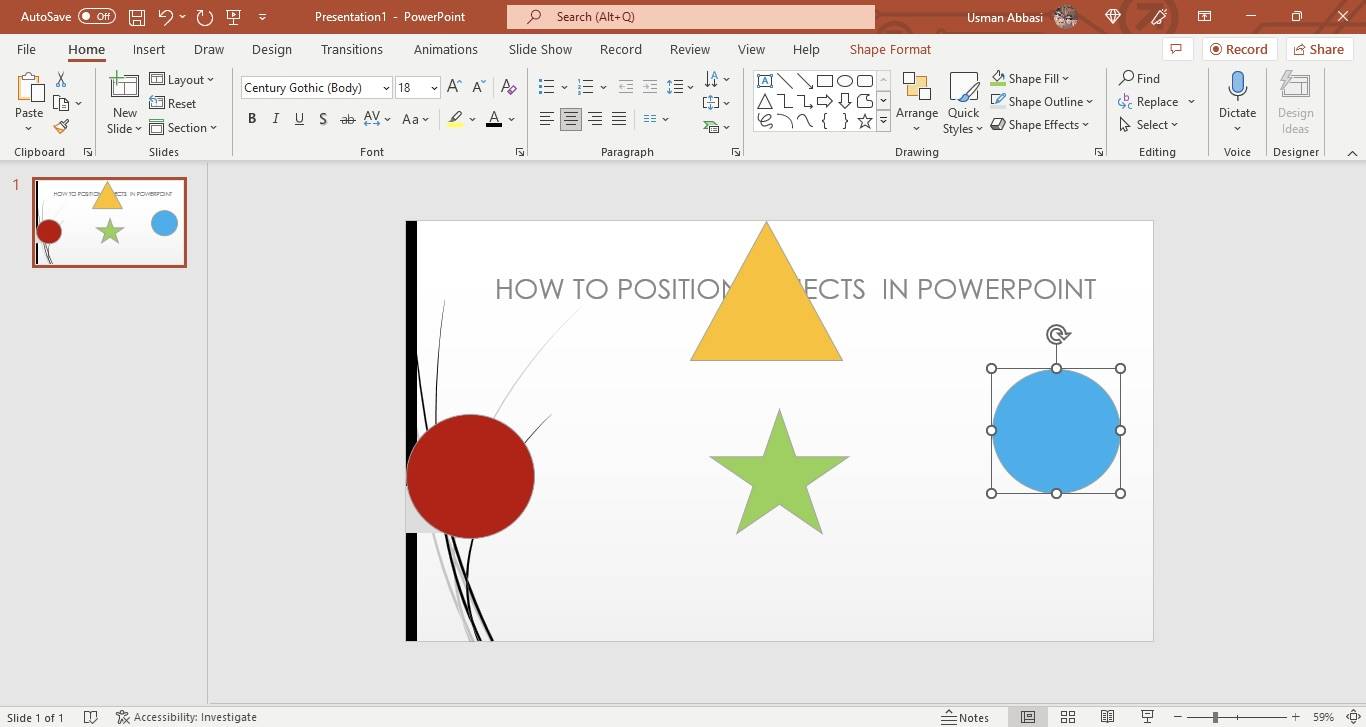
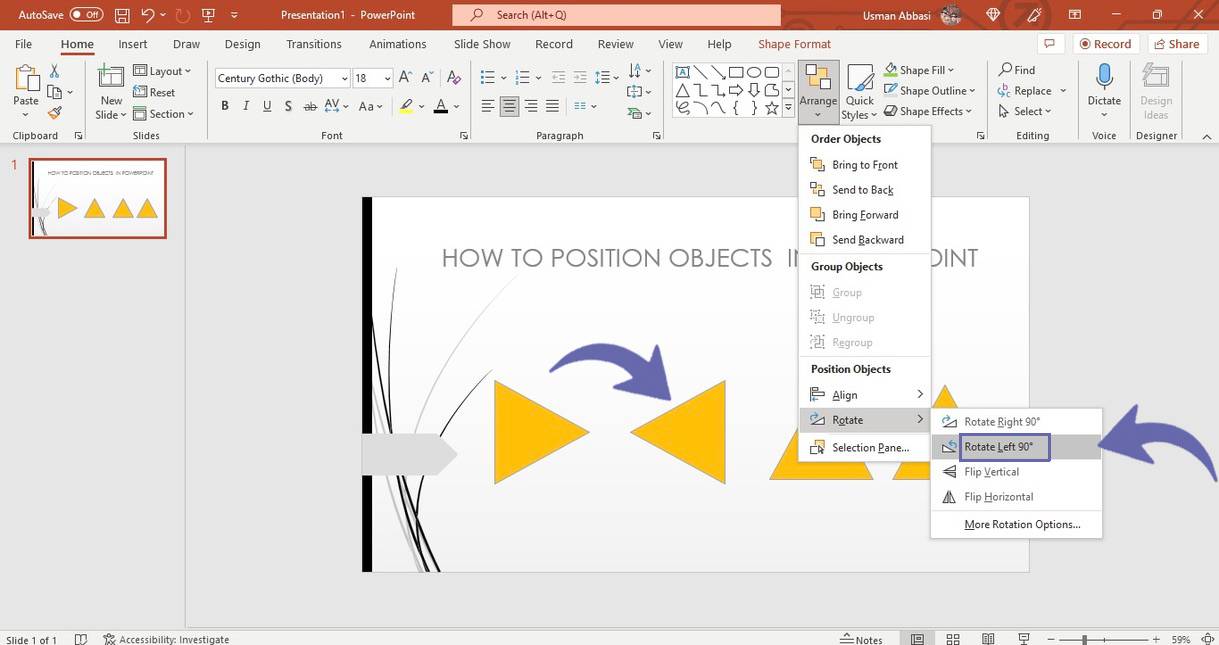
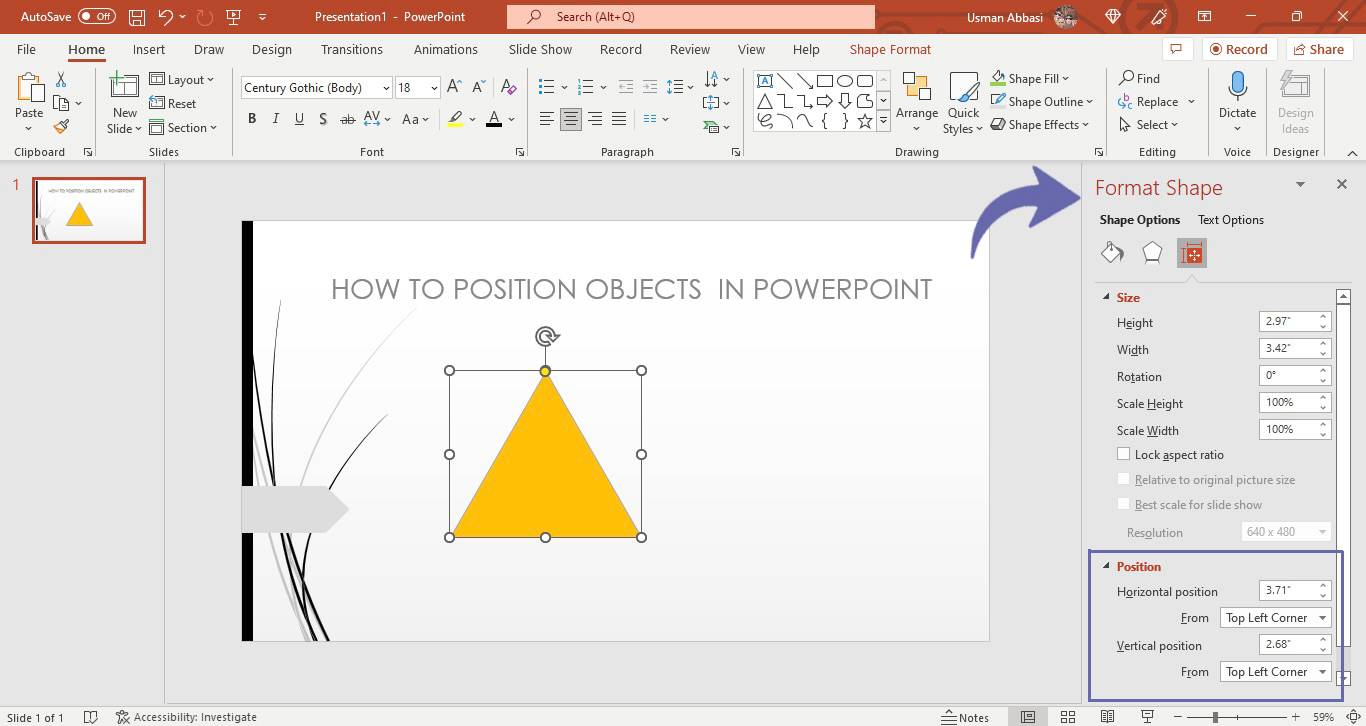
How to change the position of objects in PowerPoint
1. Select the object and Go to “Home Tab”
2. In the “Drawing group”, Go to the “ Rearrange ” option
3. Click the “arrow” next to it a dropdown menu will appear with many object position options, a few of them are shown below
Align Object
Align to left
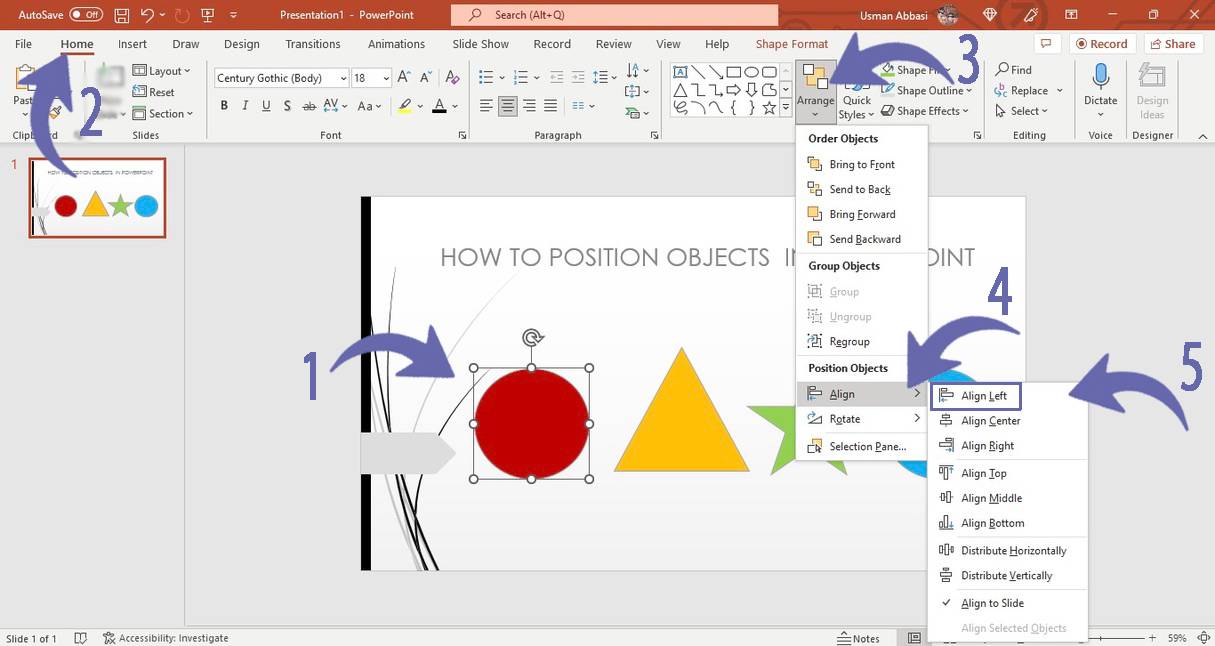
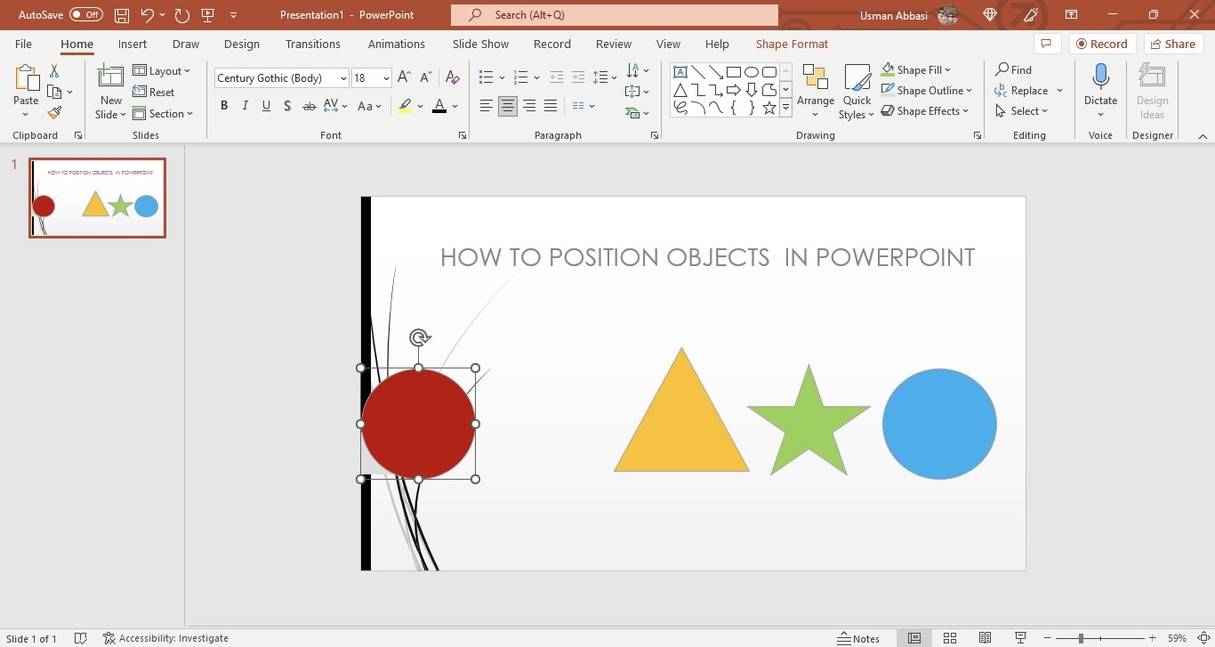
Align to top

Distribute horizontally
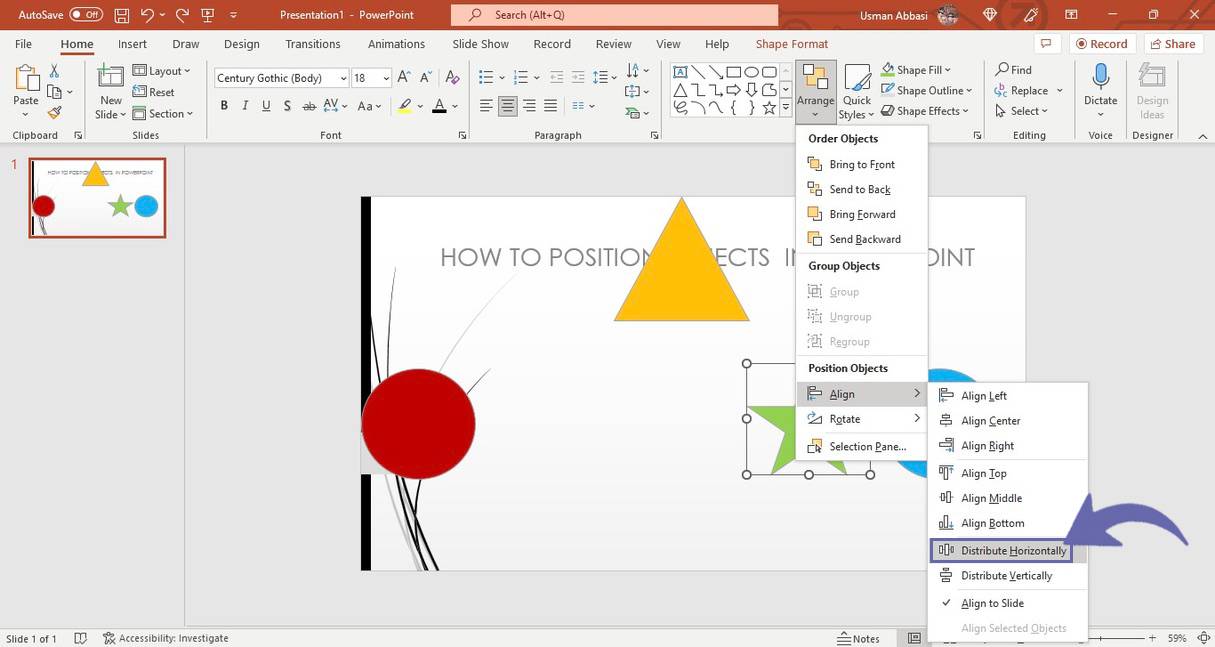
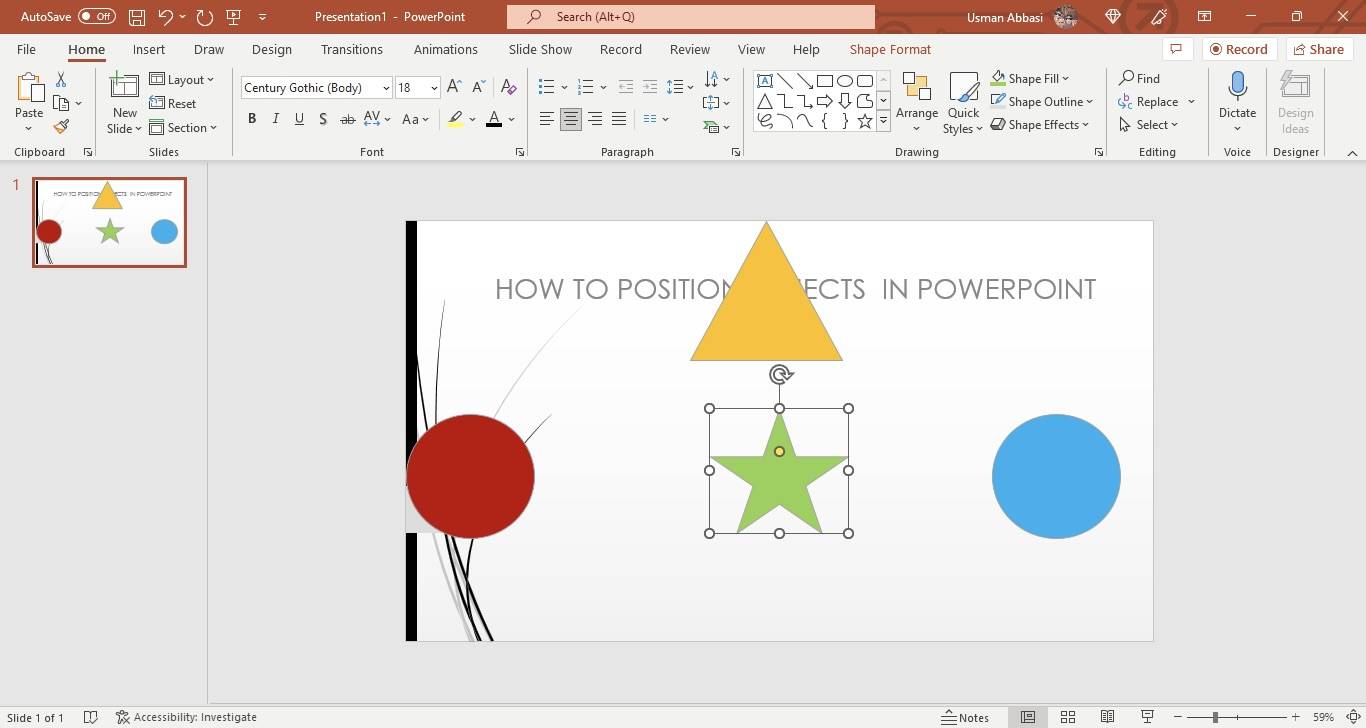
Distribute Vertically
Rotate Object
6. a dropdown menu will appear, select angles of your choice e.g.,
Rotate Right 90º
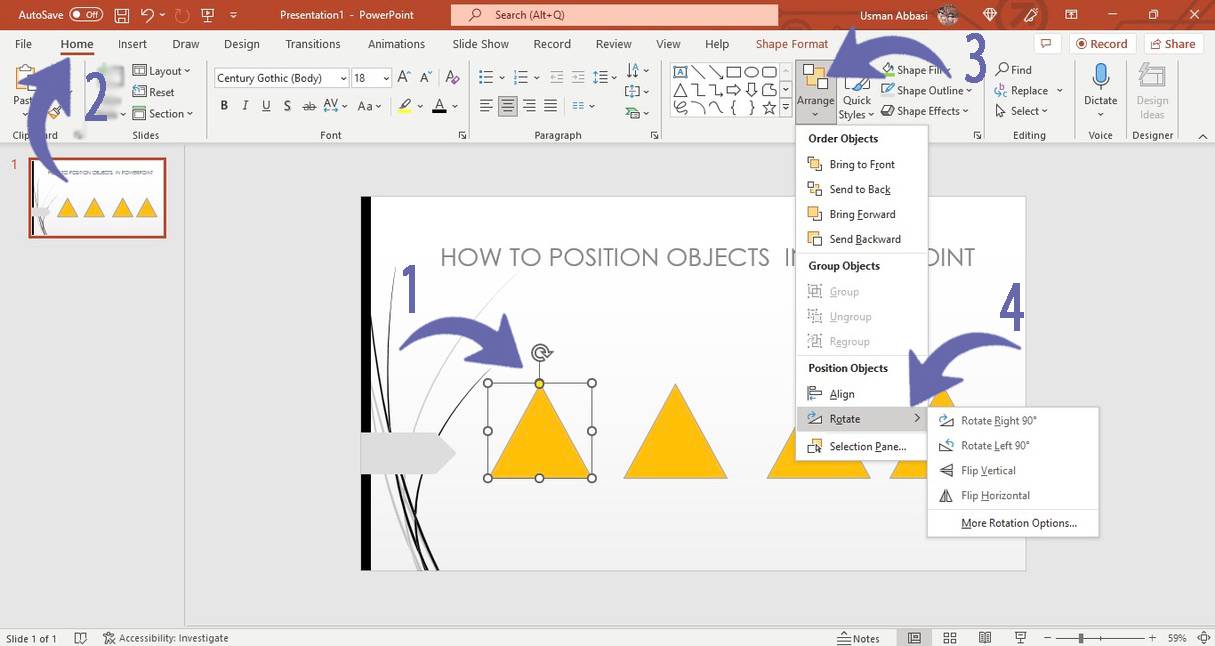
Rotate left 90º
7. To customize the rotation of an object, choose the “More Rotation Option” from the drop-down menu
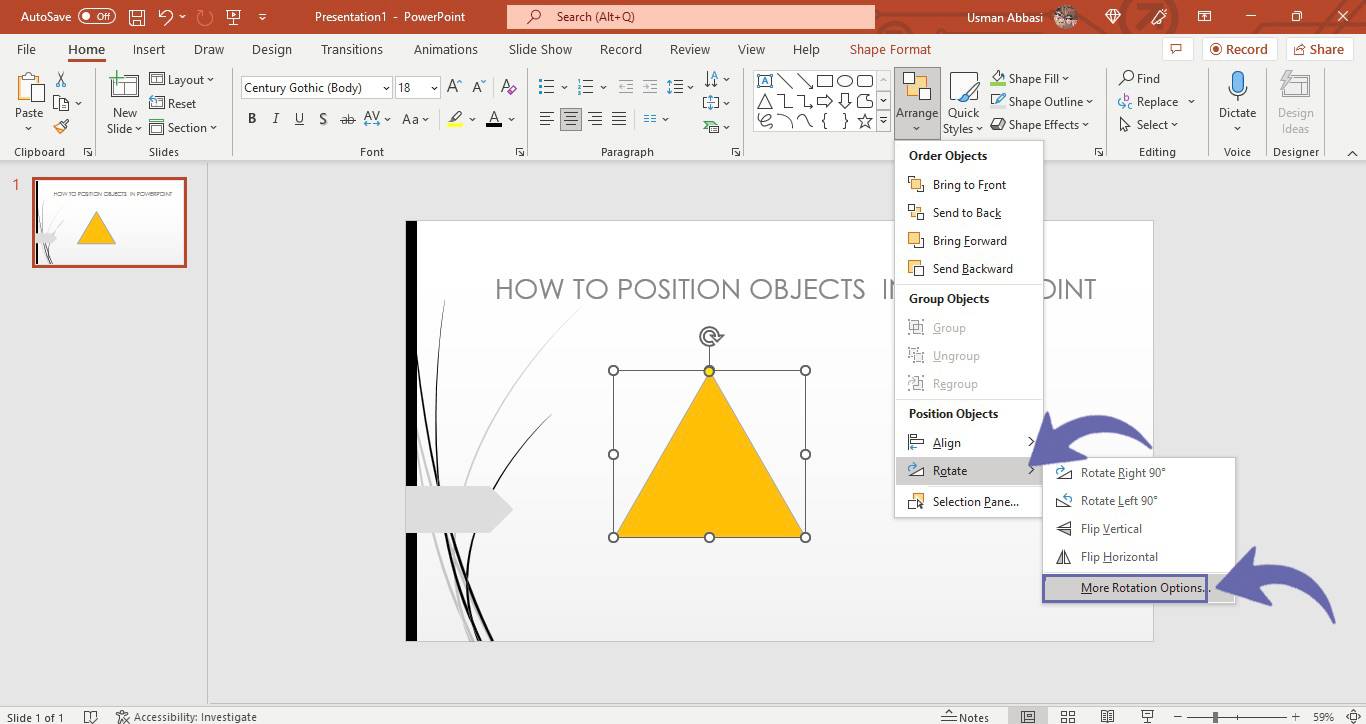
8. On the right side, a “Format Shape” panel will appear with object position customization options
How to Hide, Show and Lock, Unlock object layers in PowerPoint
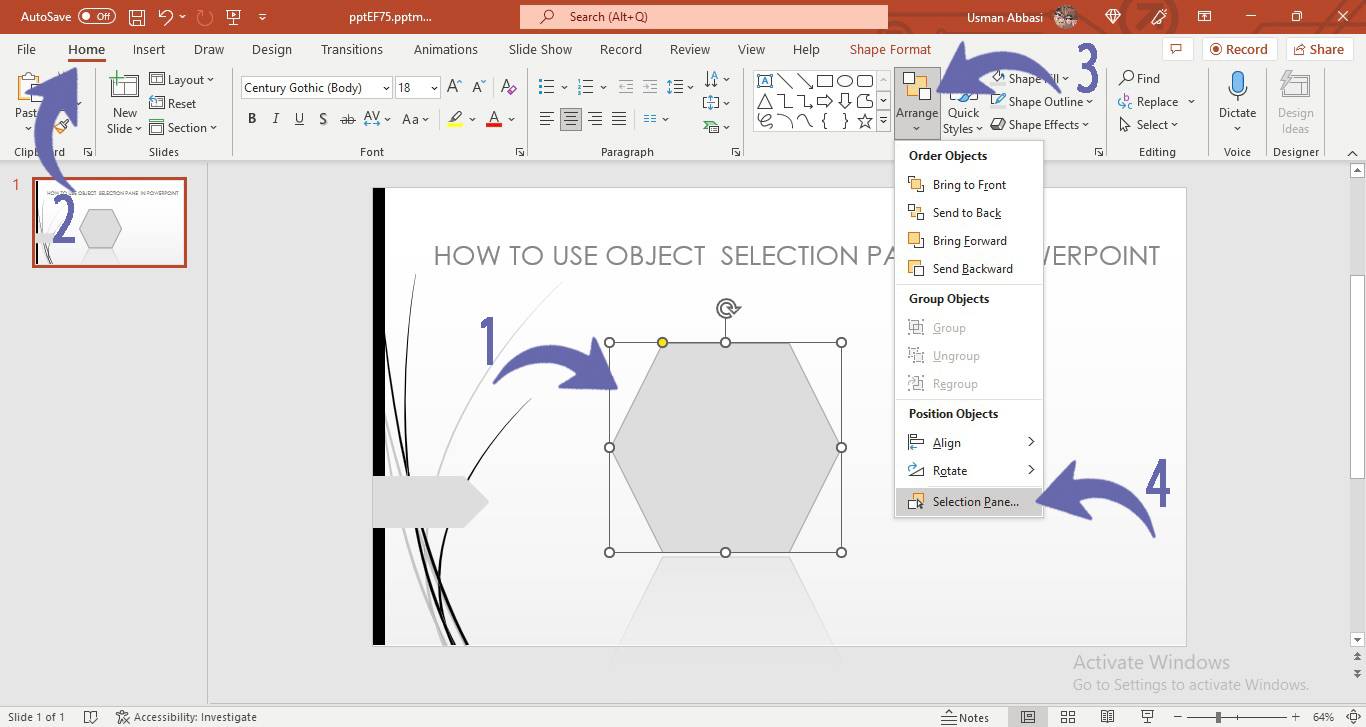
1. Select the shape and Go to “Home Tab”
2. In the “Drawing group”, Go to the “ Rearrange ” option
3. Click the “arrow” next to it, and a drop-down menu will appear
5. Select the “Selection Panel” option
6. on the right, a “selection panel” will appear with a few object layer options i.e.,Show All /Hide All (you can hide /show all layers at once by this option )
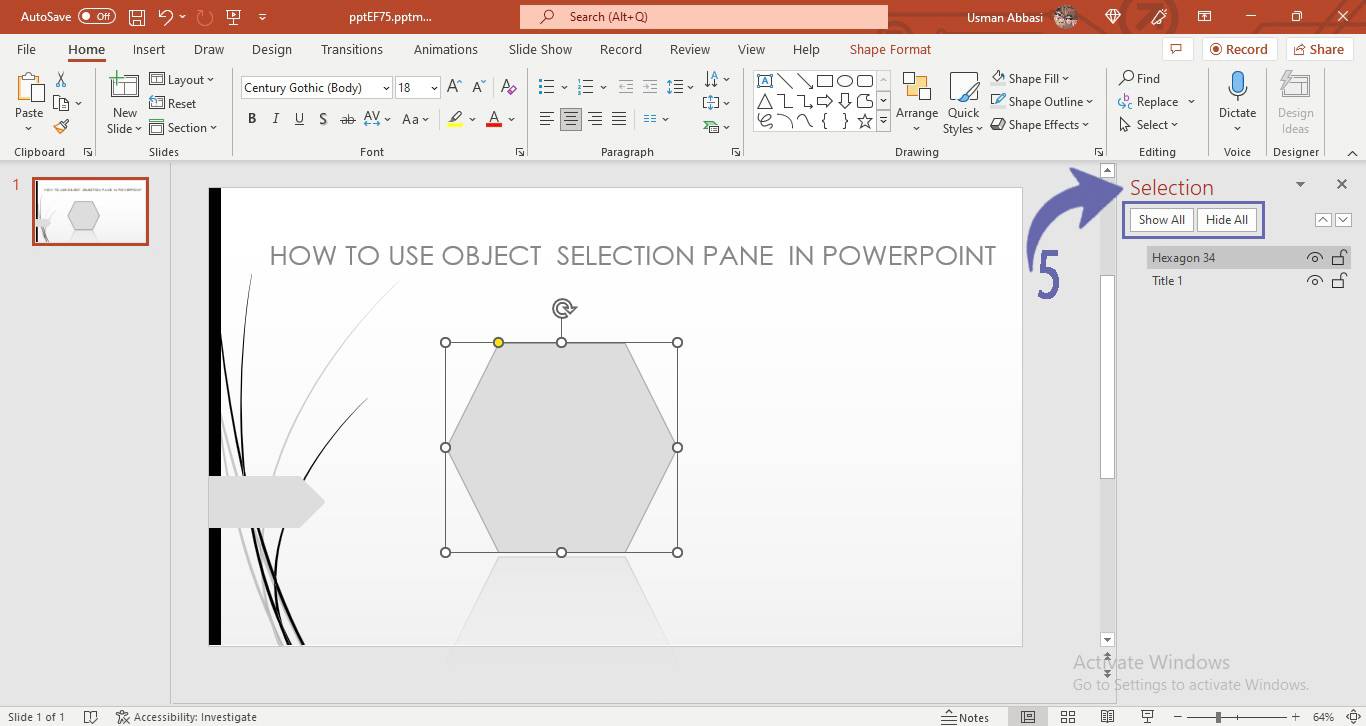
Show (Select the layer to show the object layer )
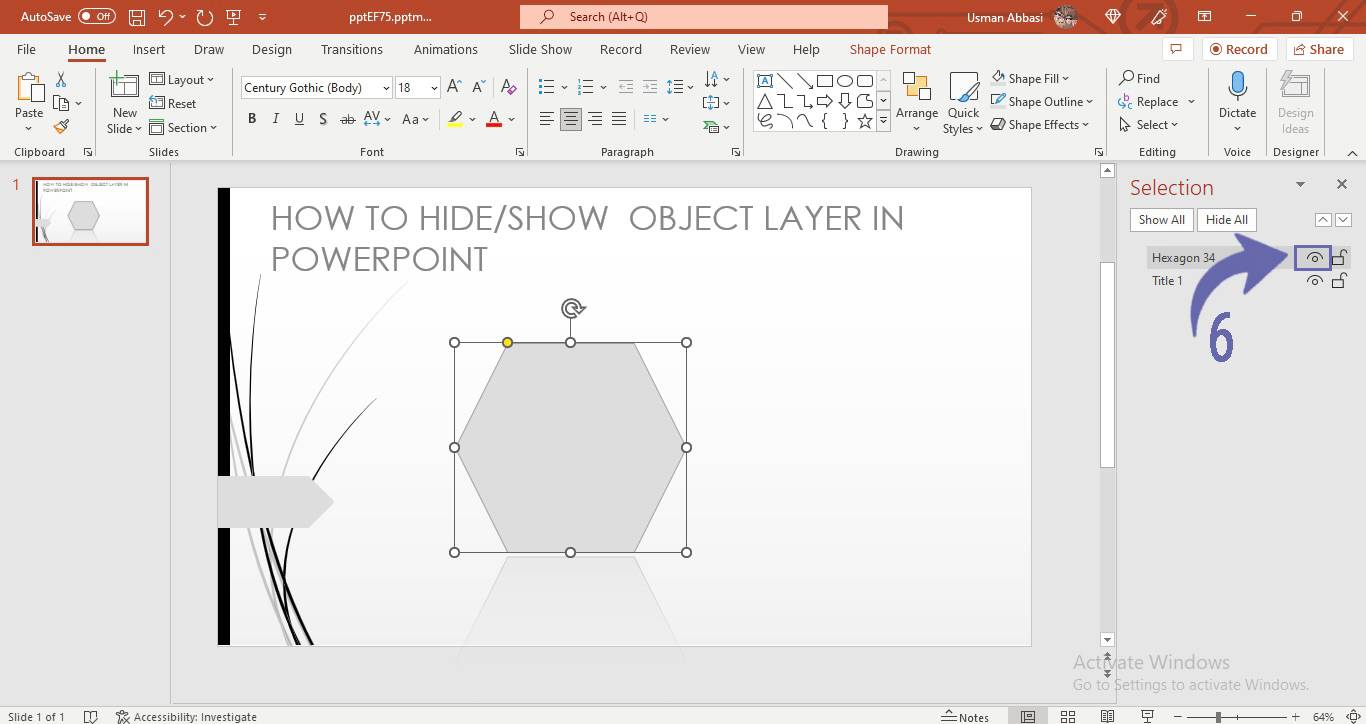
Hide (Select the layer to hide the object layer )
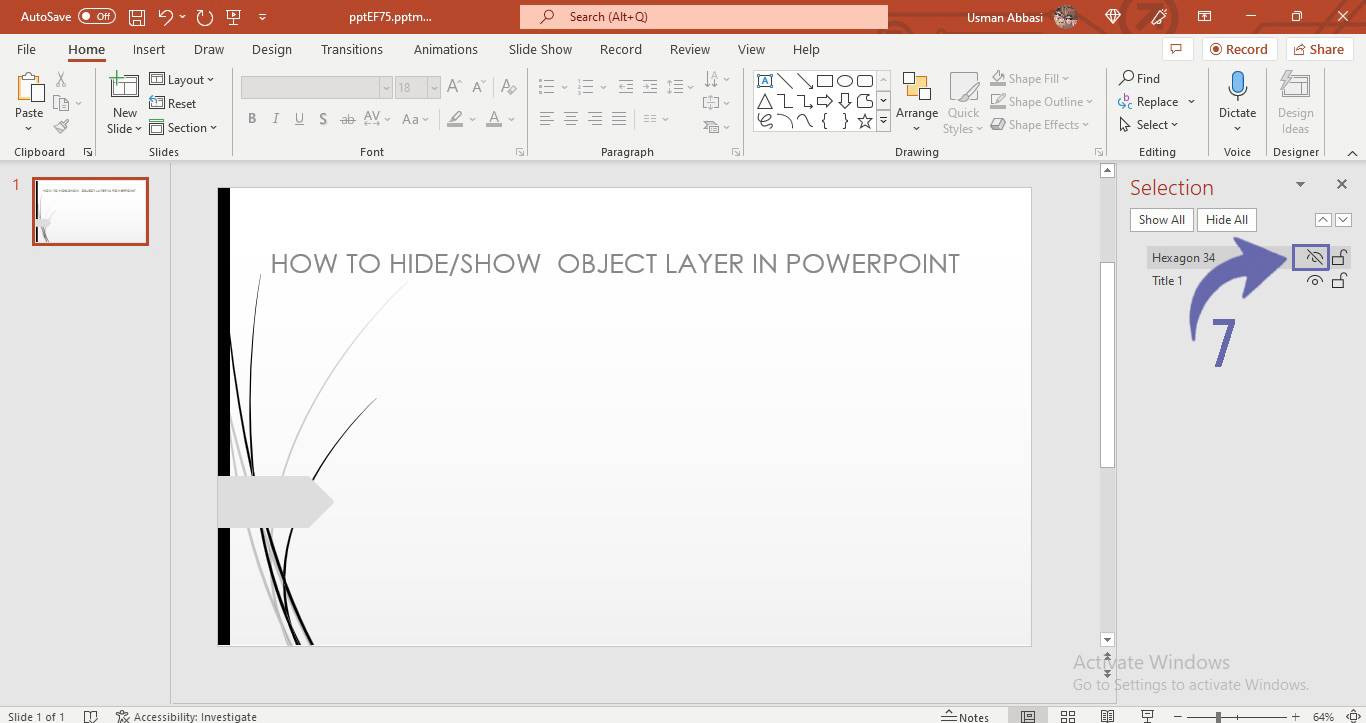
Unlock ( Select this option if you want to unlock the object layer)
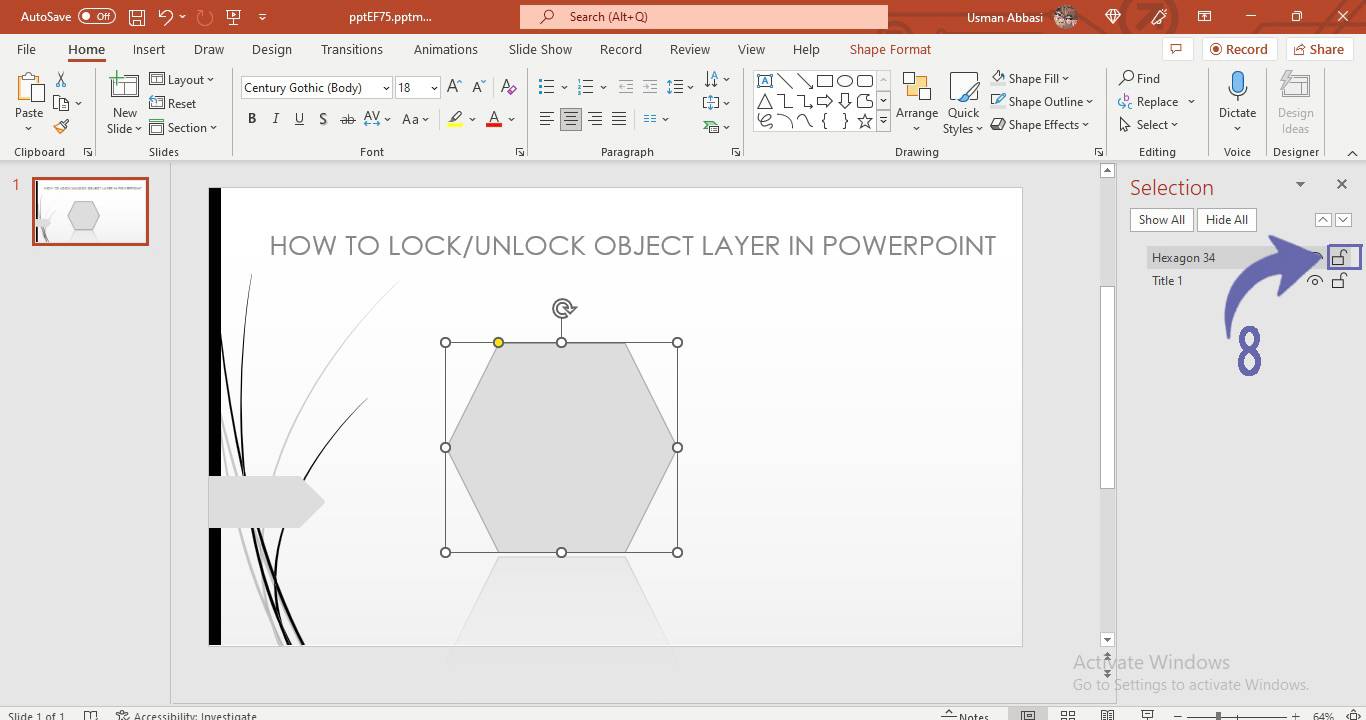
Lock ( Select this option if you want to lock the object layer)

7. This panel is very helpful if you are working on a number of different layers
How to add quick style to the shape in PowerPoint
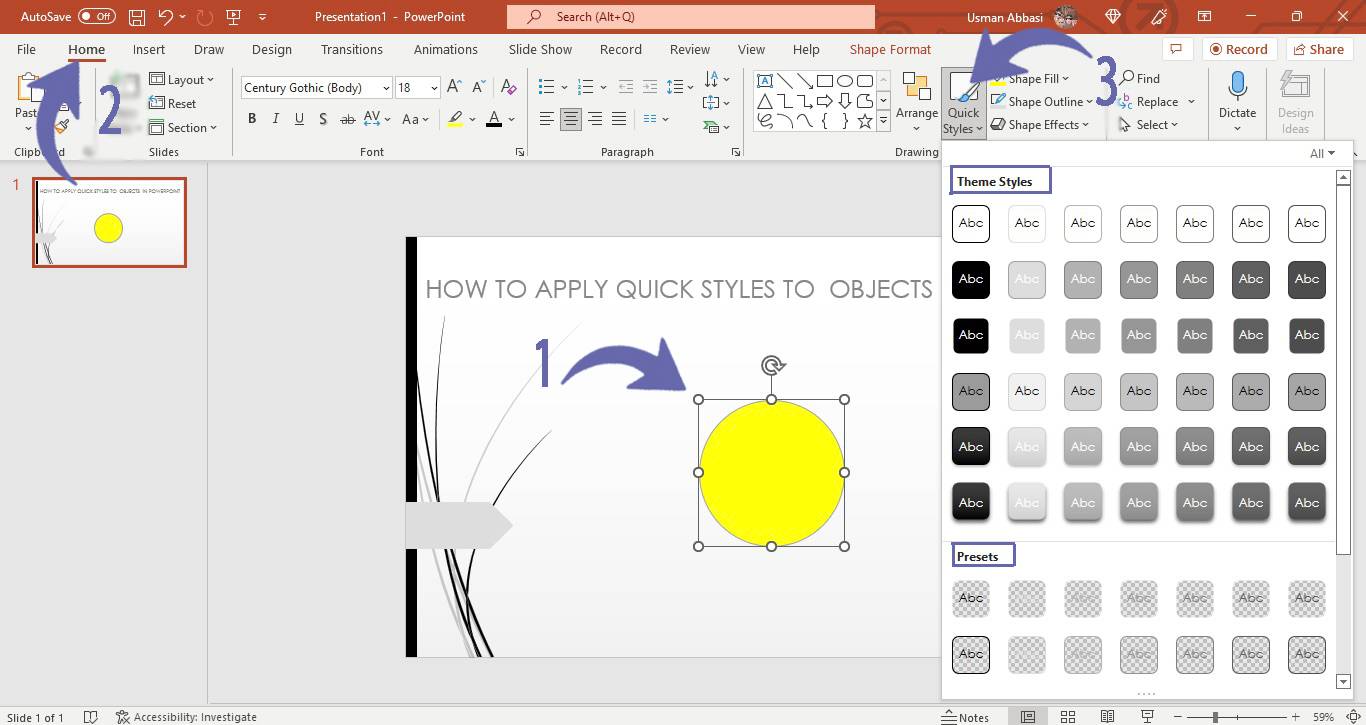
1. Select the shape and Go to “Home Tab”
2. In the “Drawing group”, Go to the “ Quick Style ” option
3. Click the “arrow” next to it, and a dropdown menu will appear with many quick styles divided into two categories
i.e., are theme style and presets
Theme Styles
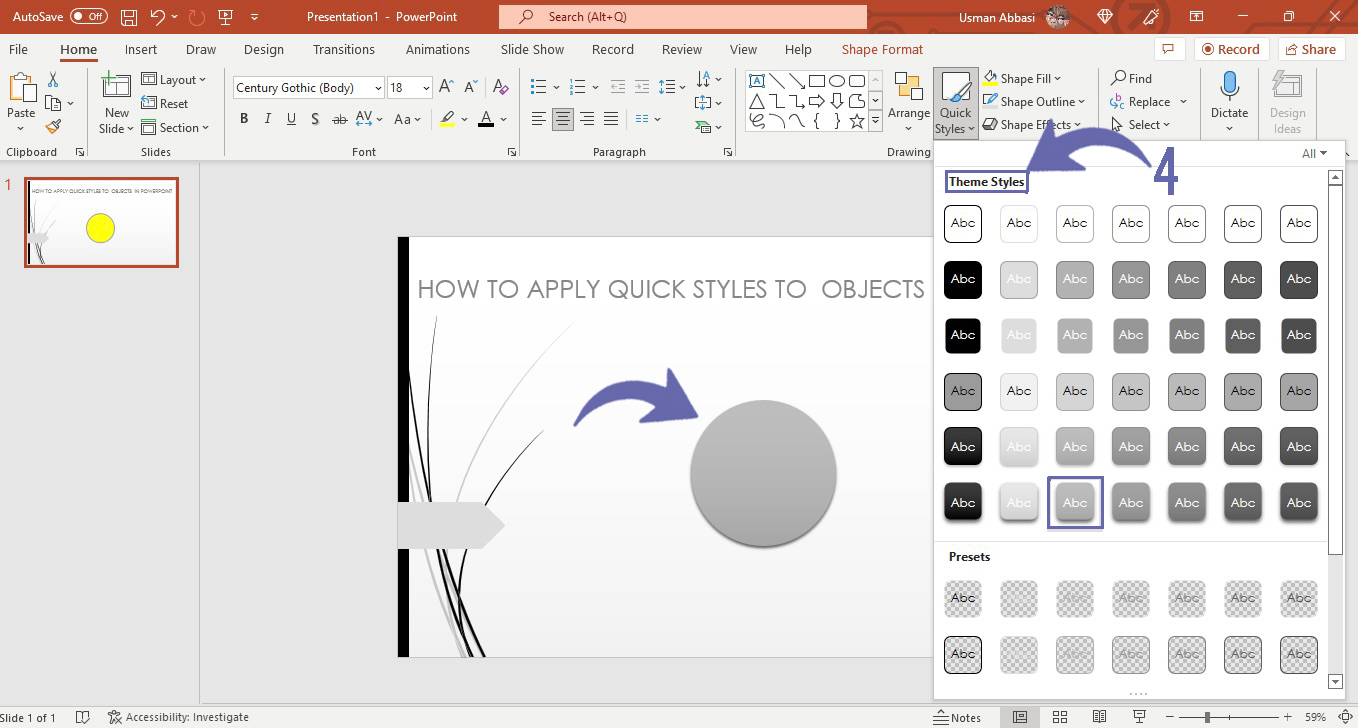
Presets

4. Select the Quick style you want to add to your shape/object
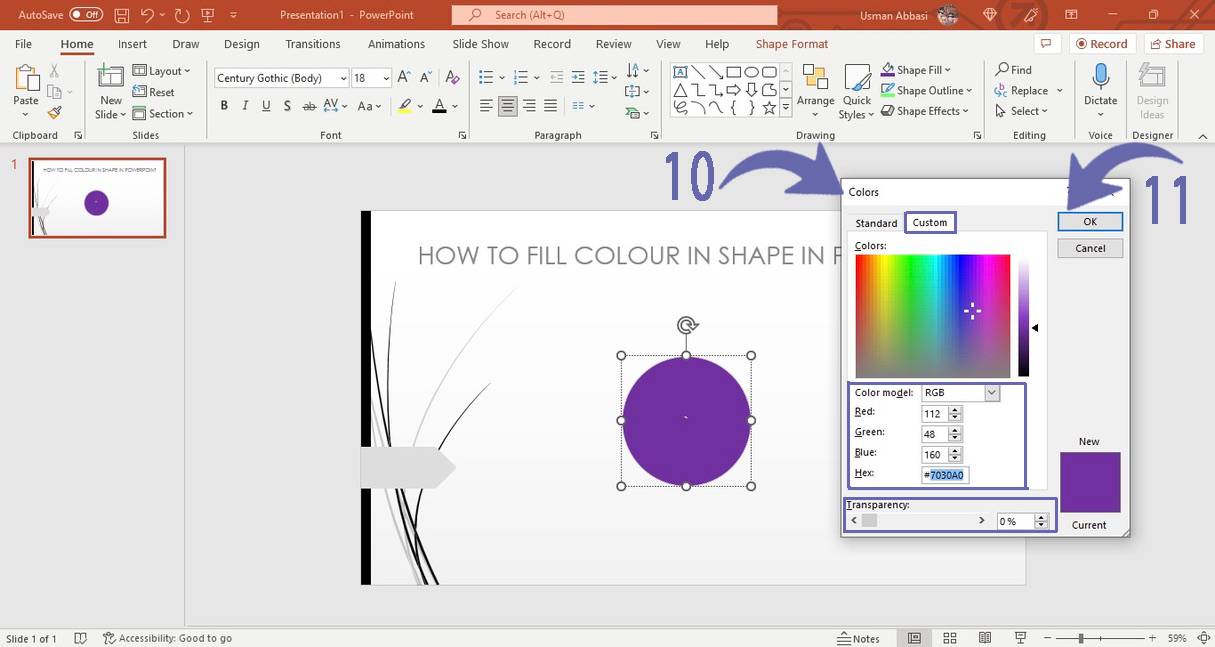
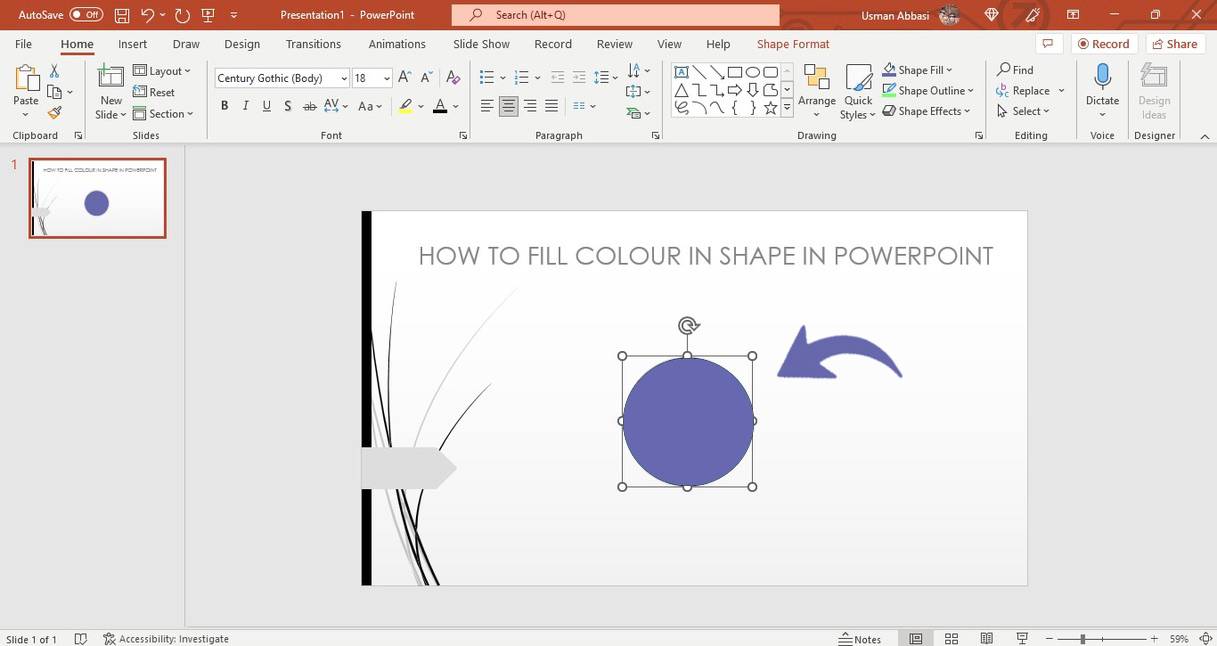
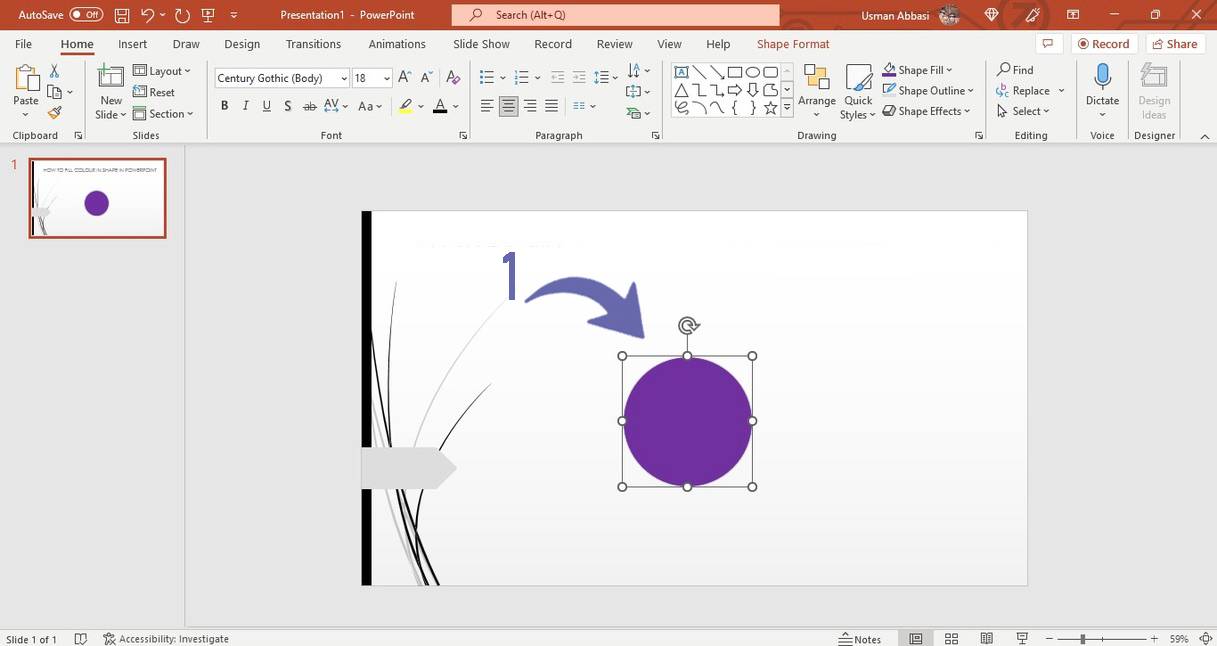
How to fill color in a shape in PowerPoint
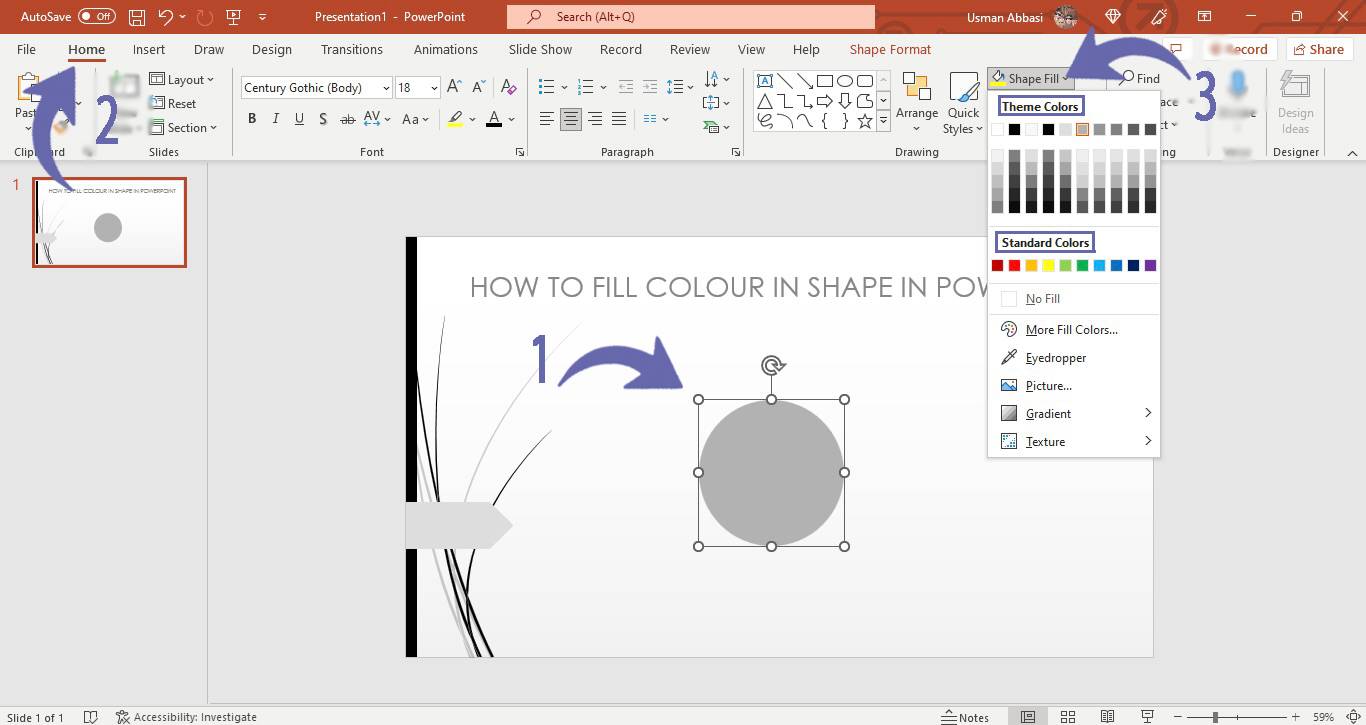
1. Select a shape and Go to the “Home Tab”
2. In the ‘Drawing group”, Go to the “ Shape Fill “ option
3. Click the “arrow” next to it
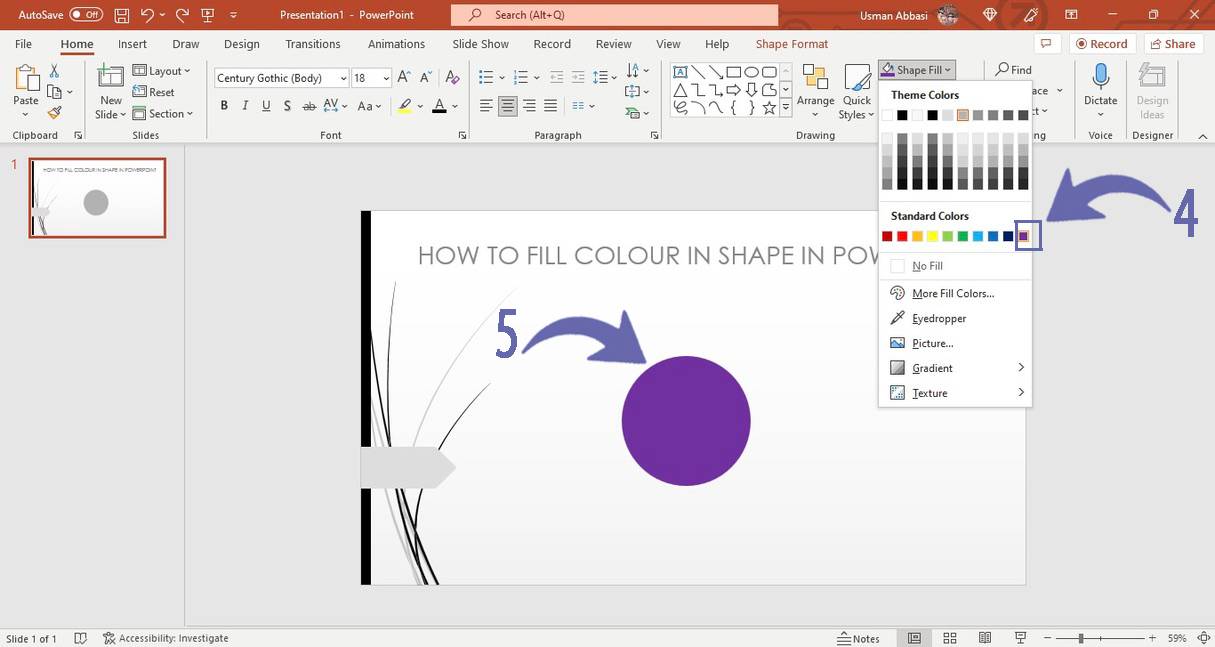
4. A drop-down menu will appear with three categories of colors i.e.,
Recent colors (the colors you have recently used in your PowerPoint)
Theme Colours ( Each theme has its own colors, which change according to the theme applied to your slide in PowerPoint)
Standard Colours ( Theses are the ten colors that appear with every theme )
you can select the color from the theme or standard color pallet
5. To customize colors, click on the “More Color Fill’ options
6. A color dialogue box will appear with two color pick categories i.e., custom and standard colors
7. In custom, you can pick any color of your choice from the color wheel and click ok
8. You can also adjust the color transparency of your shape color in both custom and the standard color dialogue box
How to remove color fill of the shape in PowerPoint
1. Select a shape and Go to the “Home Tab”
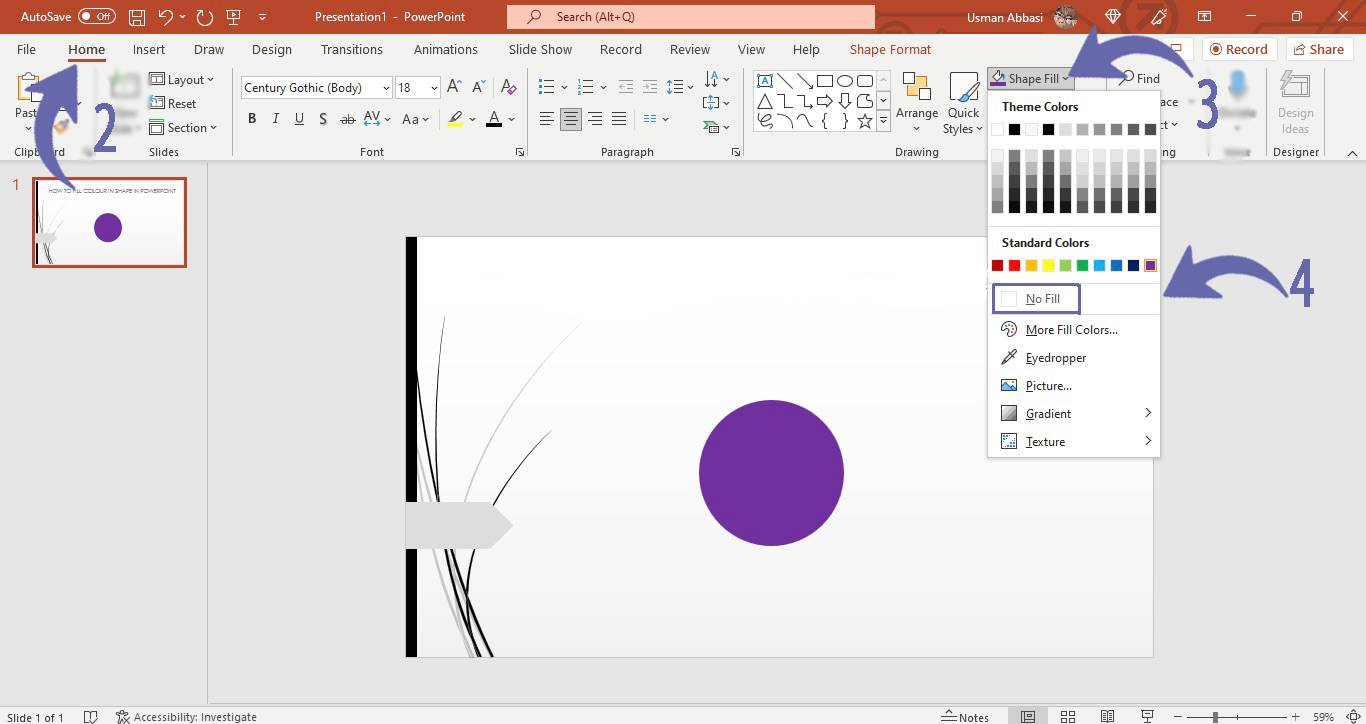
2. In the “Drawing group”, Go to the “ Shape Fill “ option
3. Click the “arrow” next to it, and a dropdown will appear
4. From the drop-down menu, you can select the top “No Fill” option to remove the shape fill color
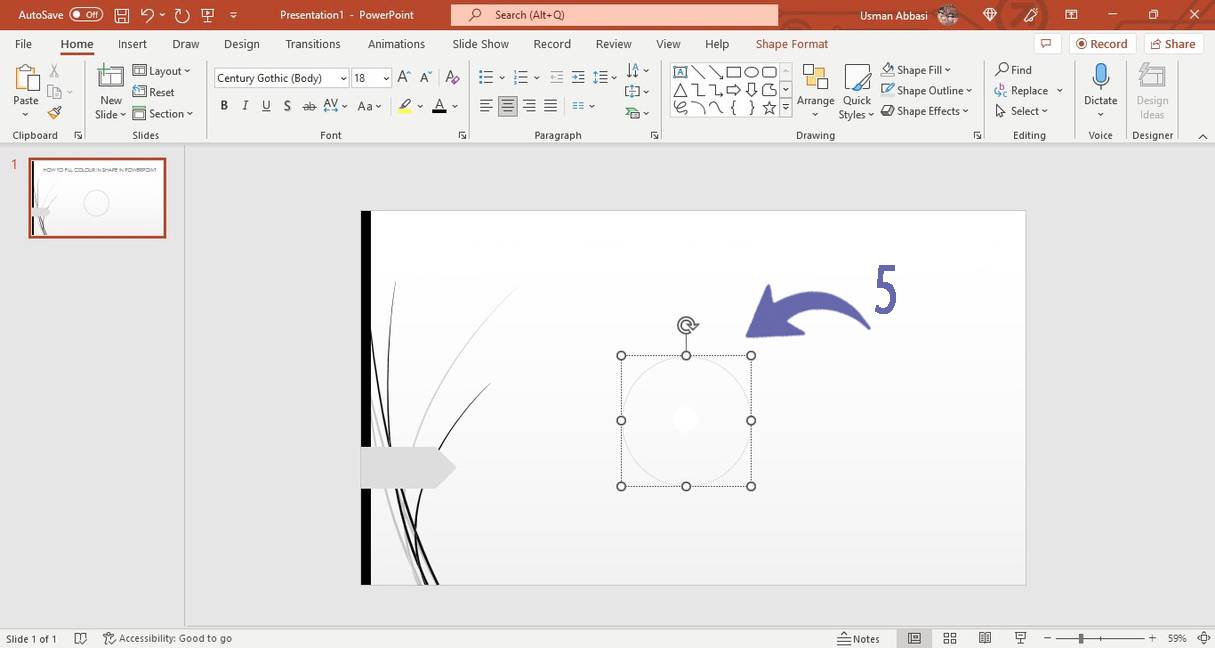
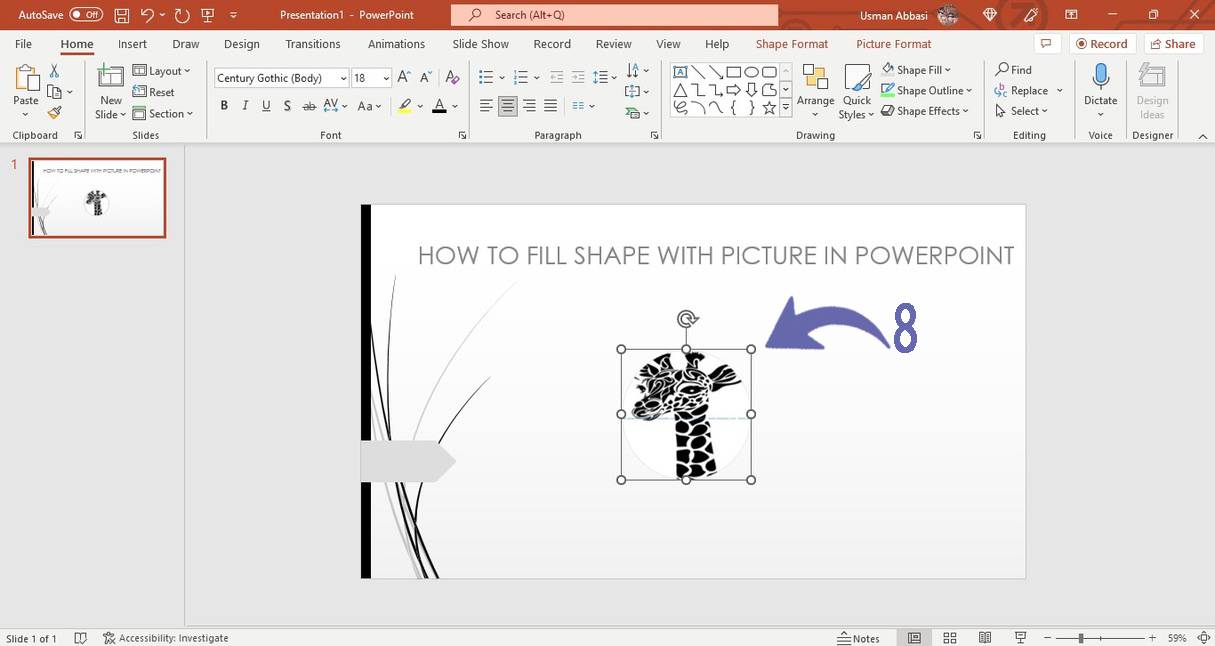
How to insert a picture in shape in PowerPoint
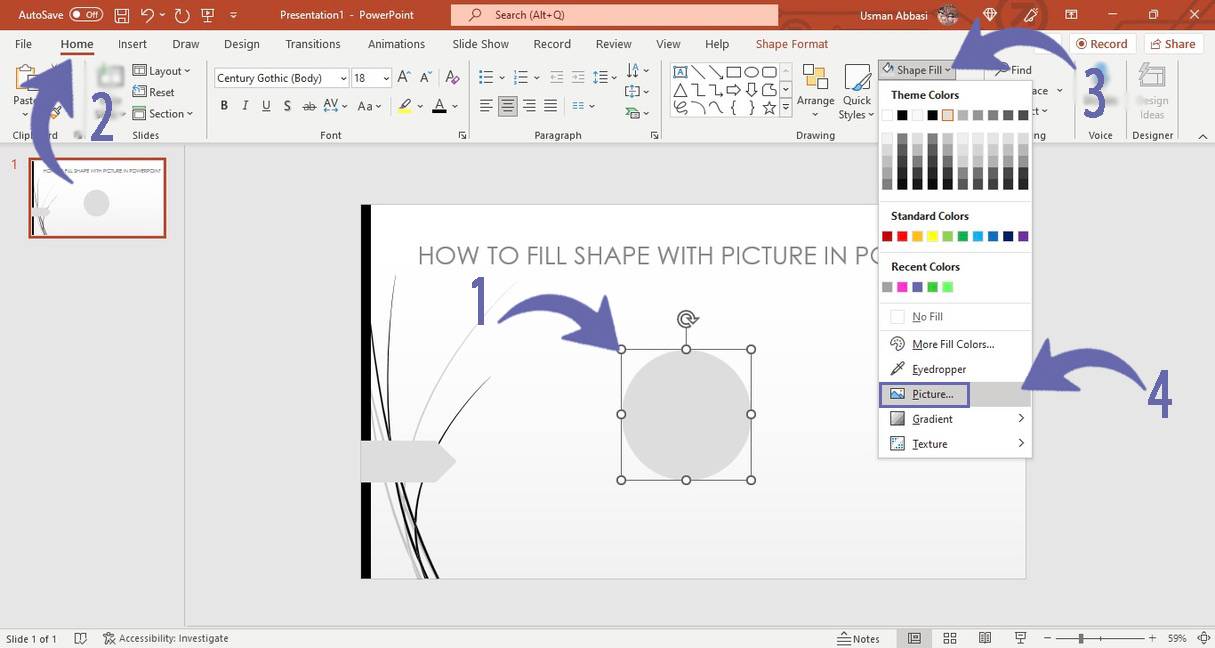
1. Select the shape and Go to the “Home Tab”
2. In the “Drawing group”, Go to the “ Shape Fill “option
3. Click the “arrow” next to it, and a drop-down menu will appear
4. From the dropdown menu, select the “Picture” insert option
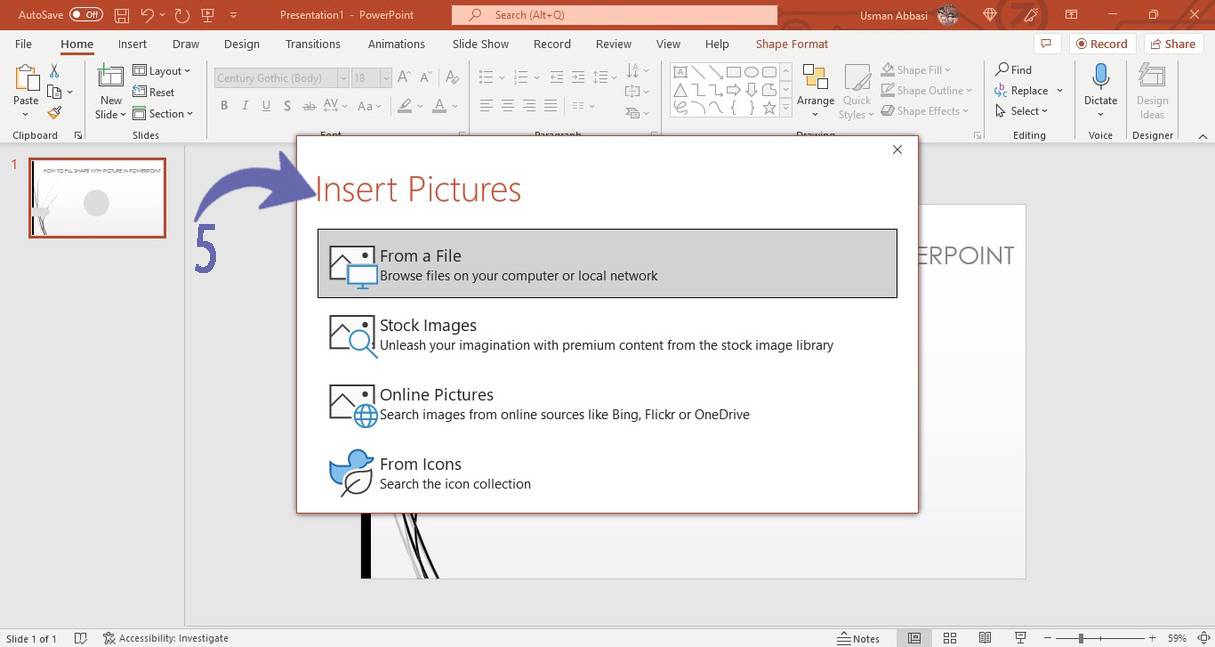
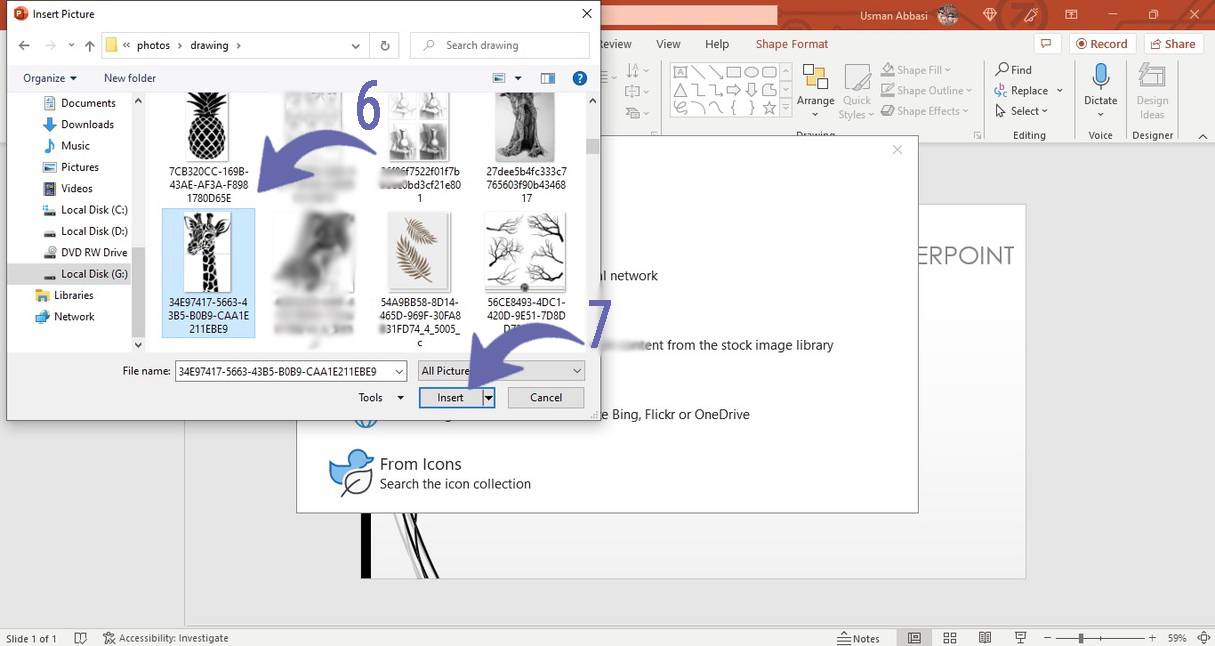
5. You can browse pictures from your device (browse files on your computer)
online ( Search images from online sources), stock images (search from stock image library) From icons (search from icon collection)
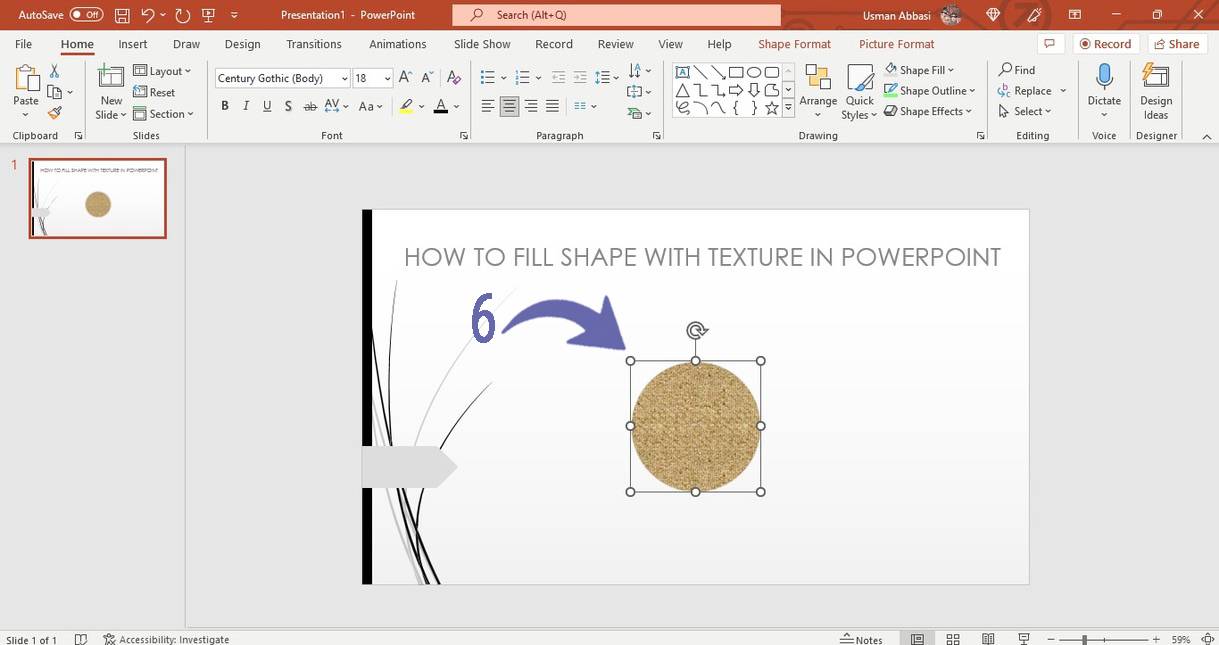
How to add texture to the shape in PowerPoint
1. Select the shape and Go to the “Home Tab”

2. In the “Drawing group”, Go to the “Shape Fill “ option
3. Click the “arrow” next to it, and a drop-down menu will appear
4. From the dropdown menu, select the Texture option
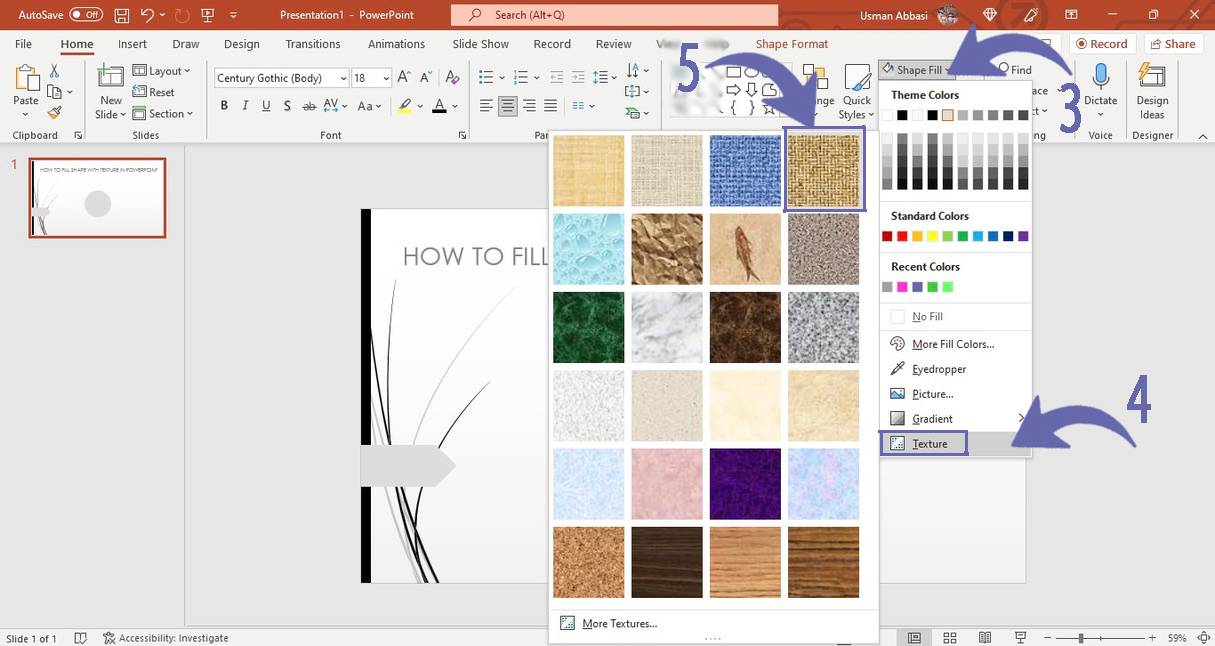
5. Select the texture from the options you want to add
How to add a gradient to the shape in PowerPoint
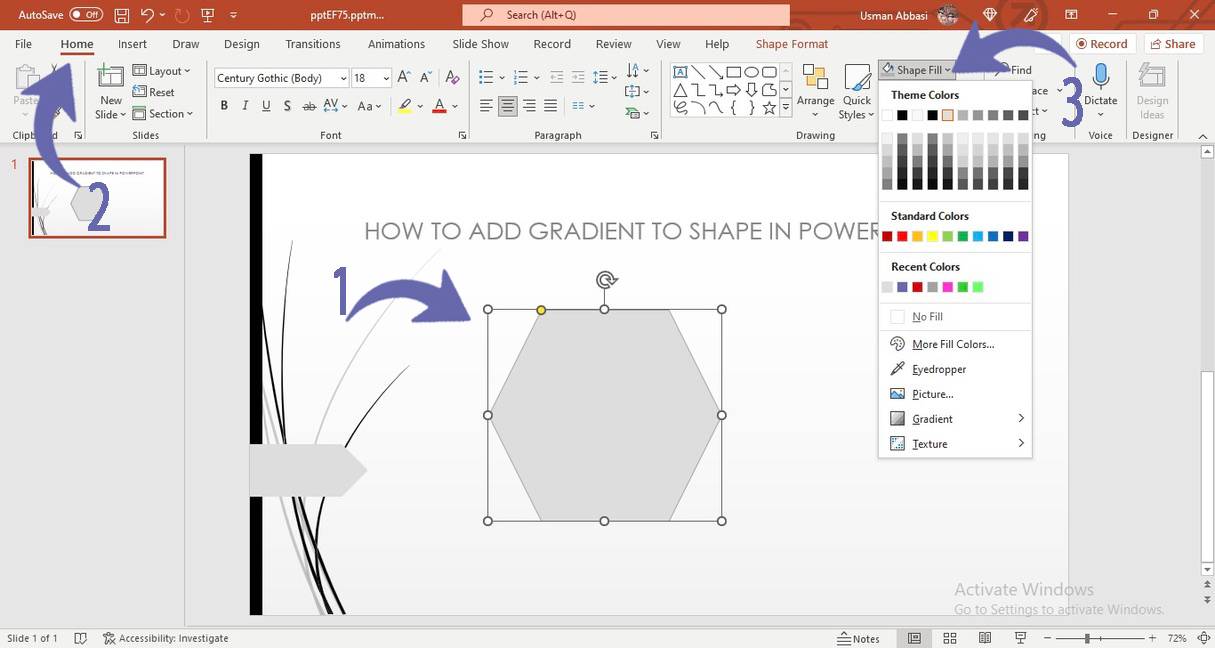
1. Select the shape and Go to “Home Tab”
2. In the “Drawing group”, Go to the “ Shape Fill “ option
3. Click the “arrow” next to it, and a drop-down menu will appear
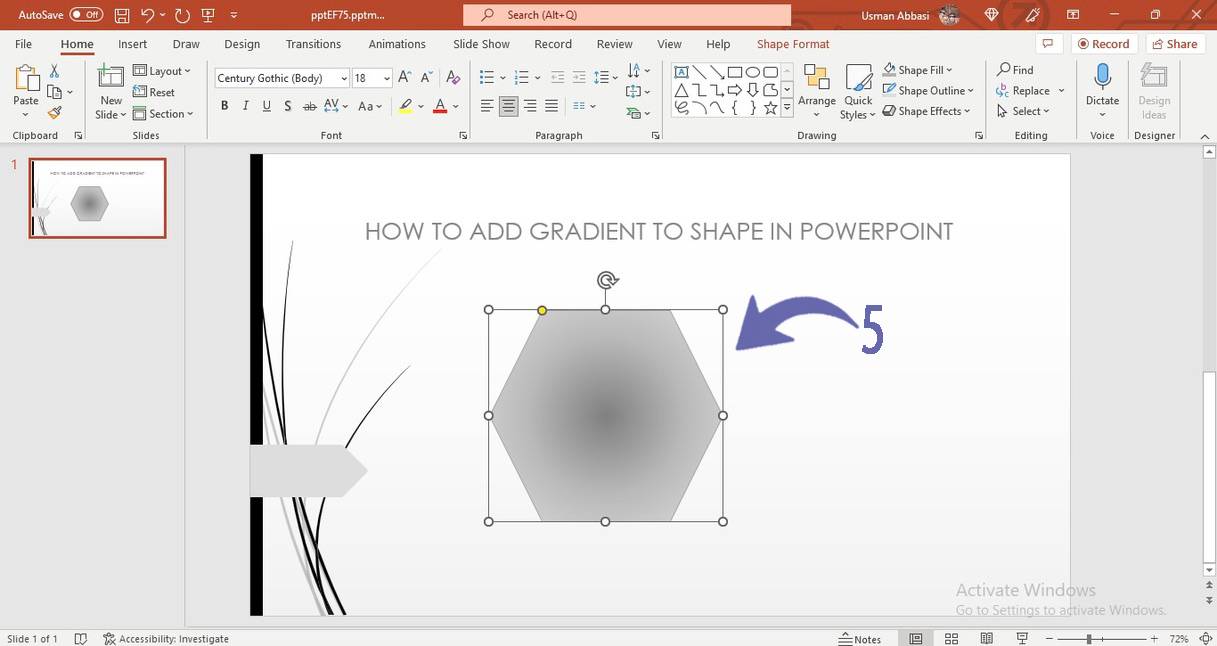
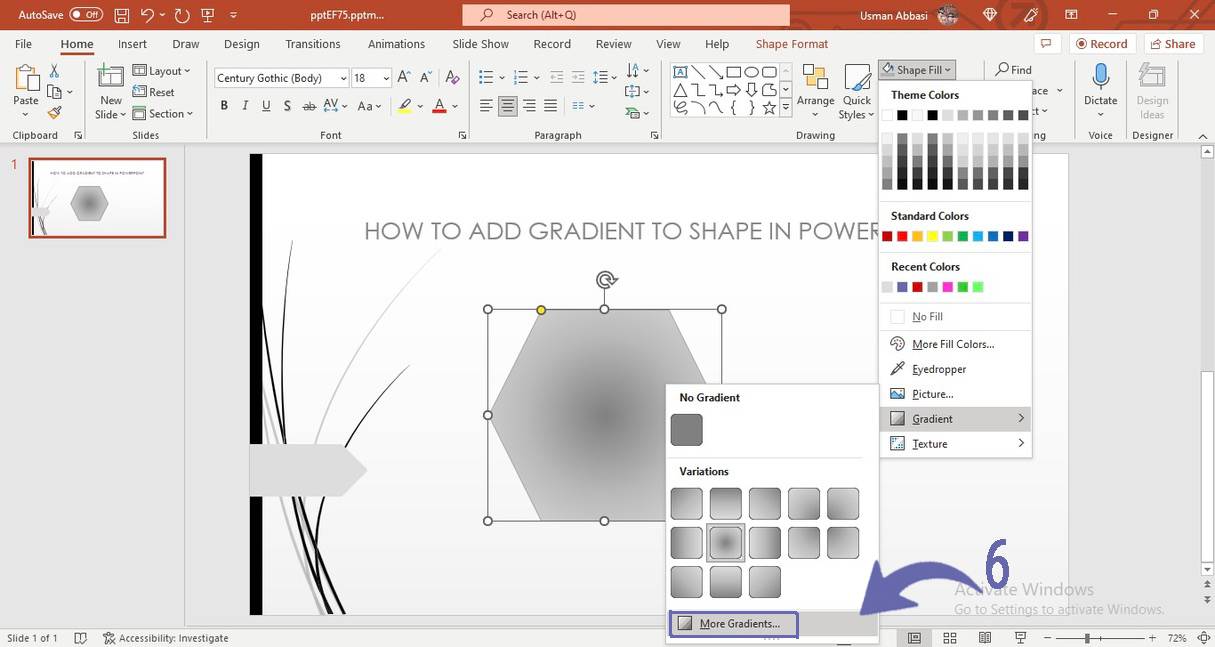
4. From the dropdown menu, select the “Gradient” option
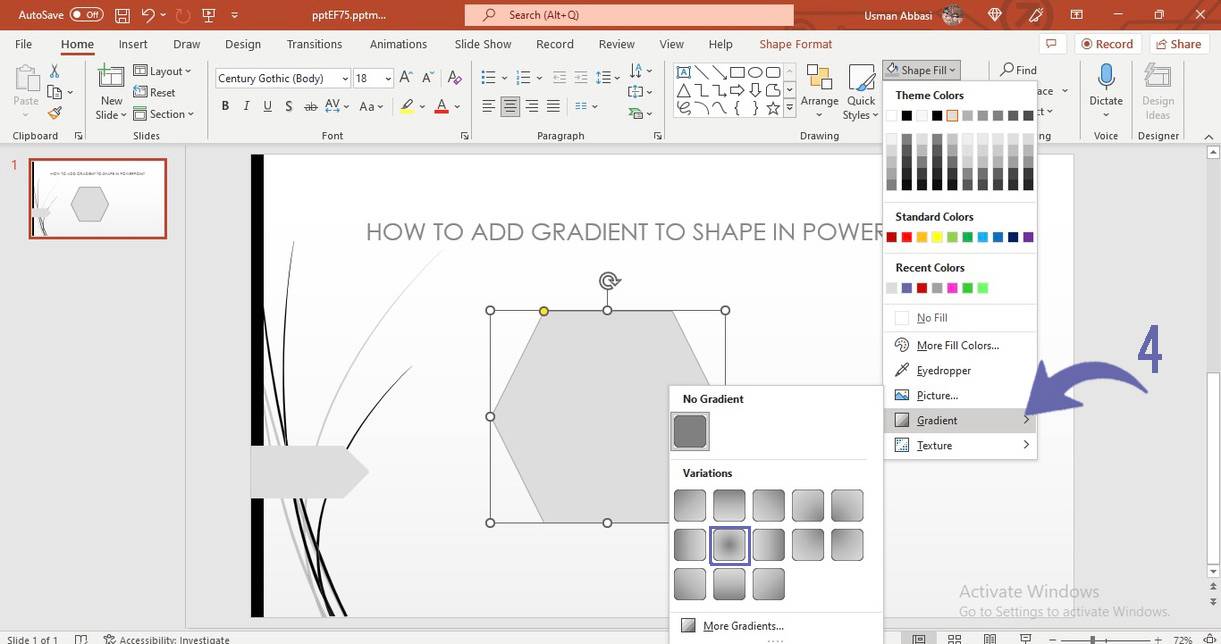
5. Choose the gradient from the options and click
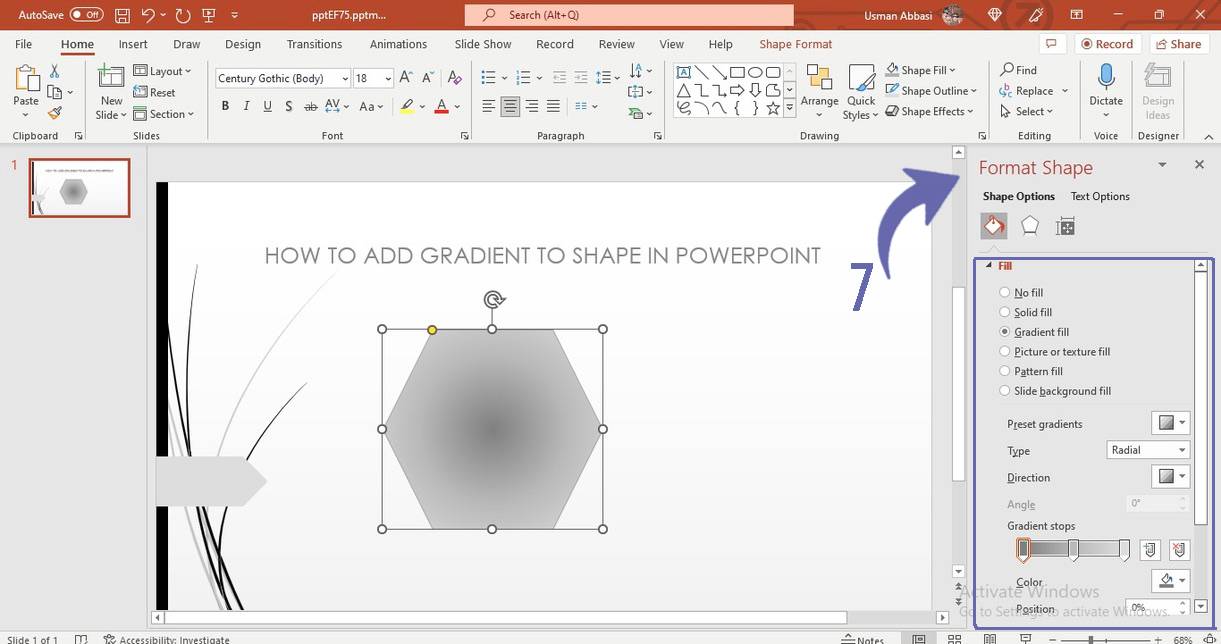
6. To customize the gradient, click the option “More Gradients” from the drop-down menu
7. A “Format Shape” panel will appear with many gradient customization options
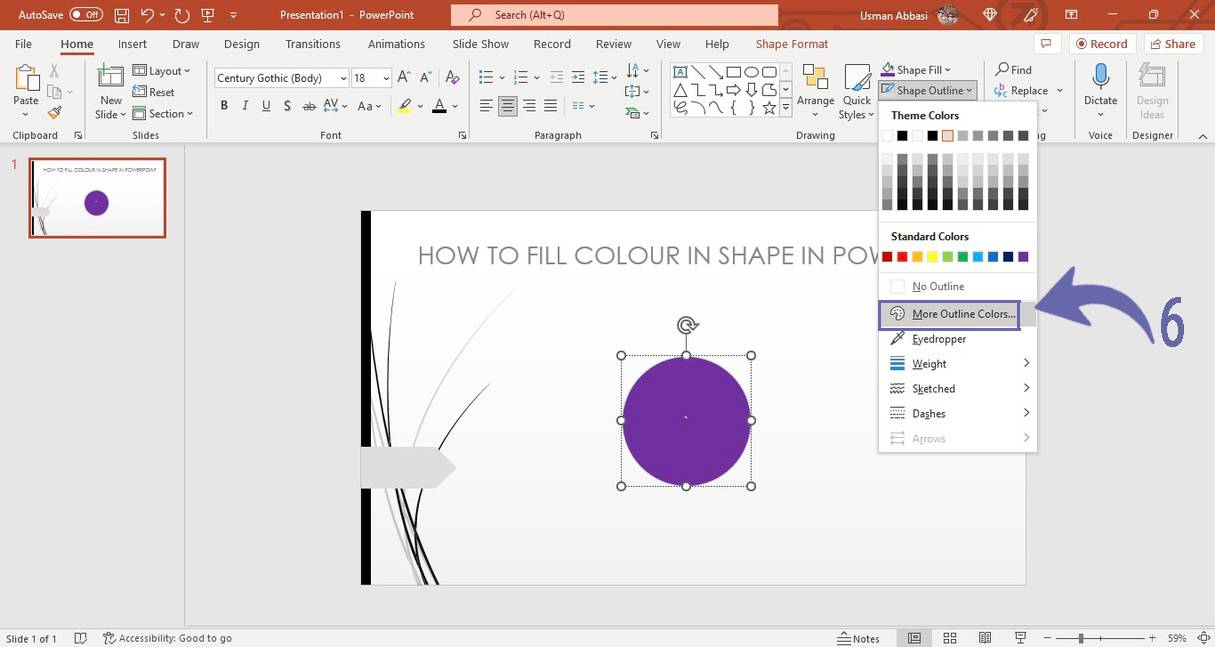
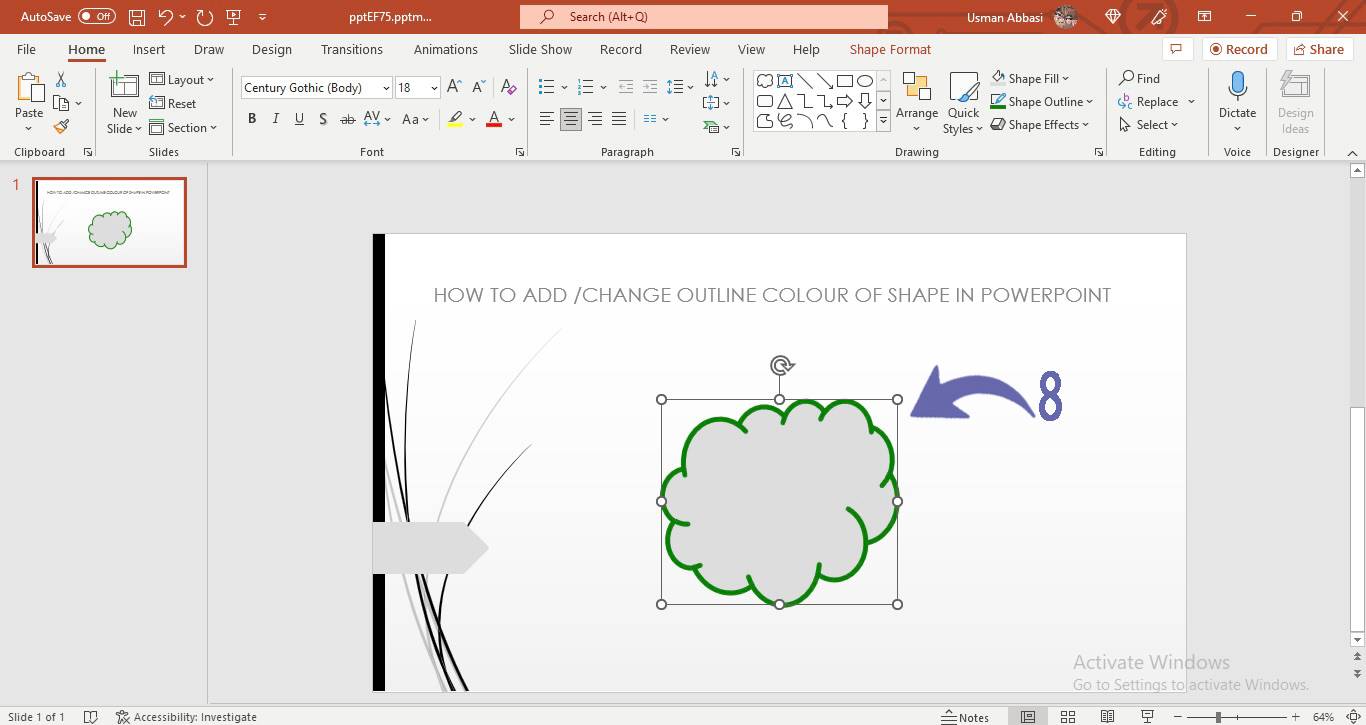
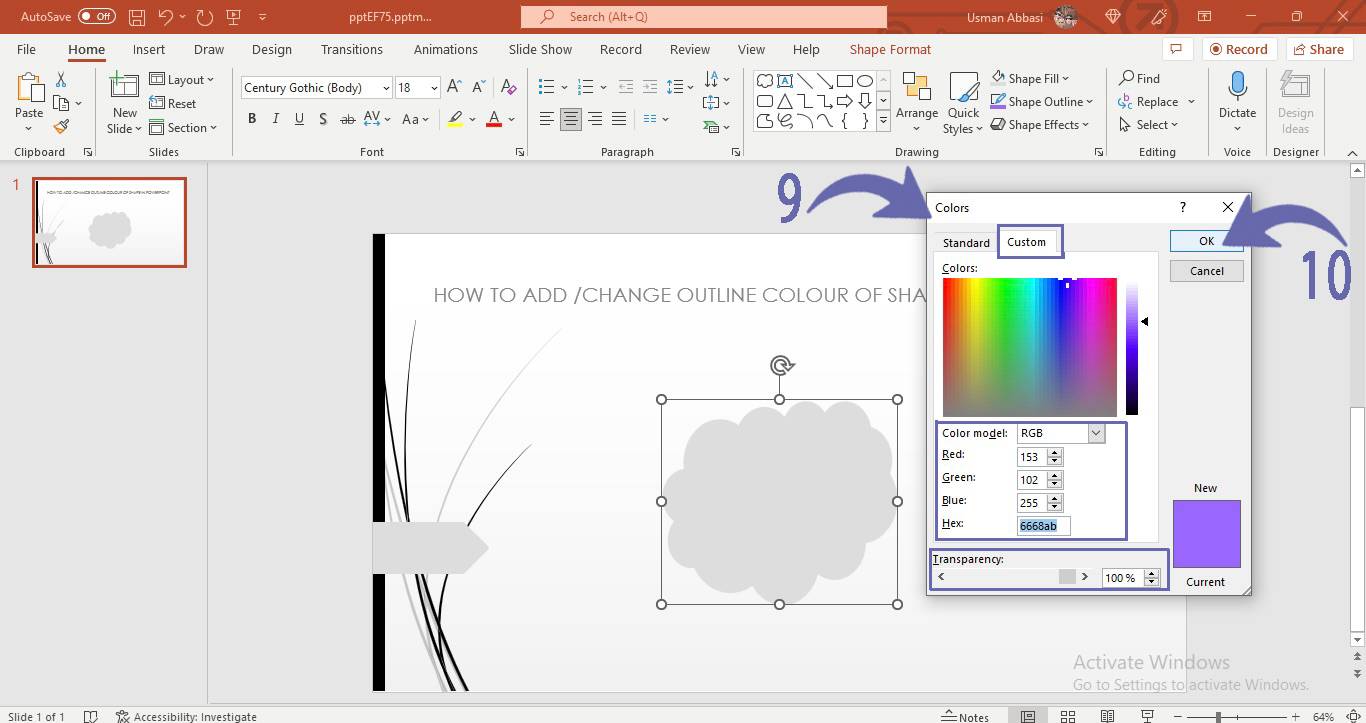
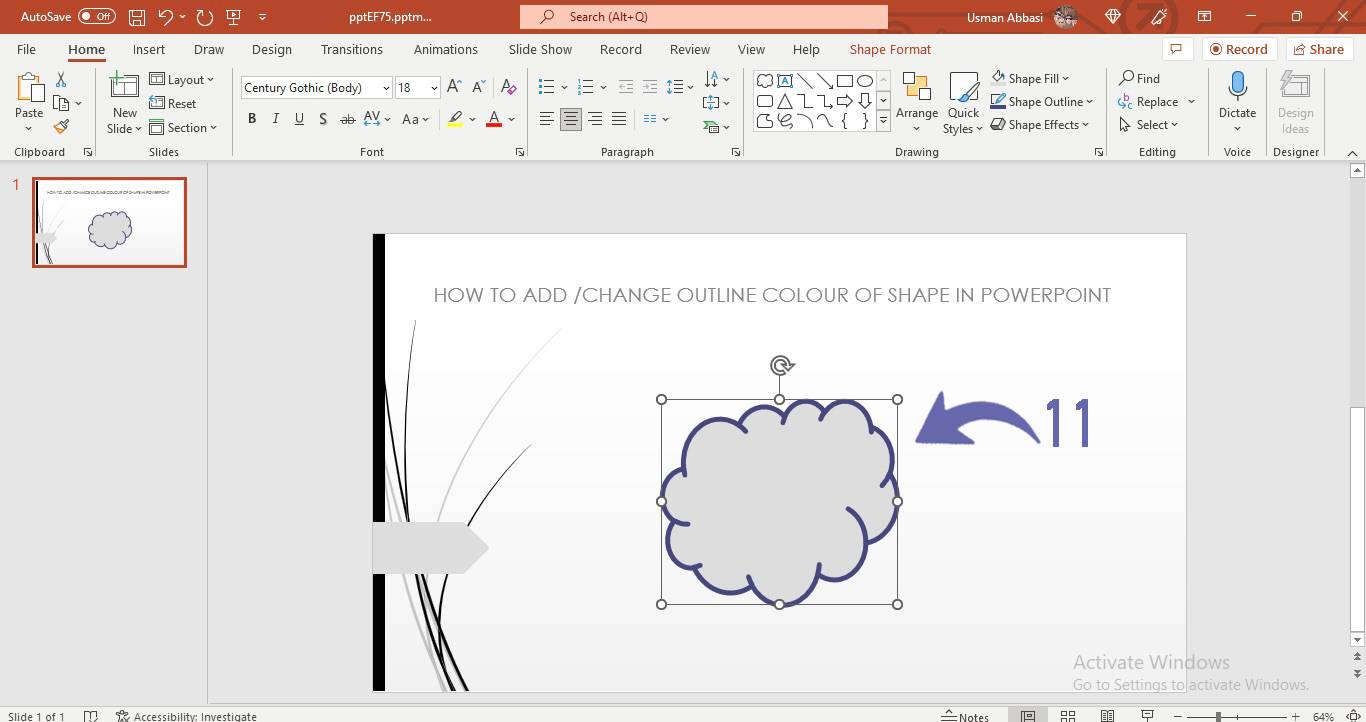
How to change the outline color of Shape in PowerPoint
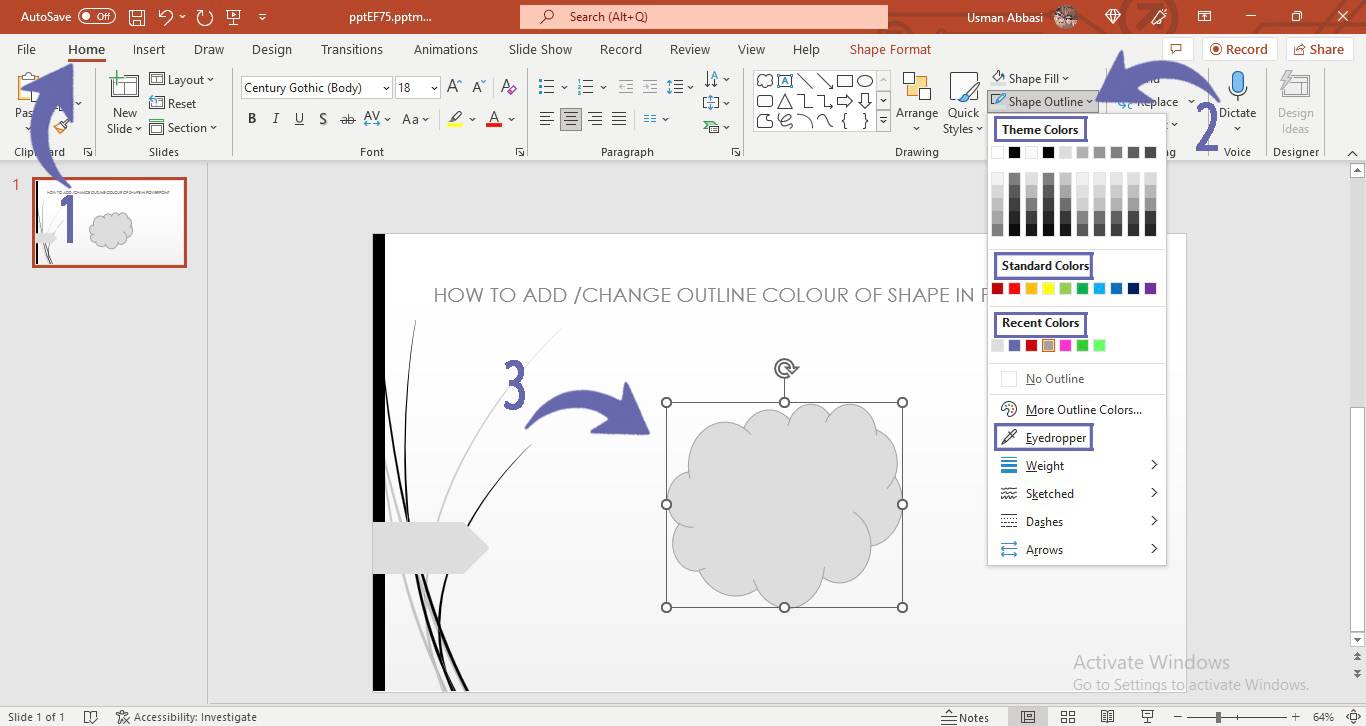
1. Select the shape and Go to “Home Tab”
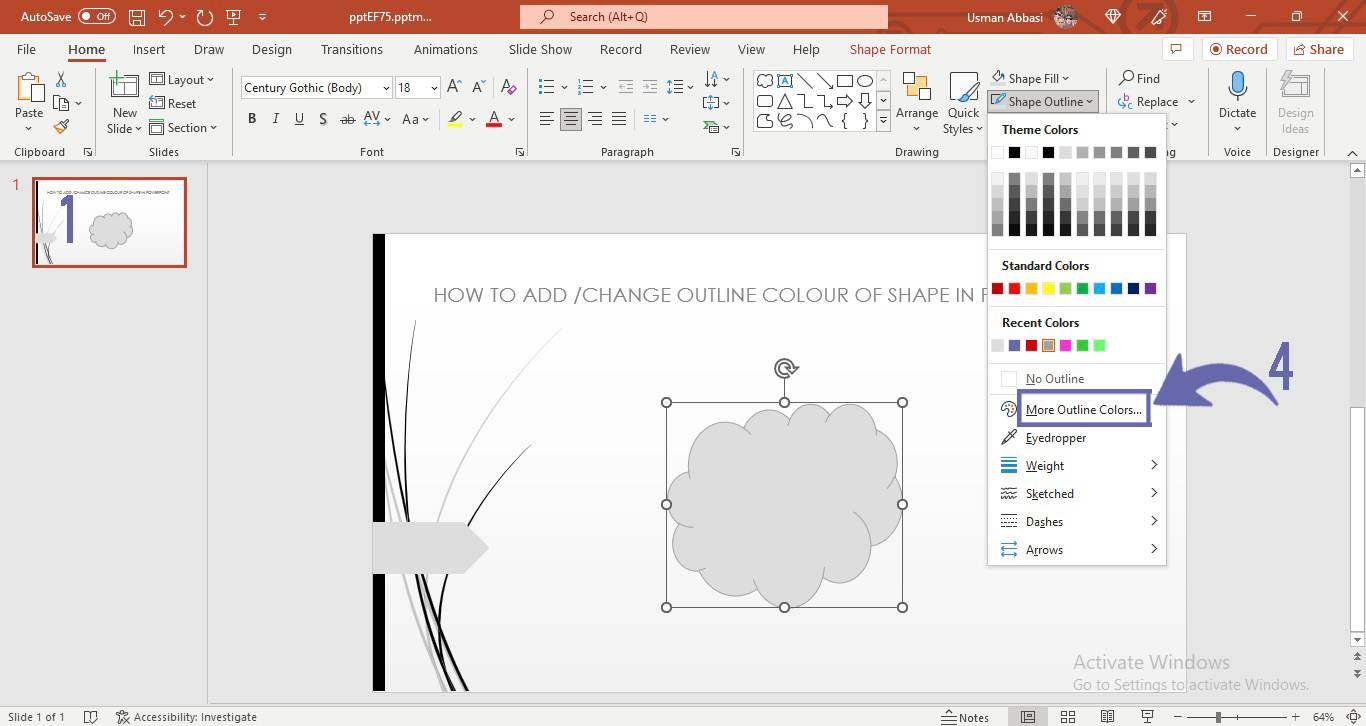
2. In the “Drawing group”, Go to the “Shape Outline“ option
3. Click the “arrow” next to it, and a dropdown menu will appear with outline color categories i.e., recent colors, theme colors, standard colors, and eye dropper options
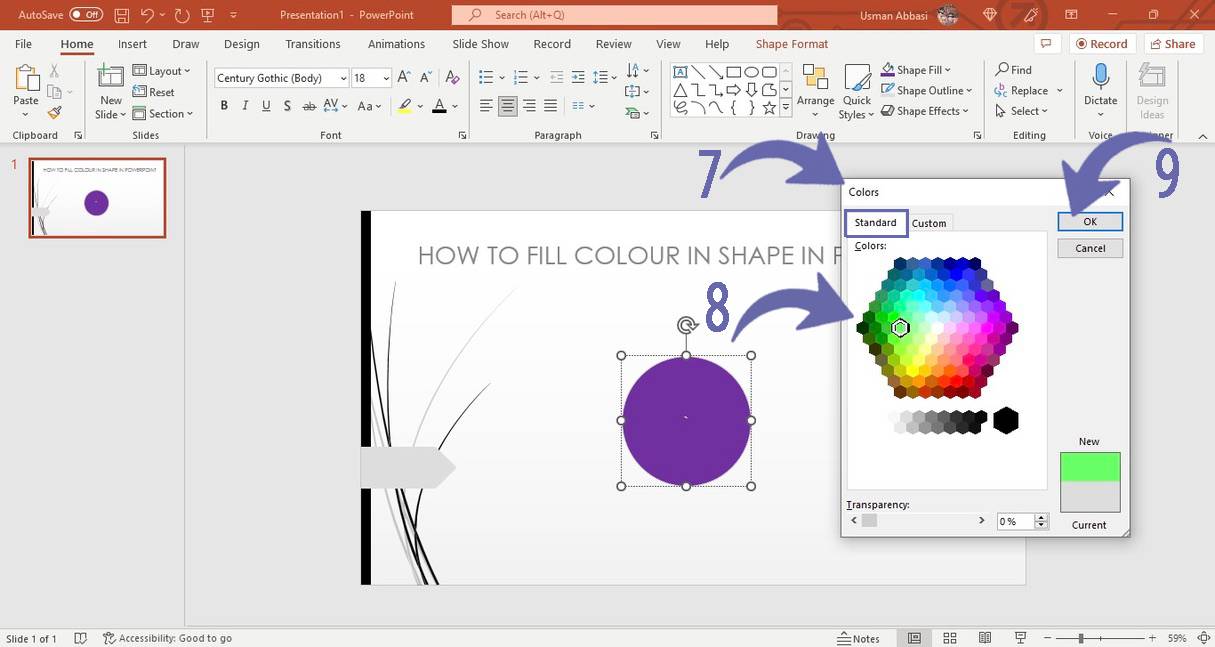
4. To customize colors, select “More colors option” from the dropdown menu
5. A color dialogue box will appear with two color pick categories i.e., custom and standard colors
6. In custom, you can pick any color of your choice from the color wheel and click ok
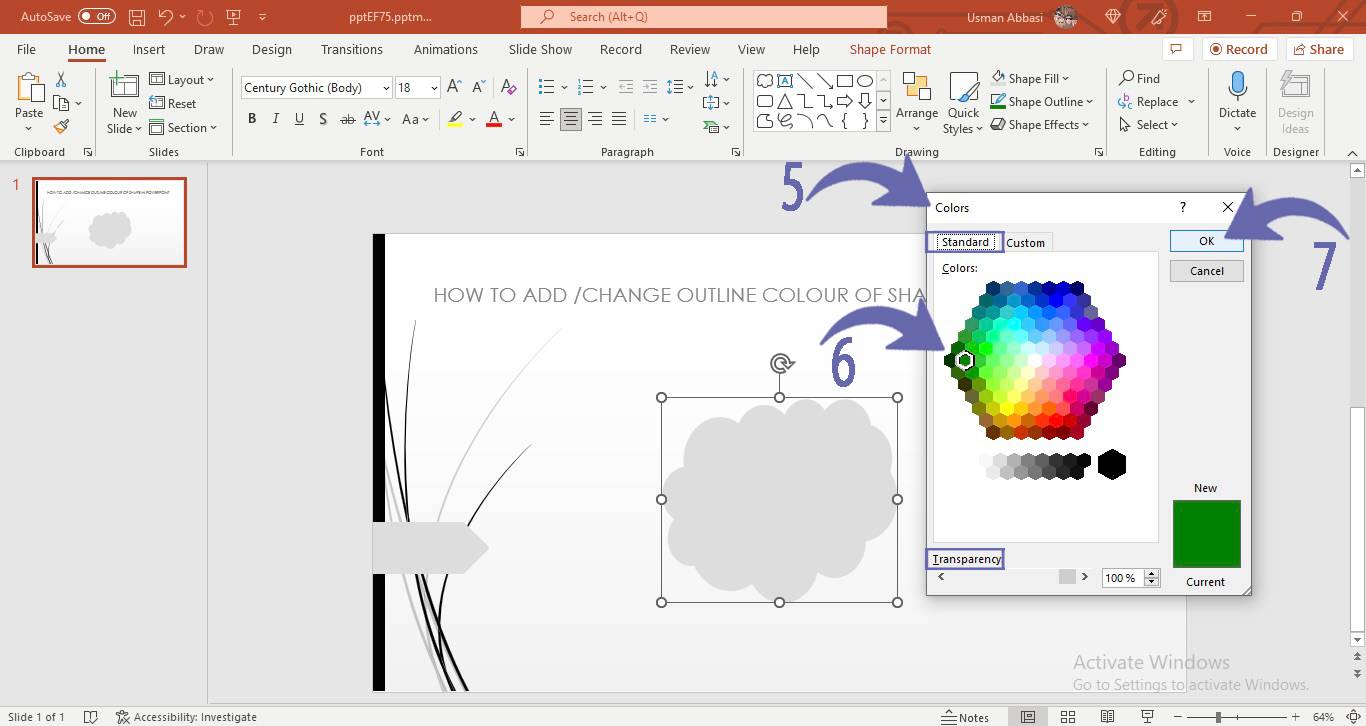
7. You can also adjust the color transparency of your shape color in both custom and a standard color dialogue box
8. In standard, you can pick your desired color also by writing its HEX or RGB code
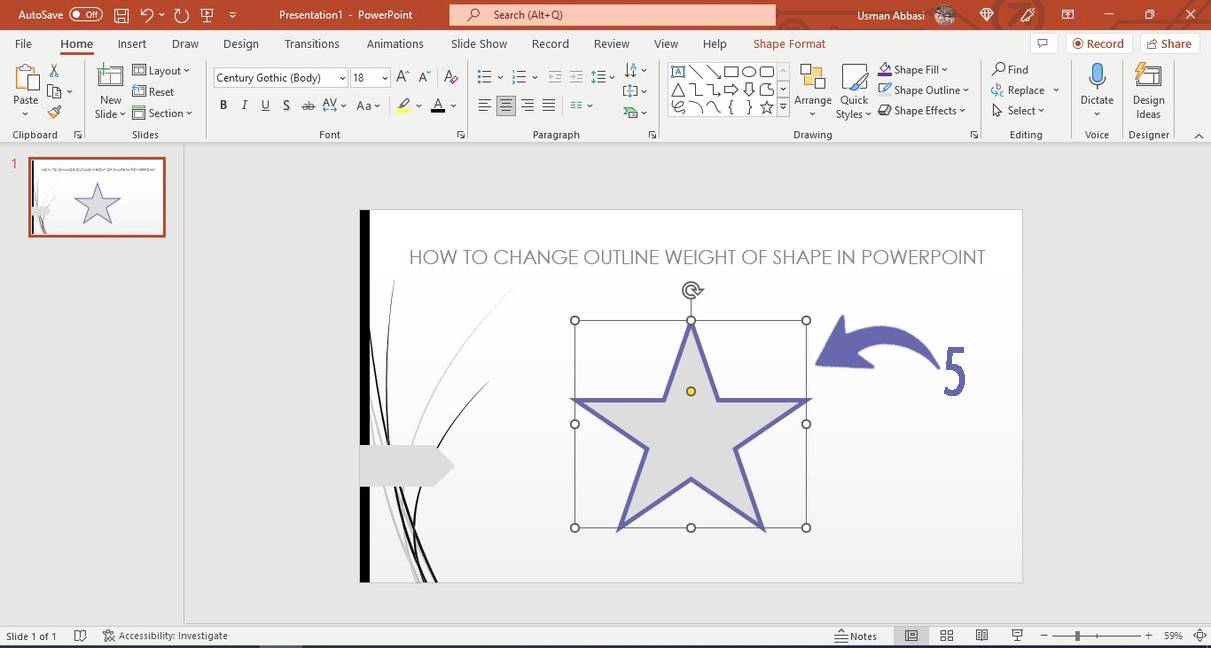
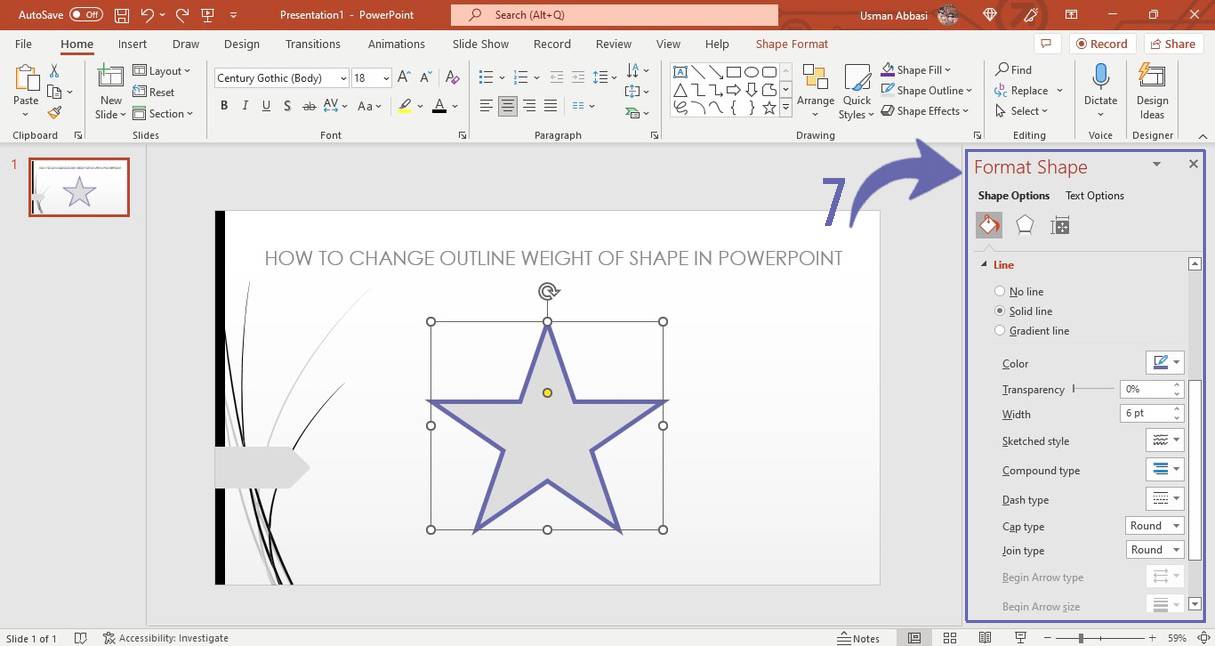
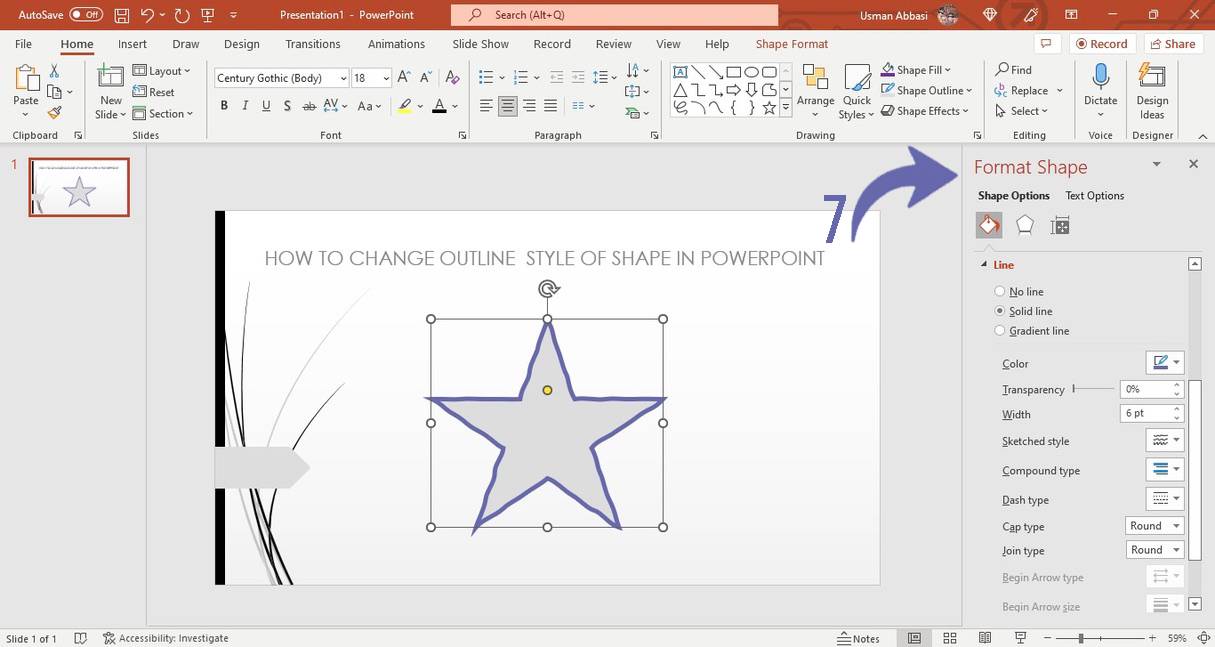
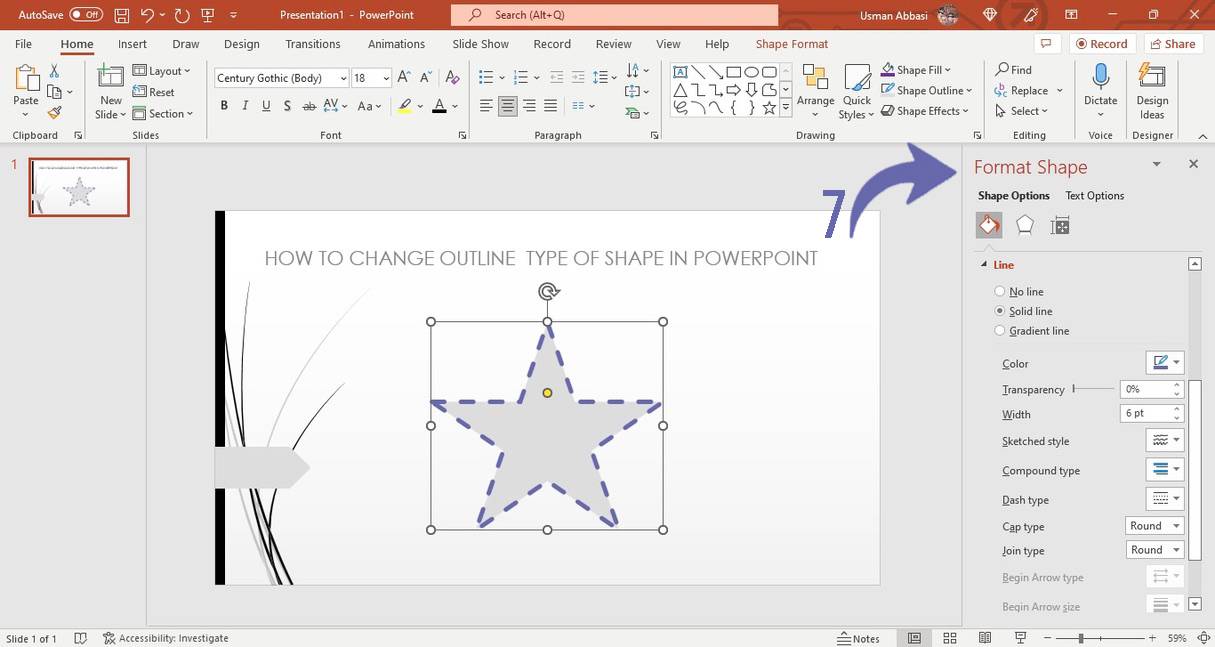
How to change the outline weight of a shape in PowerPoint
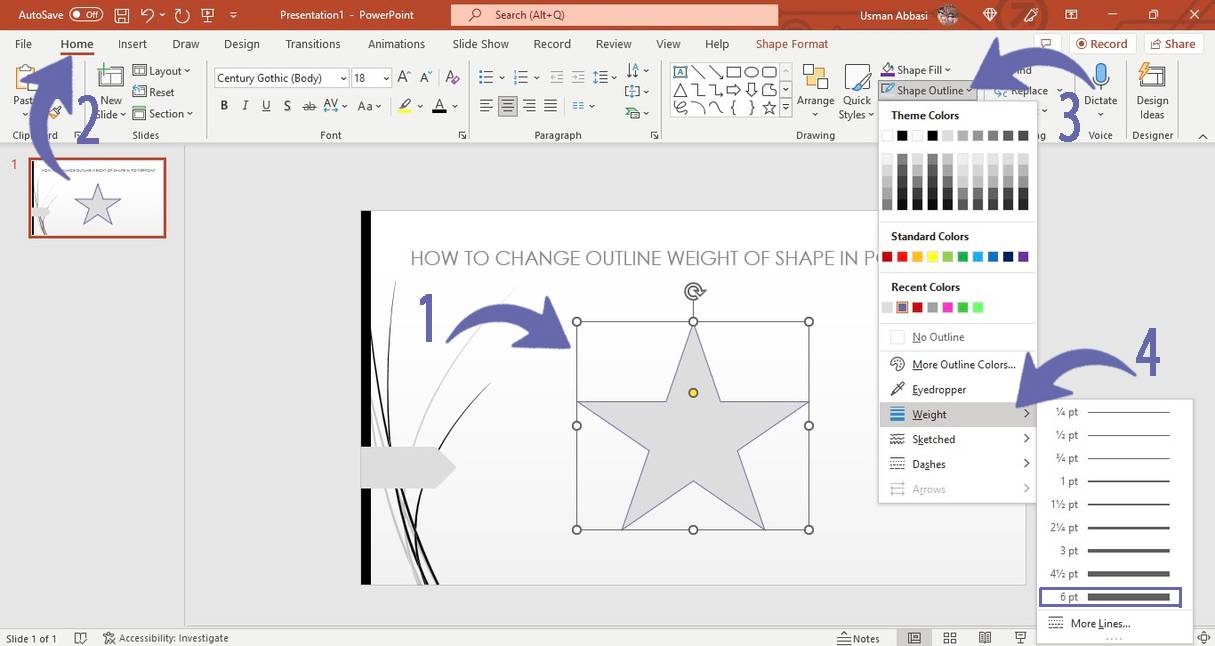
1. Select the shape and go to “Home Tab”
2. In the “Drawing group”, go to the “Shape Outline“ option
3. Click the “arrow” next to it
4. From the dropdown menu, select the “Weight” option
5. Click the arrow next to it, from the dropdown menu select your required shape outline weight
6. To customize your shape outline weight, click the “More Lines” option from the dropdown menu
7. On the right side of the window, a “Format Shape “ panel will appear with many shape customization options
How to Change shape outline sketched with the style in PowerPoint
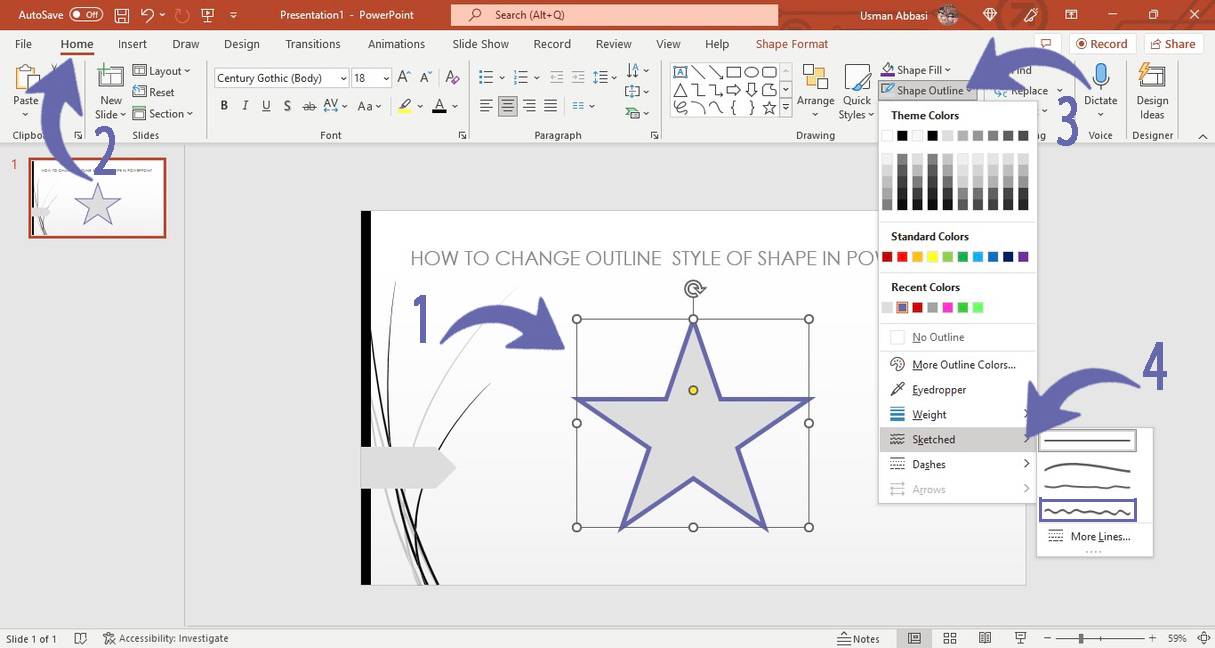
1. Select the shape and Go to “Home Tab”
2. In the “Drawing group”, Go to the “Shape Outline“ option
3. Click the “arrow” next to it
4. From the dropdown menu, select the “Sketched” option
5. from the dropdown select the style you want to add to lines
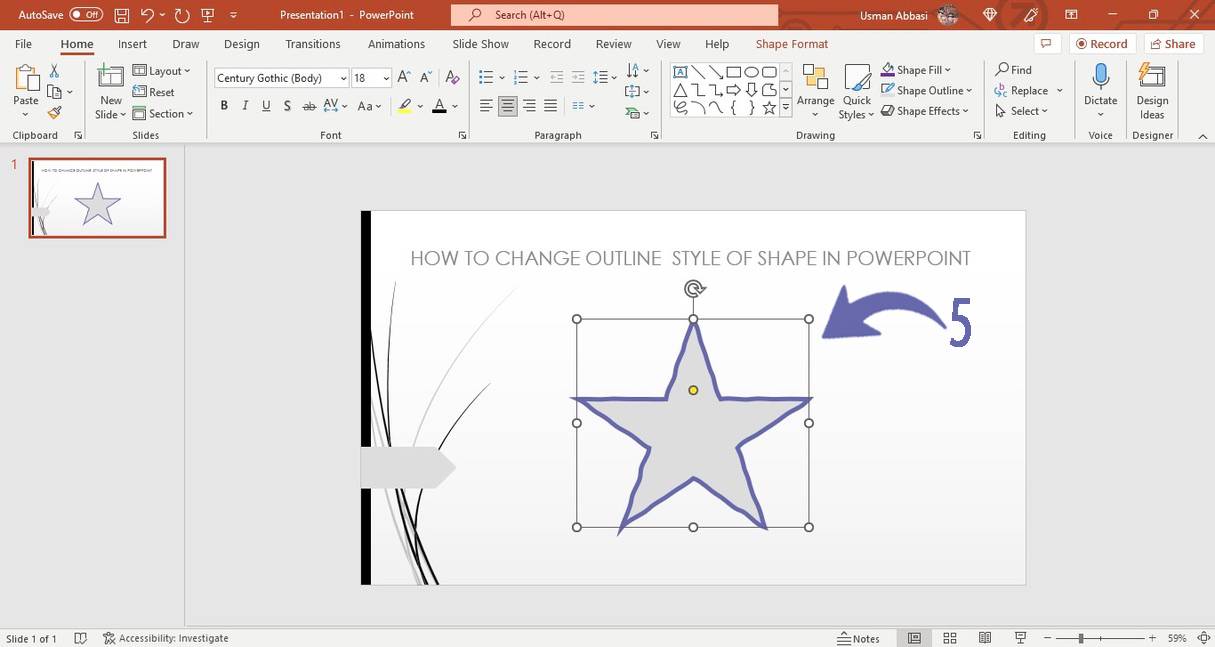
6. To customize your shape outline sketched style, click the “More Lines” option from the dropdown menu
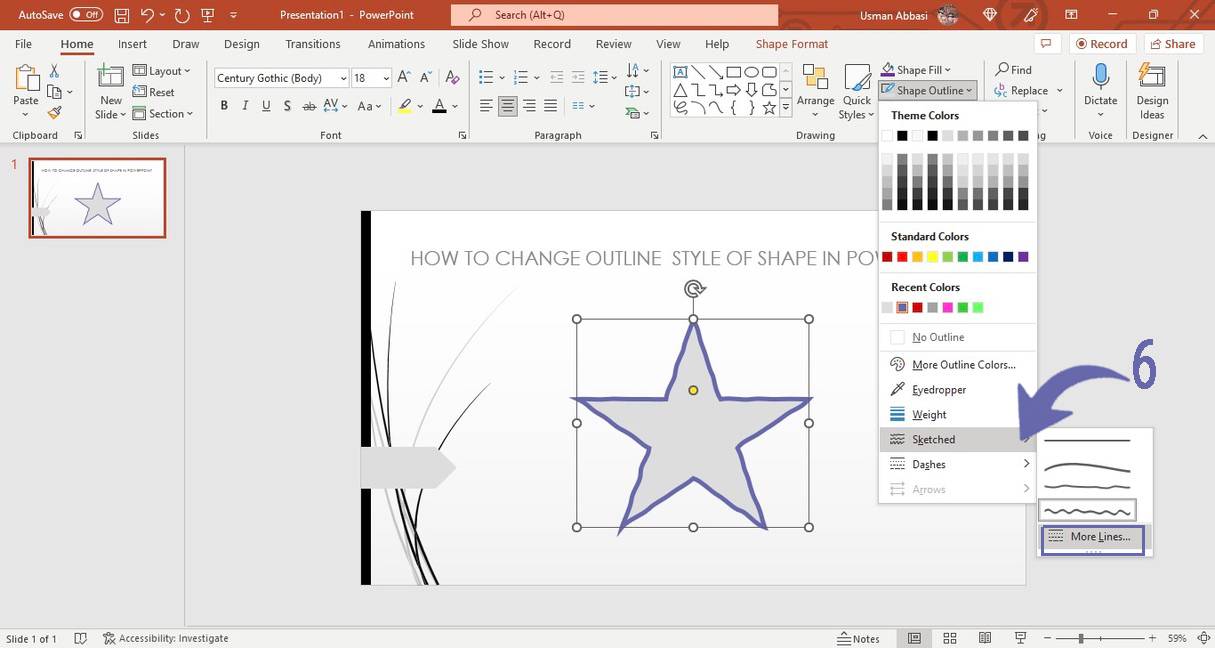
7. On the right side of the window, a “Format Shape “ panel will appear with many shape outlines sketched with style customization options
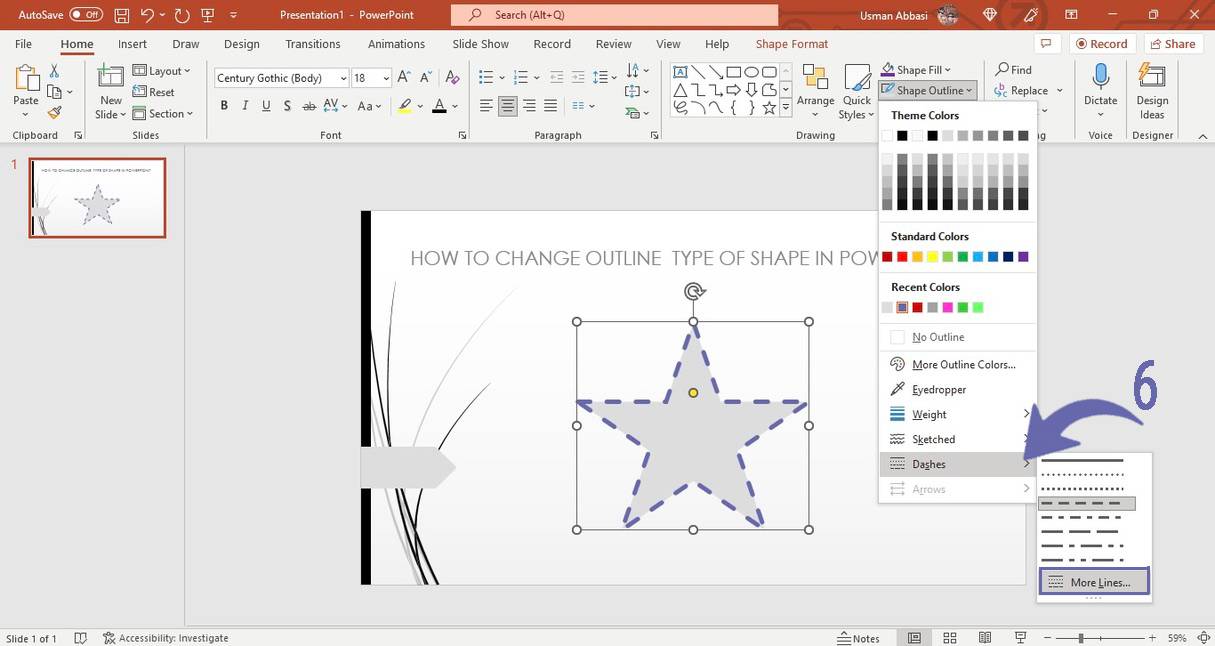
How to Change shape outline Dashes style in PowerPoint
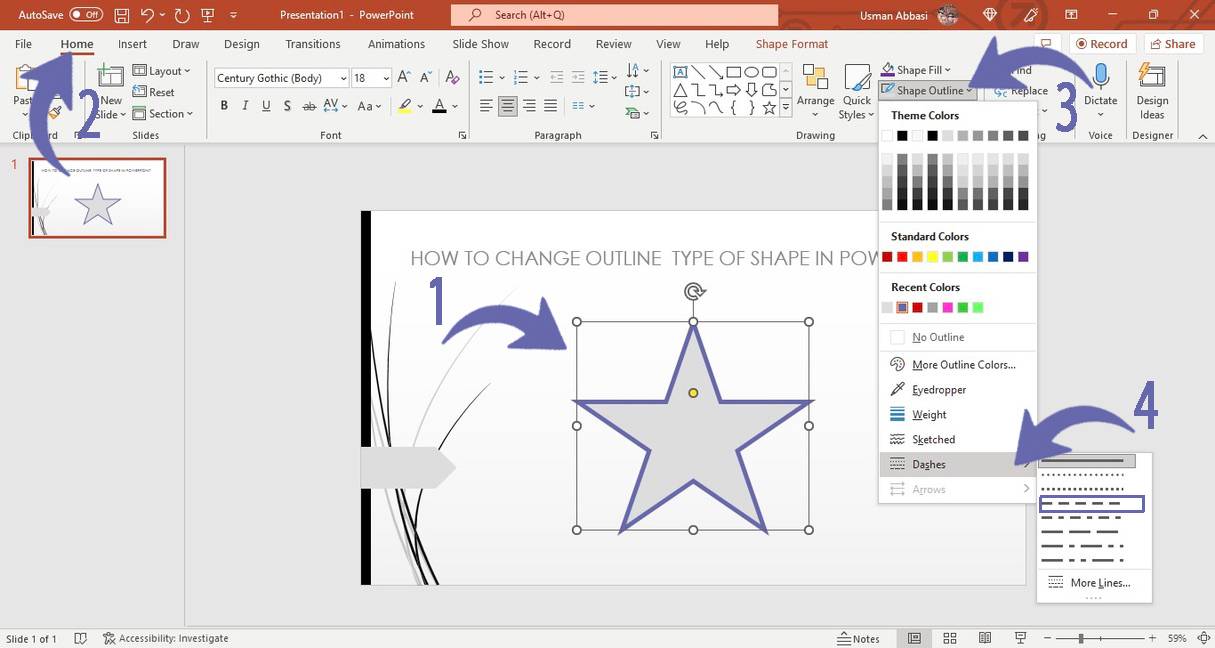
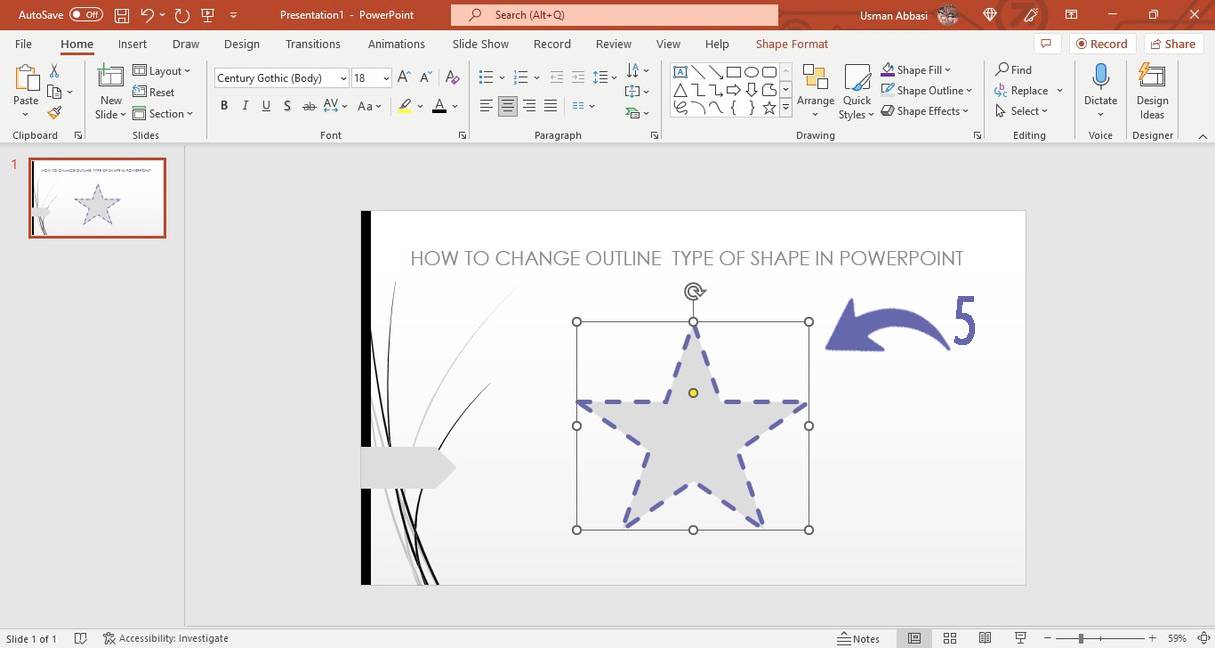
1. Select the shape and Go to “Home Tab”
2. In the “Drawing group”, Go to the “Shape Outline“ option
3. Click the “arrow” next to it
4. From the dropdown menu, select the “Dashes” option
5. From the dropdown select the dashes style you want to add to lines
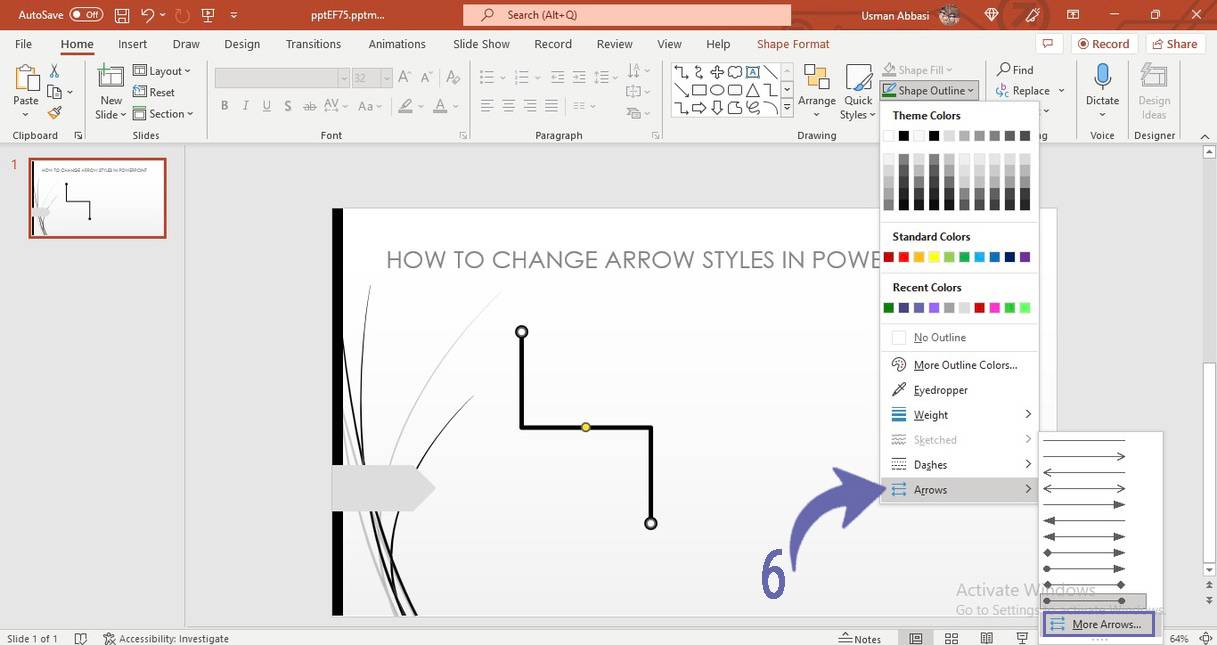
How to change the arrow style of Lines in PowerPoint
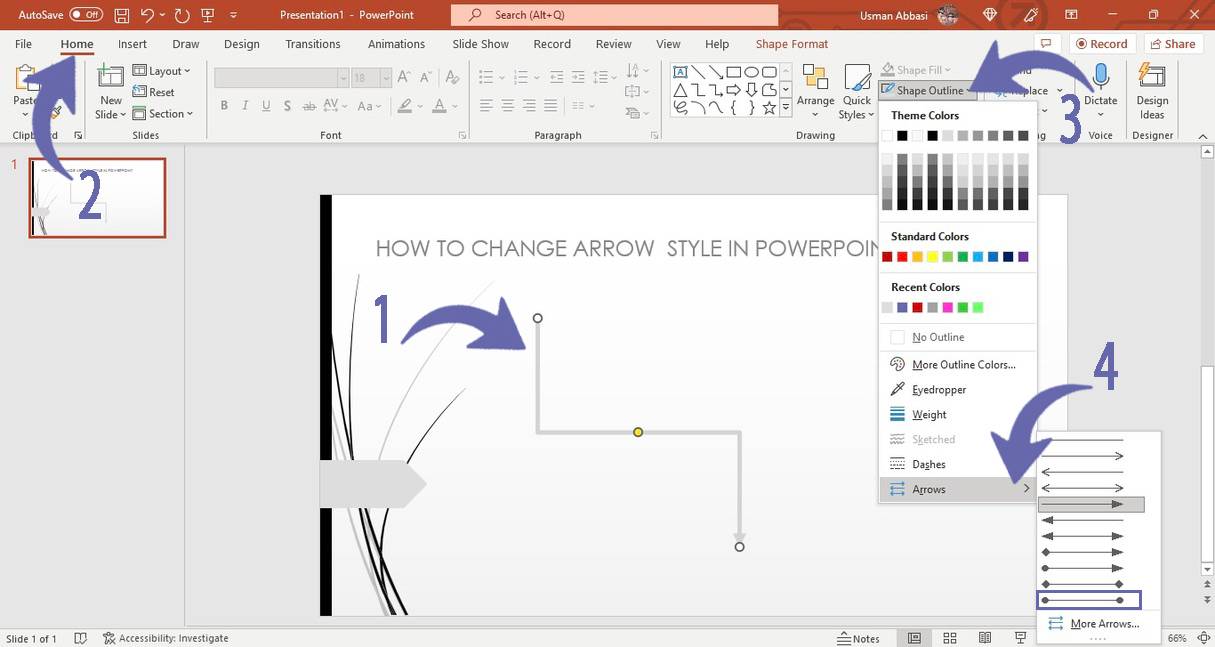
1. Select the line and Go to “Home Tab”
2. In the “Drawing group”, Go to the “Shape Outline“ option
3. Click the “arrow” next to it
4. From the dropdown menu, select the “Arrow” option
5. From the dropdown select the arrow style you want to add to lines
6. To customize the style of the arrows, select “More option” from the dropdown menu
7. On the right, A “Format Shape” panel will appear with a few arrows customizing options i.e.,
Begin Arrow type( this option enables you to change the type of begin arrows
Begin Arrow size(to change the size of the beginning arrow, select the size and press enter button on your keyboard )
End Arrow type (this option enables you to change the type of End arrows, select the arrow you want to add and press the enter button on your keyboard )
End arrow size (to change the size of the end arrow, click the arrow and select the required size from the dropdown menu )
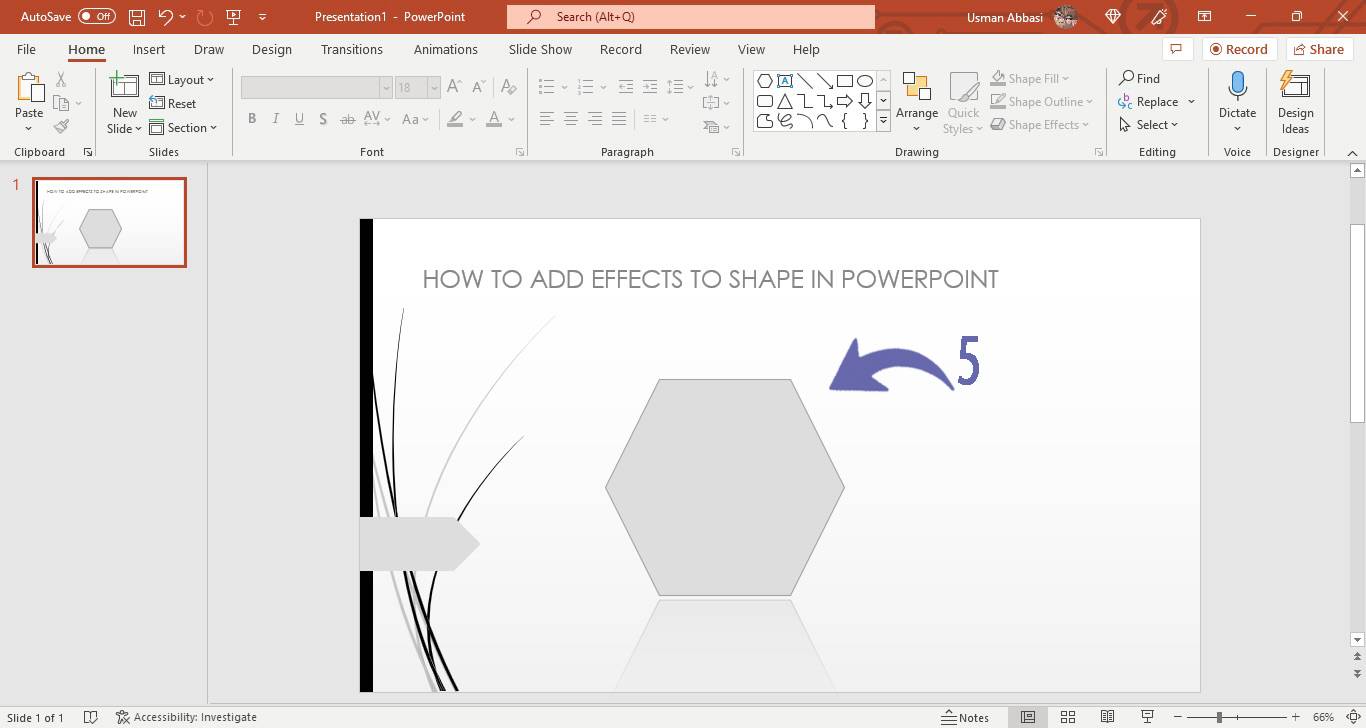
How to adjust the Shadow effect of a Shape in PowerPoint
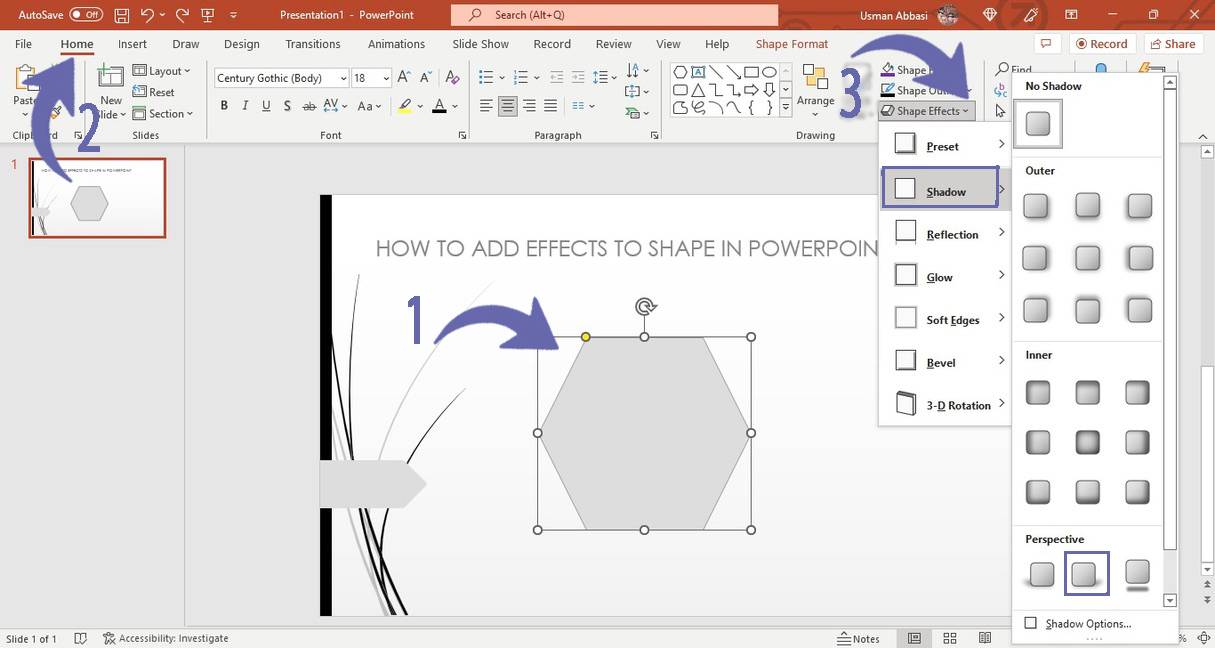
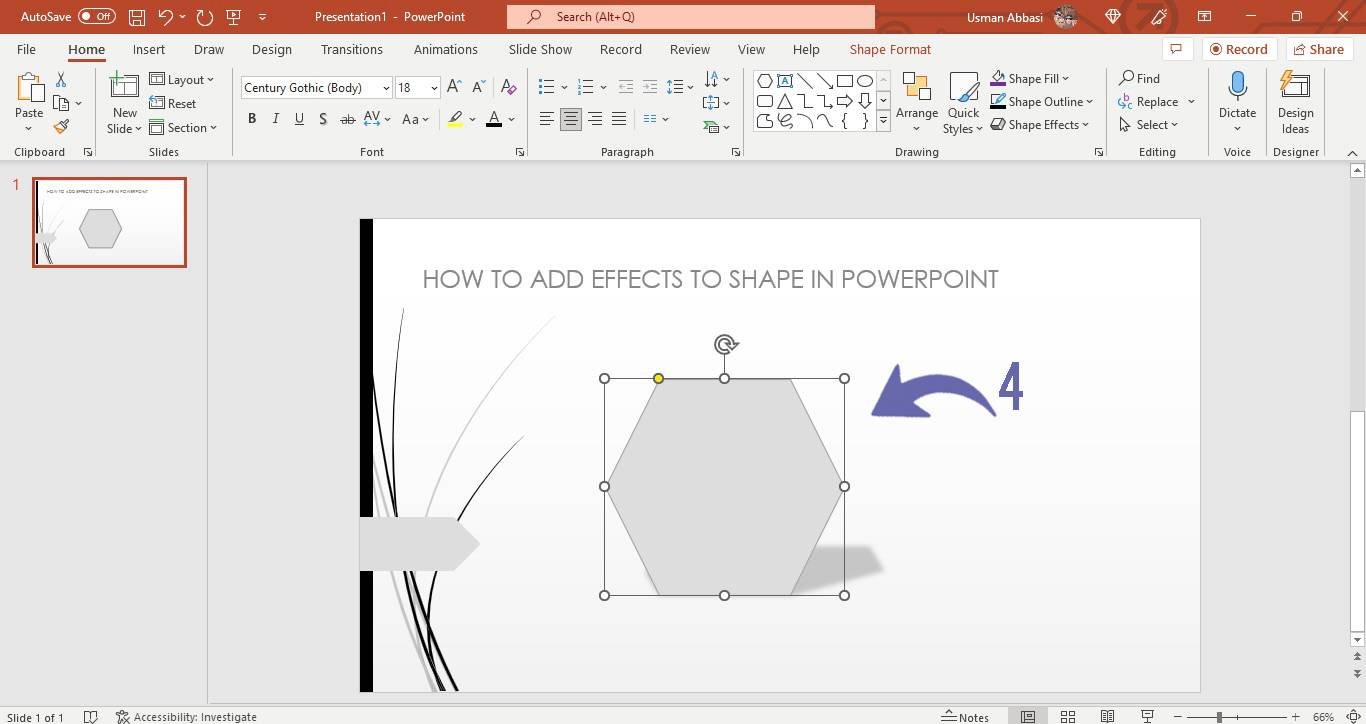
1. Select the object and go to the “Home tab”
2. In the “Drawing” group, click the “Shape Effect” option
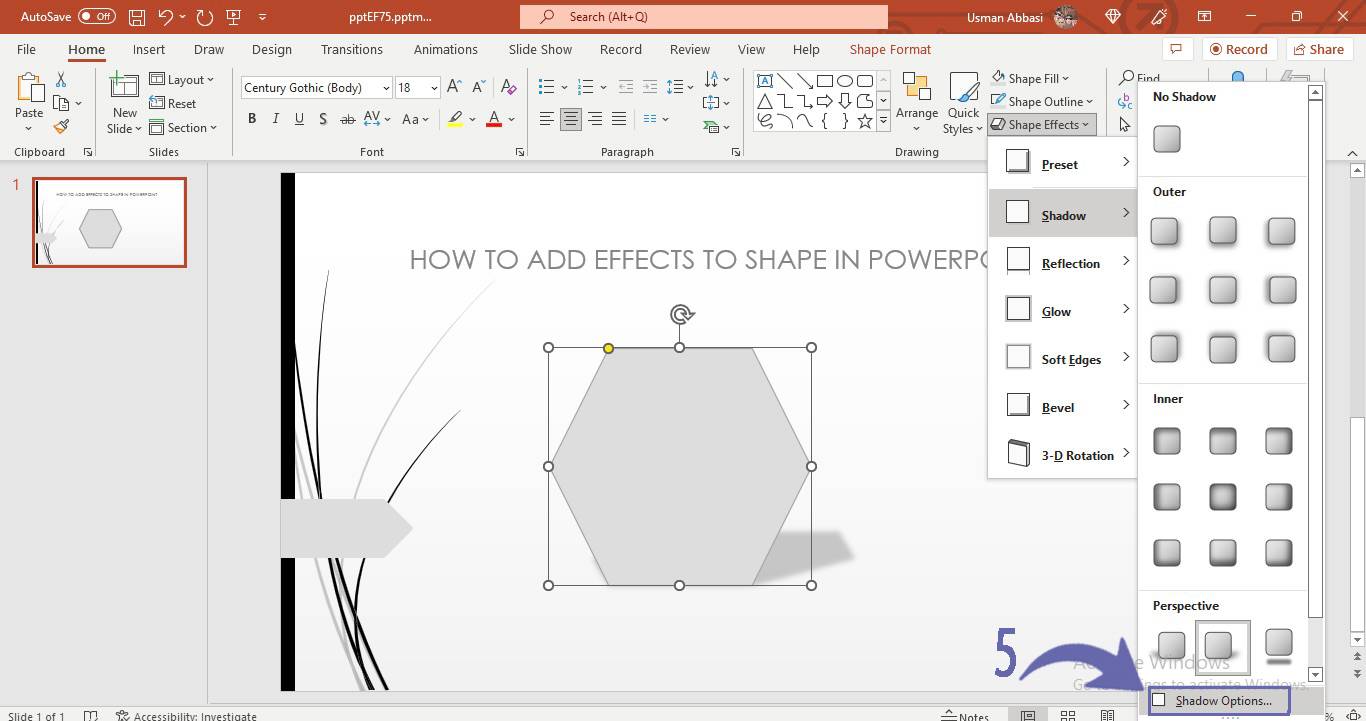
3. From a dropdown menu select the “Shadow” option
4. Many shadow effect options will appear categorized into three categories i.e.,
Inner ( apply shadow on the inner part of the object)
Outer ( apply shadow on the outer part of the object)
Perspective (apply shadow according to the object perspectives )
5. To customize the shadow effect, click “Shadow Option” from the dropdown menu
6. On the right side of the window, the “Format Shape” panel will appear
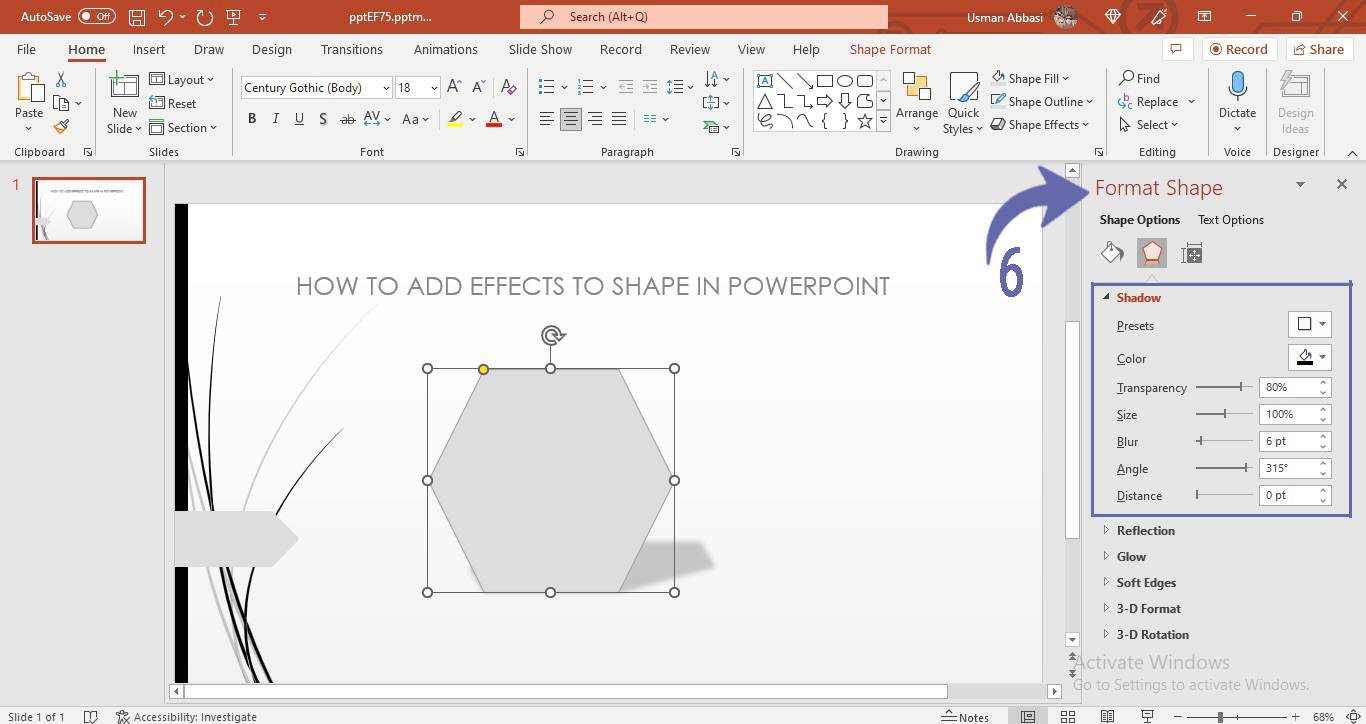
7. Click the shadow option and several customizing options will appear i.e.,
Presets (presets are the built-in shadow options, that are of three types
1) Outer shadow
2) Inner Shadow
3) perspective)
Colour (You can change the color of the shadow, click the bucket icon, and choose the color from the standard or theme colors you want to add to your shadow. Moreover, If you want to customize your shadow color click the more color option from the dropdown menu)
Transparency( transparency of the shadow color can be increased or decreased by sliding the pin left and right OR simply enter the transparency value and press enter on your keyboard )
Size(you can also change the size of your shadow by sliding the pin right to increase and left to decrease the shadow size Or you can simply write the size value in the text box and press enter on your keyboard )
Blur(you can blur the shadows by sliding the pin left to decrease and right to increase the blur amount of a shadow)
Angle( you can also set the angle of the shadow, you can change the angle by sliding the pin right and left, Or you can simply enter the degree of angle and click enter on your keyboard )
Distance(distance of shadow can also be managed just by sliding the pin Or simply write the value of distance in the text box and click enter on your keyboard)
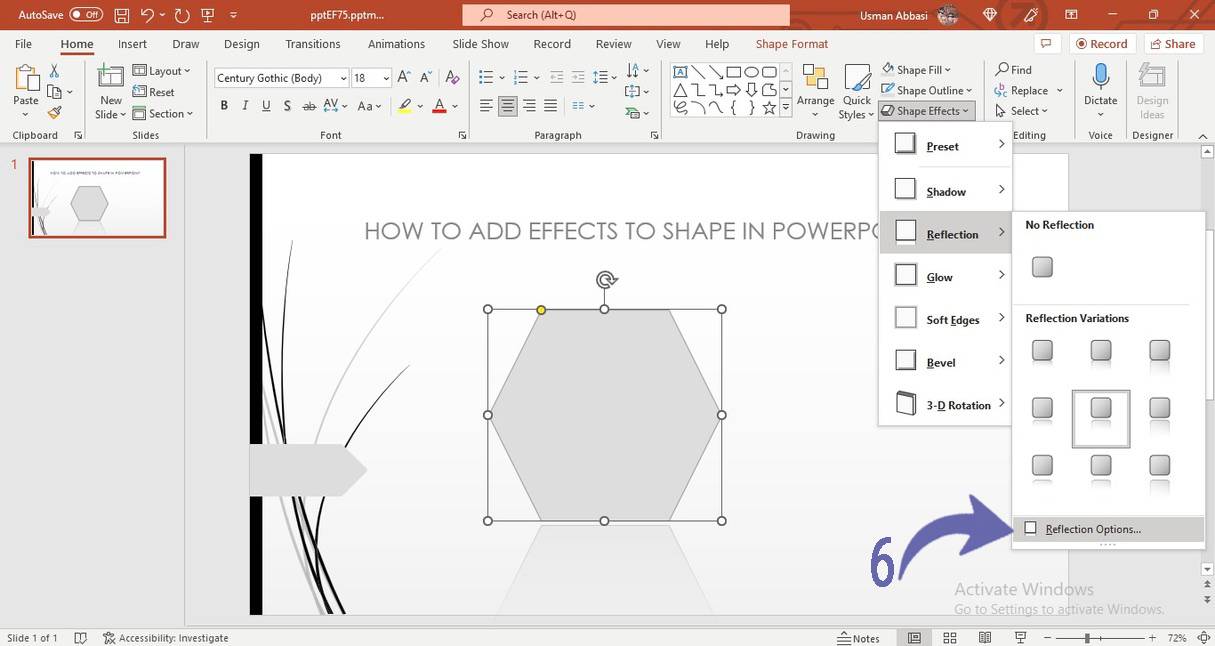
How to adjust the reflection effect of the Shape in PowerPoint
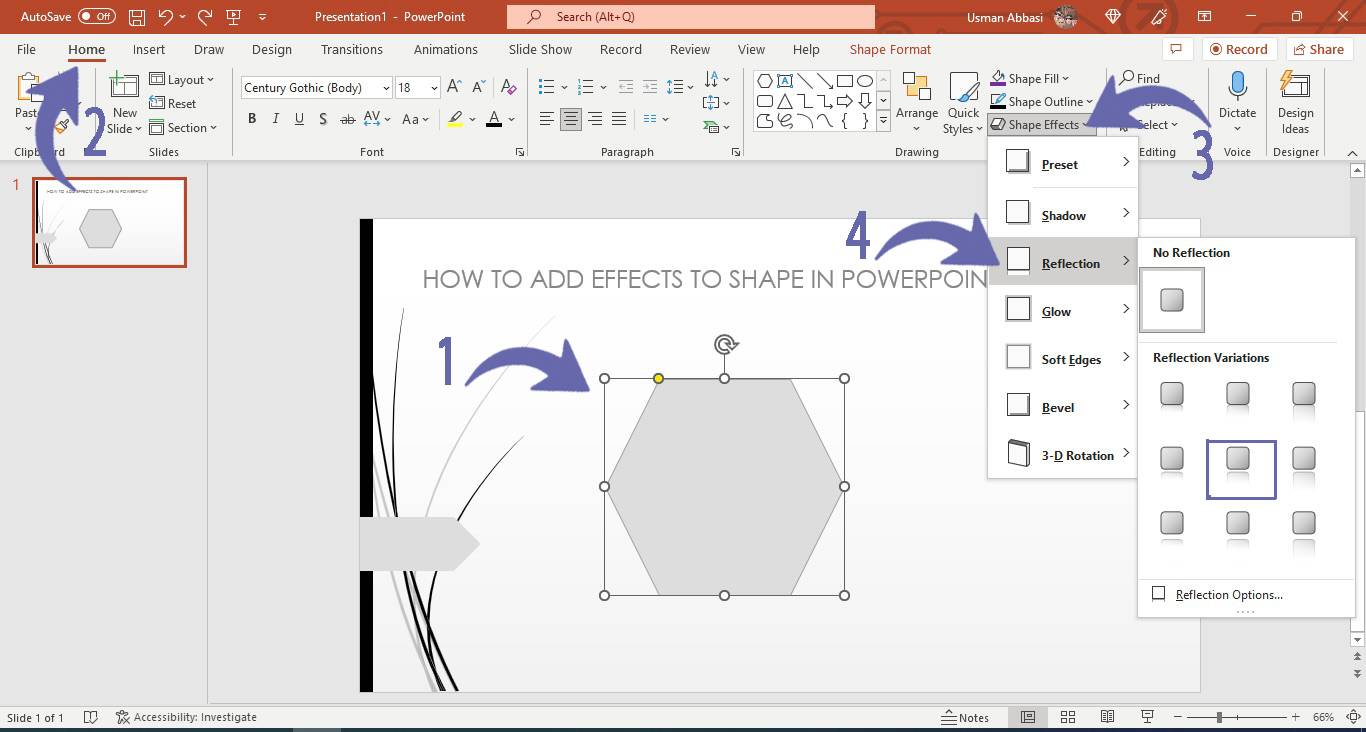
1. Select the shape and Go to the “Home Tab”, in the Drawing group
2. Go to the “Shape effects” option, and a dropdown menu will appear
3. From the dropdown menu select the “Reflection” option
4. Choose the reflection effect that you want to apply to the shape
5. To adjust reflection effects, click the “Reflection Option” from the drop-down menu
6. On the right side of the window, the Format Shape panel will appear, click on the shape icon
7. Click the Reflection option and the following customizing options will appear i.e.,
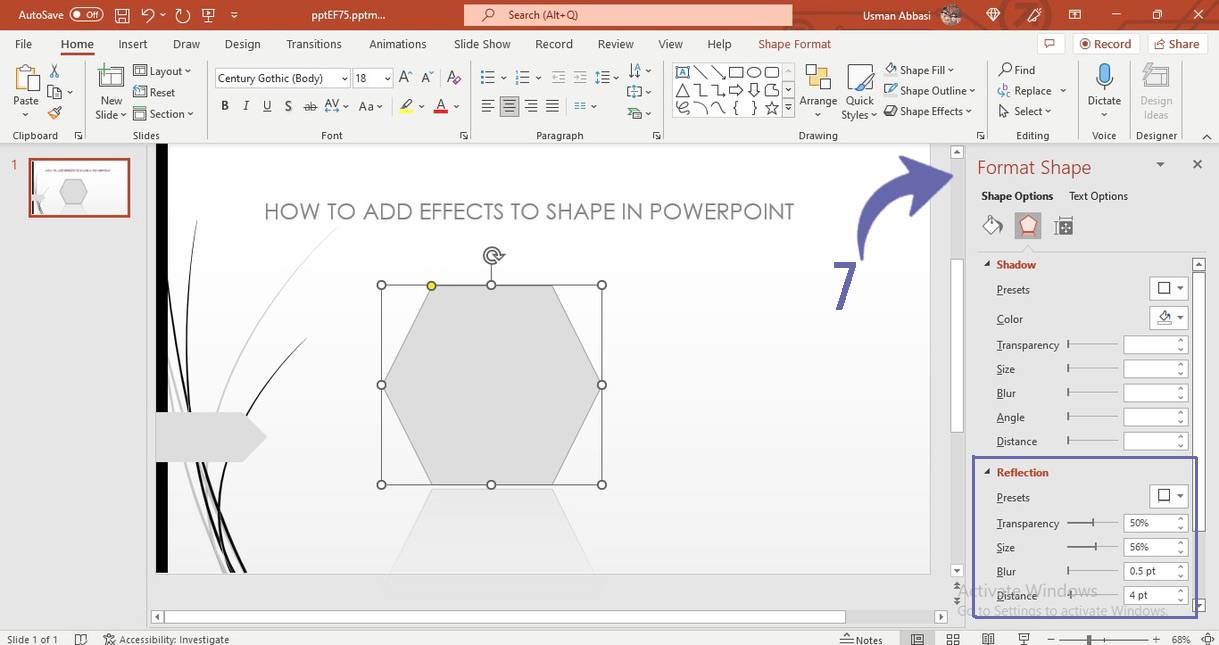
Presets (presets are the built-in reflection options)
Transparency( transparency of the reflection can be increased or decreased by sliding the pin left and right OR simply enter the transparency value and press enter on your keyboard )
Size(you can also change the size of your reflection by sliding the pin right to increase and left to decrease the reflection size Or you can simply write the size value in the text box and press enter on your keyboard )
Blur(you can blur the reflection by sliding the pin left to decrease and right to increase the blur amount of a reflection)
Distance(distance of reflection can also be managed just by sliding the pin Or simply write the value of distance in the text box and press enter on your keyboard)
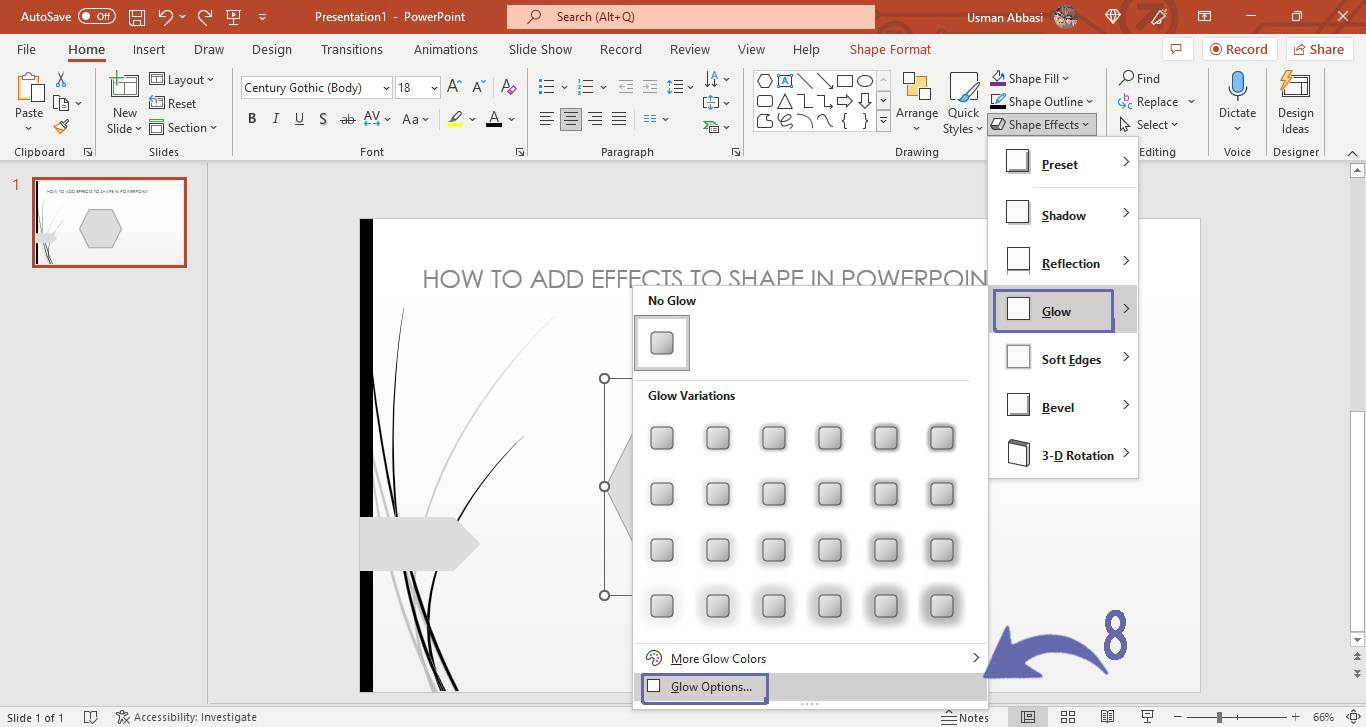
How to adjust the glow effect of a Shape in PowerPoint
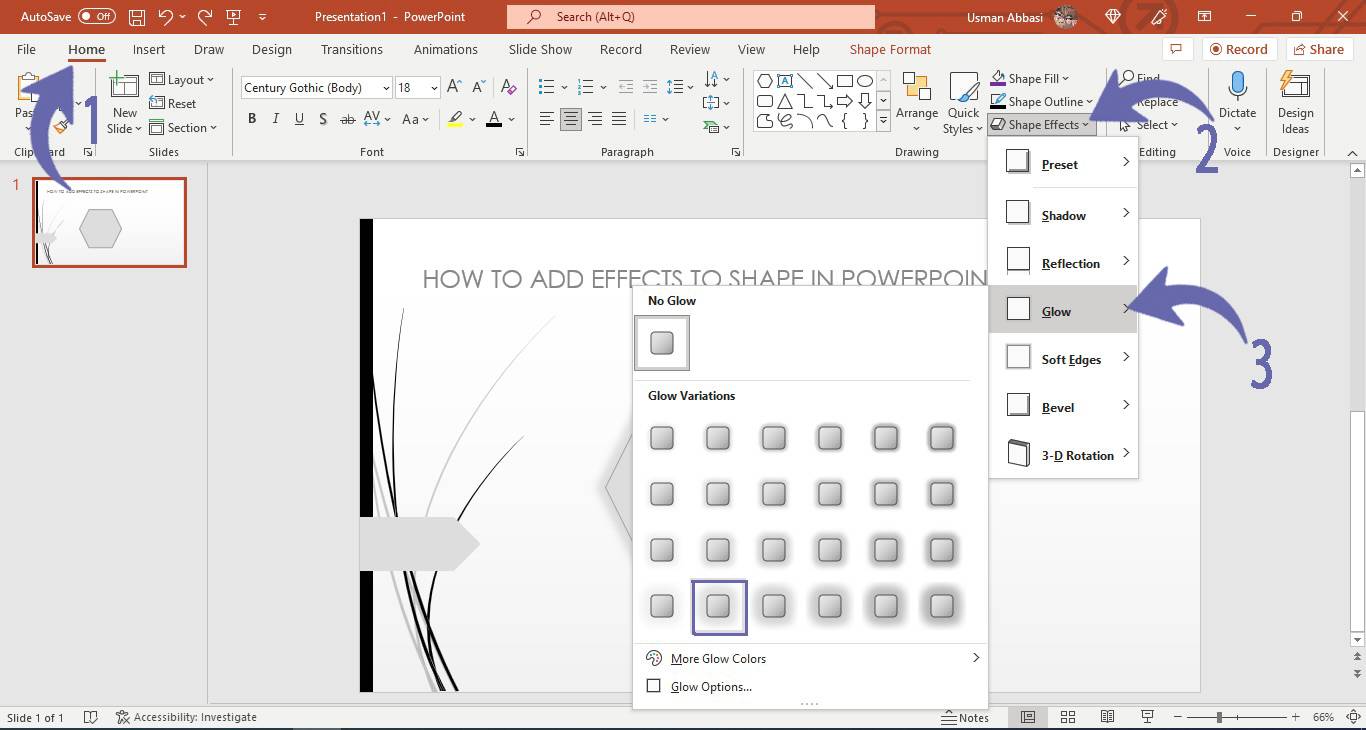
1. Select the shape and Go to “Home Tab”, in the “Drawing group”
2. From the “Shape effect o”, Click the “Glow Options”
3. Choose the glow effect that you want to apply to the shape
4. To change the glow color, click the “Glow Colour” option from the drop-down menu
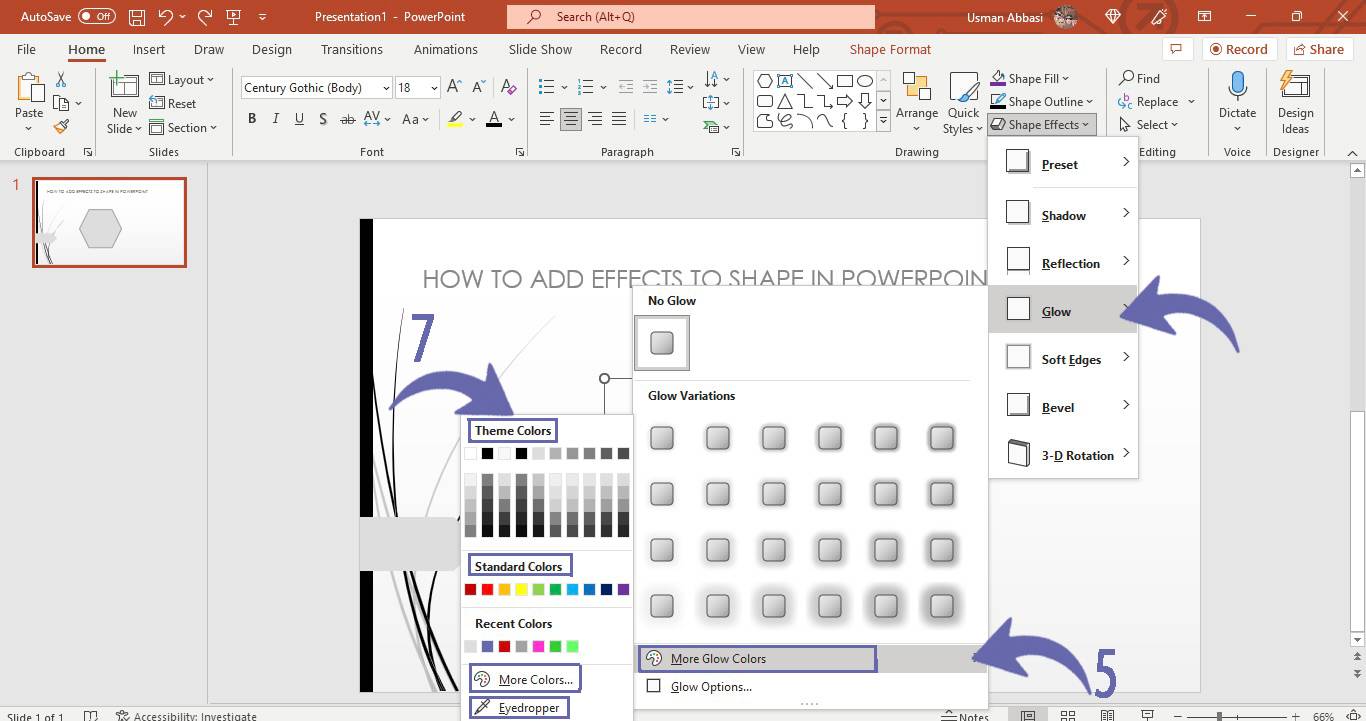
5. To adjust glow effects click the “Glow option” from the drop-down menu
6. On the right side of the window, the Format Shape panel will appear, click on the shape icon and a few customizing options will appear i.e.,

Presets (presets are the built-in glow options, in the dropdown menu you can see four variations of each glow preset)
Colour (You can change the color of the glow, click the bucket icon, and choose the color from the standard or theme colors you want to add to your glow. Moreover, If you want to customize your glow color click the more color option from the dropdown menu)
Size(you can also change the size of your glow by sliding the pin right to increase and left to decrease the glow size Or you can simply write the size value in the text box and press enter on your keyboard
Transparency( transparency of the glow can be increased or decreased by sliding the pin left and right OR simply enter the transparency value and press enter on your keyboard )
How to adjust the Soft edges effects of Shape in PowerPoint
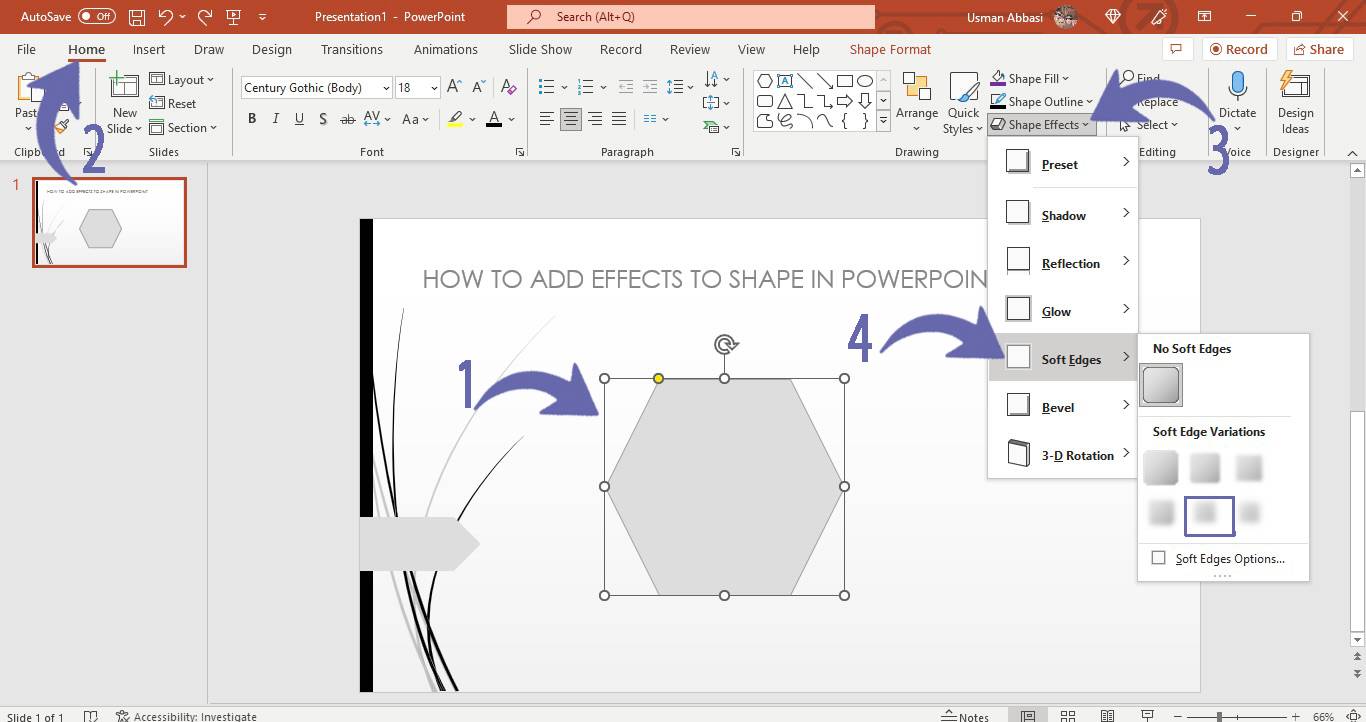
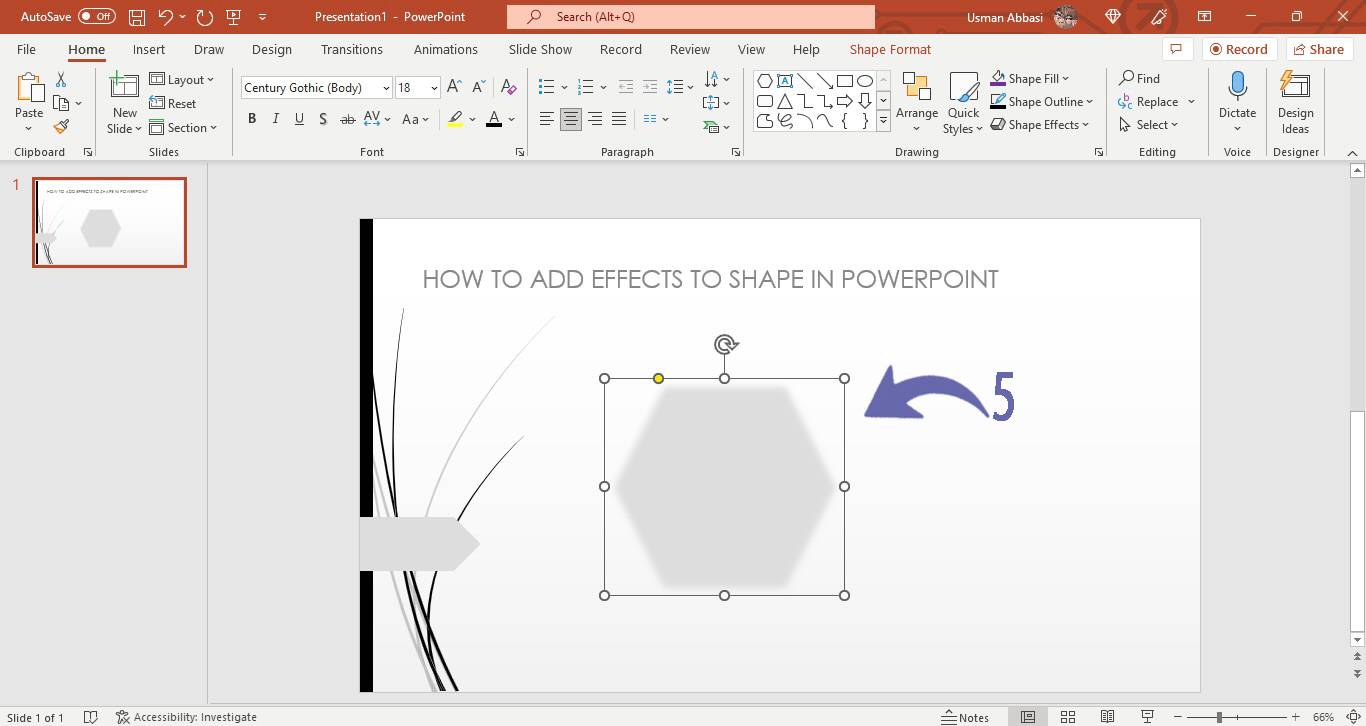
1. Select the shape and Go to the “Home Tab”, in the “Drawing group”
2. From the “Shape effects”, select the “Soft Edges” option
3. Choose the soft edges effect that you want to apply to the shape
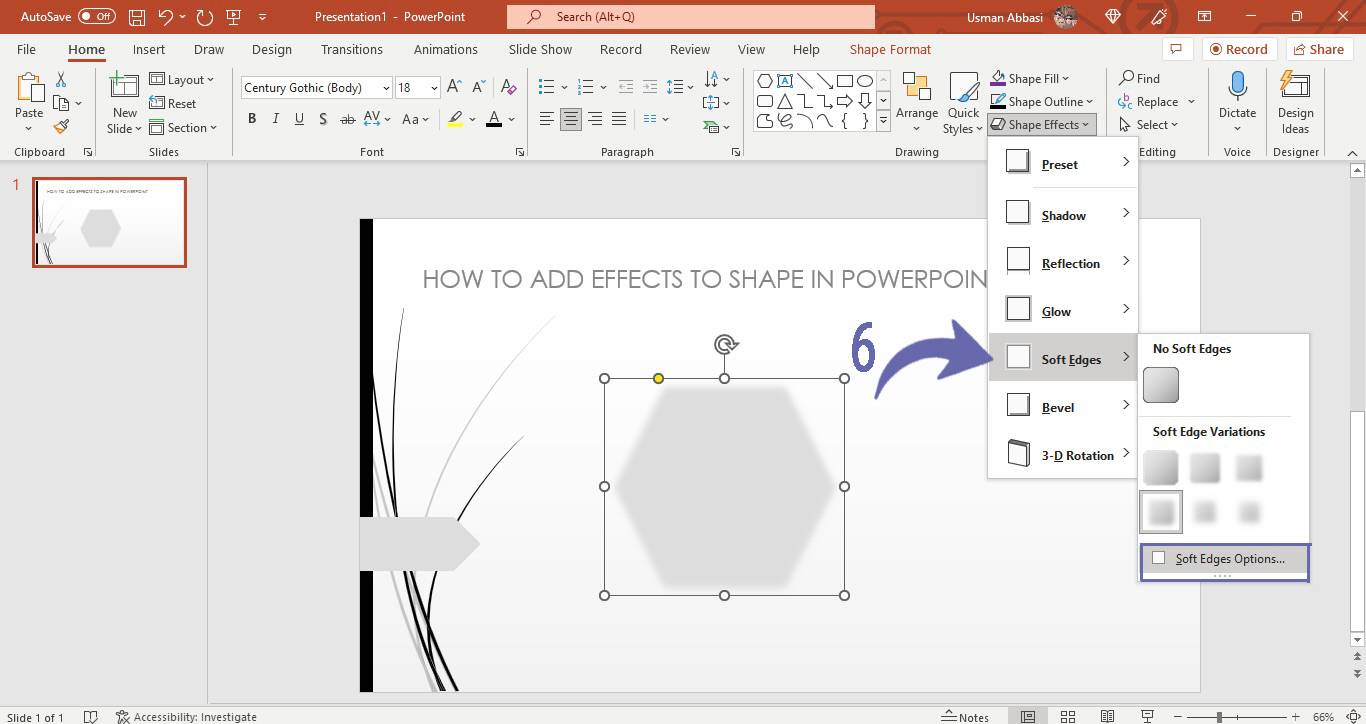
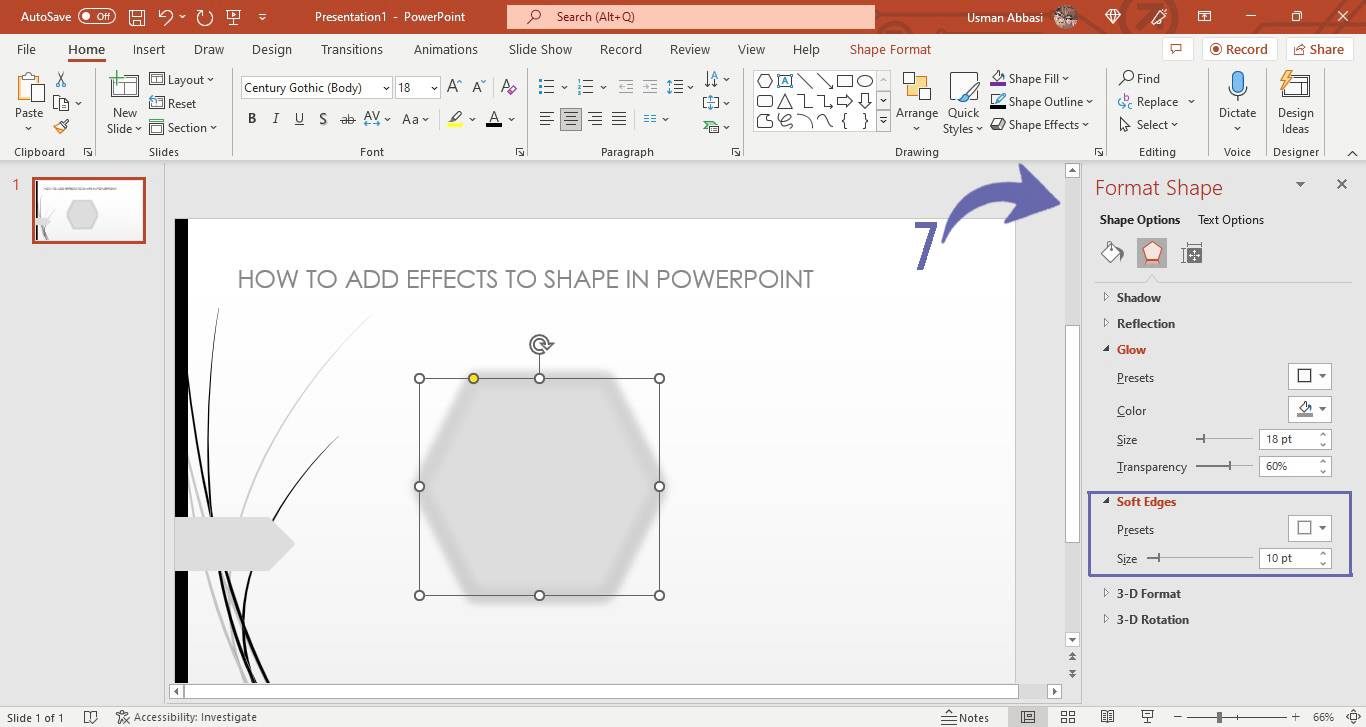
5. To adjust your soft edges effects, click the “Soft Edges Option” from the drop-down menu
6. On the right side of the window, the Format Shape panel will appear with customizing options i.e.,
Presets (presets are the built-in Soft edges options)
Size(you can change the size of the Soft edges by sliding the pin right to increase and left to decrease the Soft edges Or you can simply write the size value in the text box and press enter on your keyboard
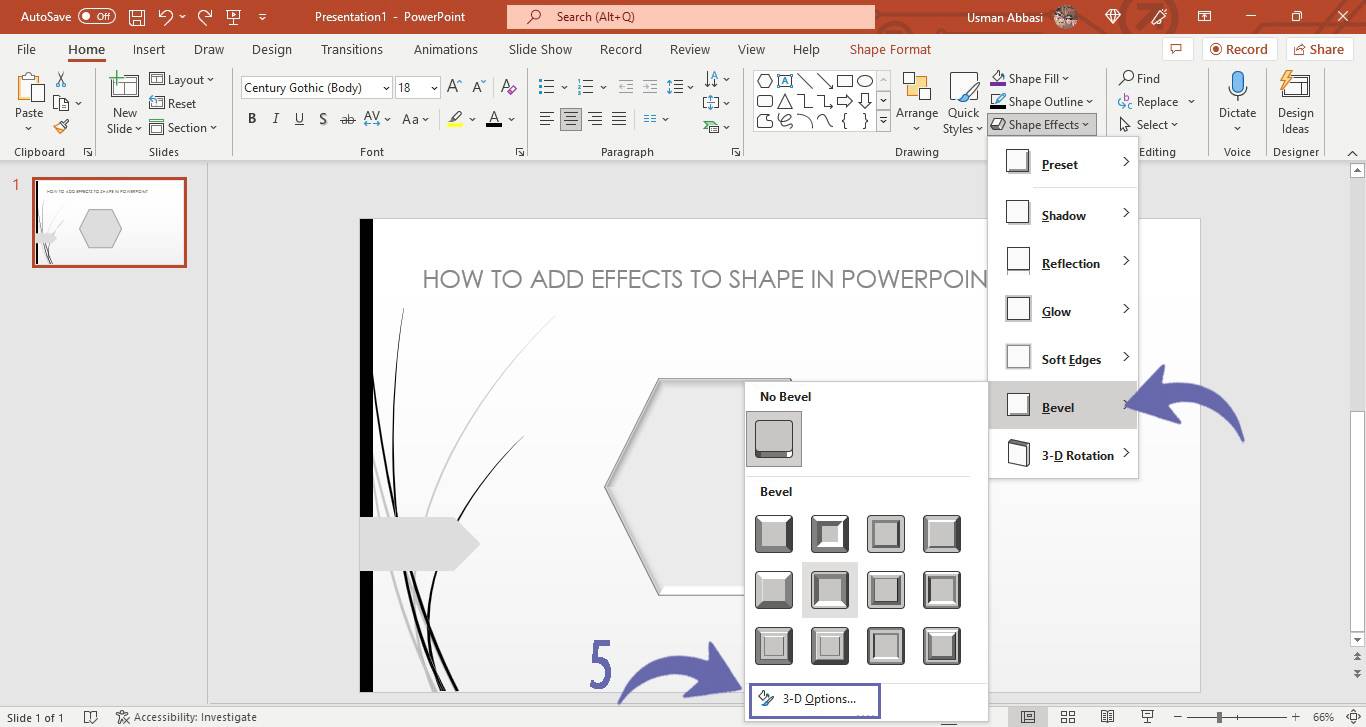
How to adjust bevel shape in PowerPoint
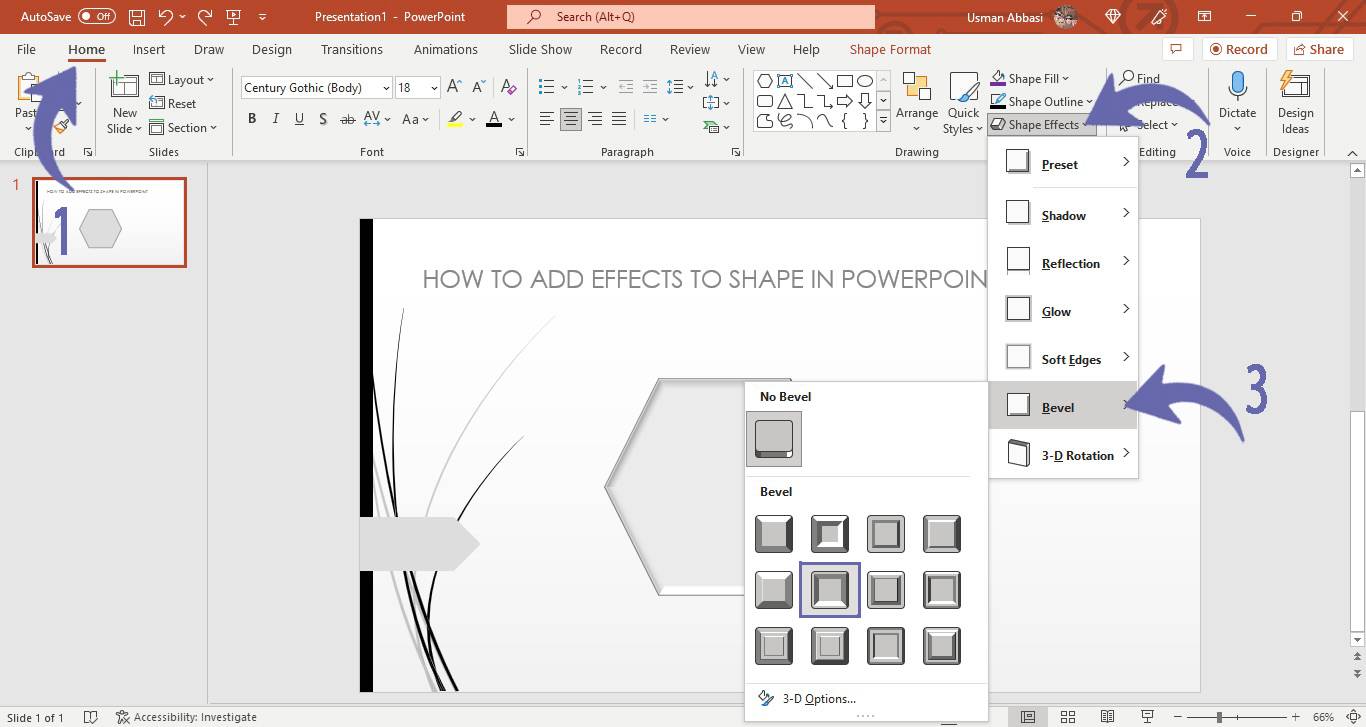
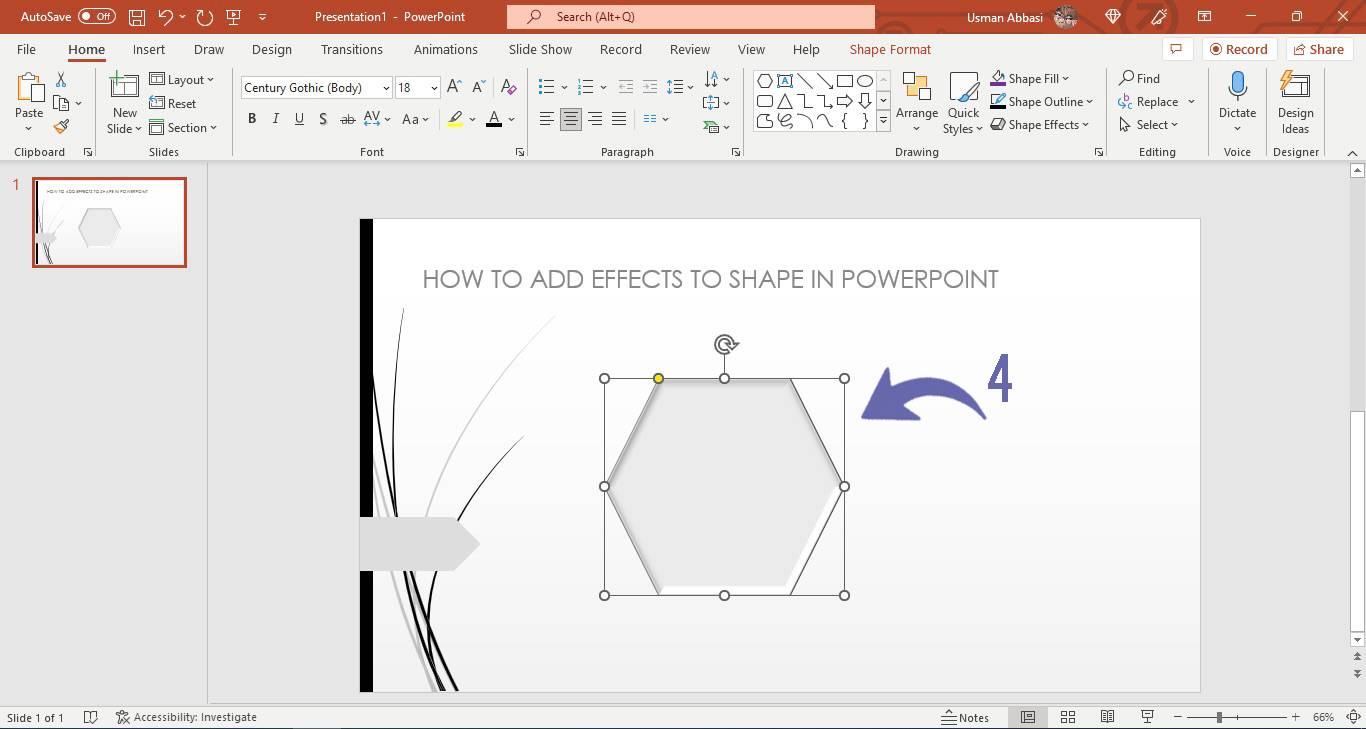
1. Select the shape and Go to the “Home Tab”, in the “Drawing group”
2. From the “Shape effects” option, choose the “Bevel” effect
3. Select the bevel effect that you want to apply to the shape
4. To adjust your bevel effects, click the “3-D Options” from the drop-down menu
5. On the right side of the window, the “Format Shape panel” will appear with a few customizing options i.e.,
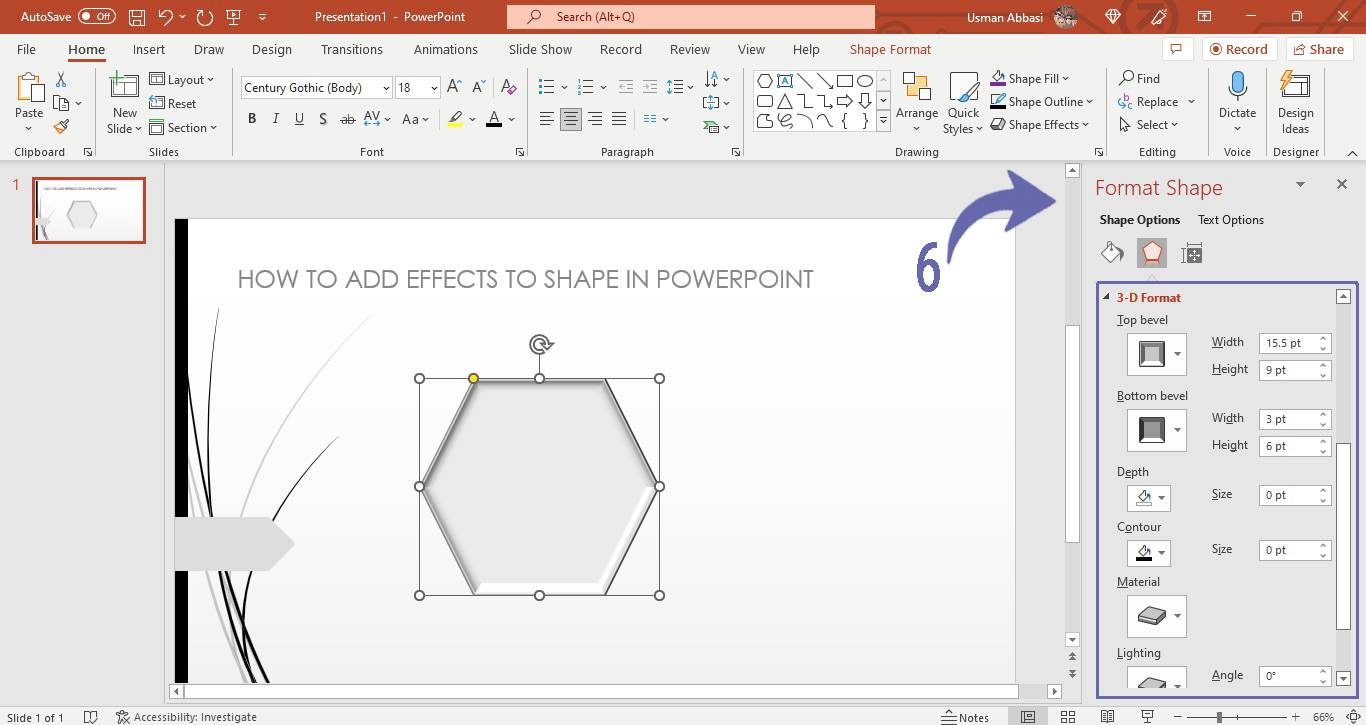
Top Bevel (In this option, many top bevels built-in styles are available, moreover you can also adjust the width and height of the top bevel)
Bottom Bevel (many built-in bottom bevel options are available, from which you can choose the style you want to add to your shape. Moreover, you can also customize the width and height of the bottom bevel, just by clicking the up and down arrow to increase and decrease the amount Or you can enter the value of your required width and height and simply press the enter button on your keyboard )
Depth(you can adjust the depth color and also the size of your shape through this option )
Contour(Colour of the contour can be changed through this option, click the bucket option and select the colour from the standard or theme colors that you want to add. If you want to customize your own contour color, click the “More option” button)
Material (By clicking this option, three categories of material styles will appear i.e.,
1) Standard,
2) Special Effect
3) Translucent.
You can choose your required style)
Lighting (You can also adjust the Lighting styles, by clicking on this option four categories of lighting will appear i.e.,
1) Neutral
2) Warm
3) Cool
4) Special ( You can choose the lighting type you want to add to your shape /object)
Pro Tip: Click the Reset button below the lighting option to reset all the changes you have done
How to adjust the 3-D shape rotation effect in PowerPoint
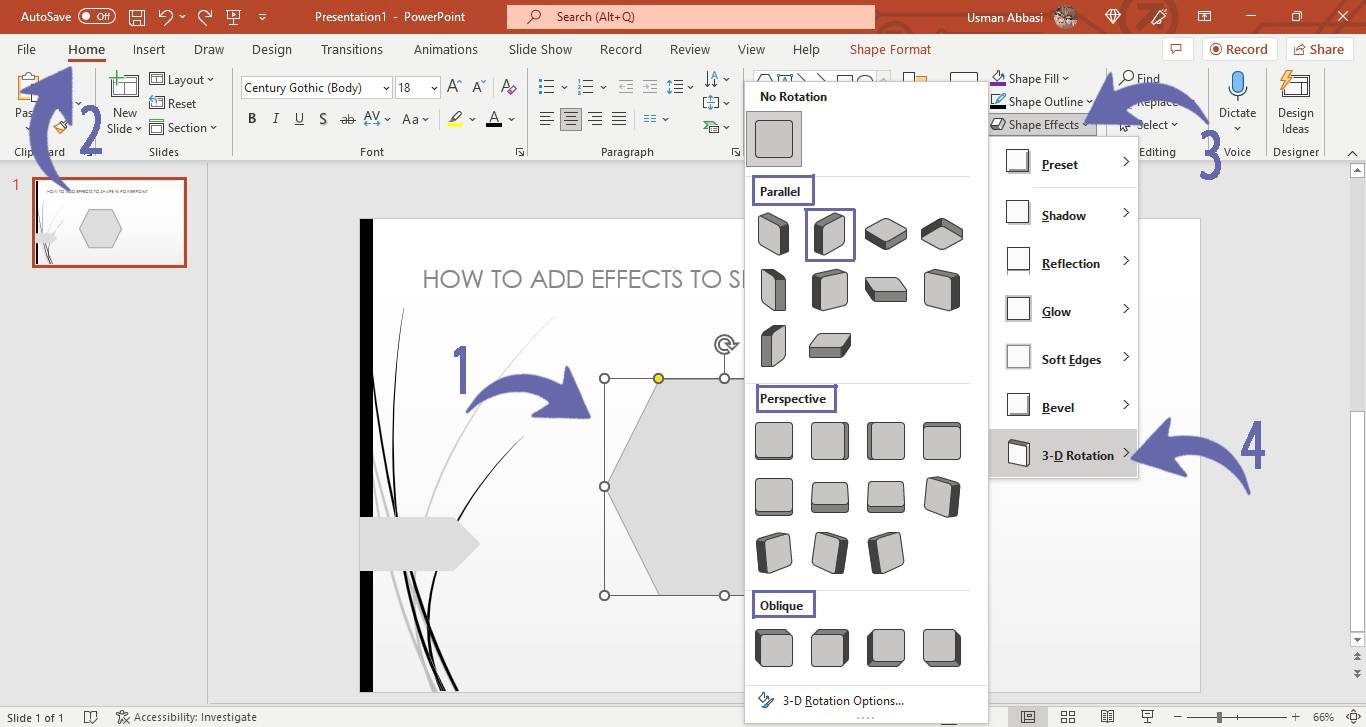
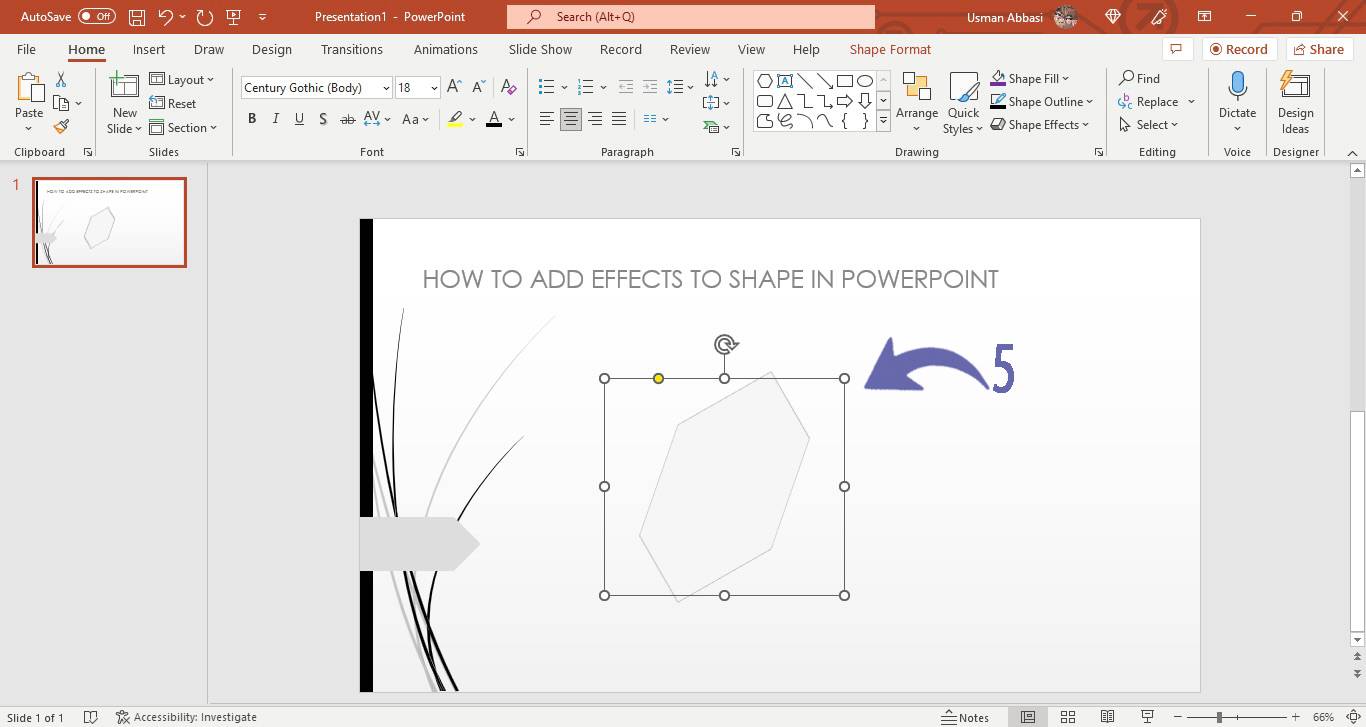
1. Go to “Home Tab”, in the Drawing group
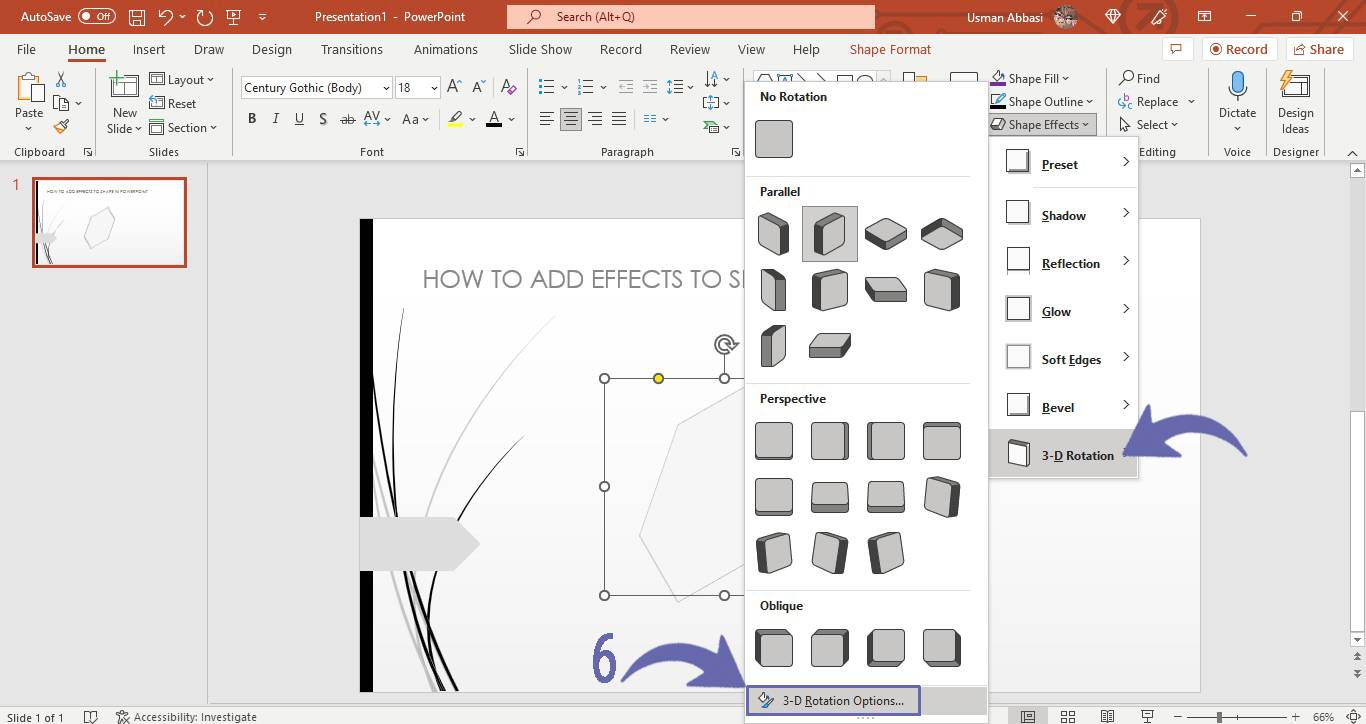
2. From the “Shape effects”, select “3-D Rotation”
3. Choose the 3-D rotation effect that you want to add to the shape
4. For more adjustment options, click the “More 3-D Rotation Options” from the drop-down menu
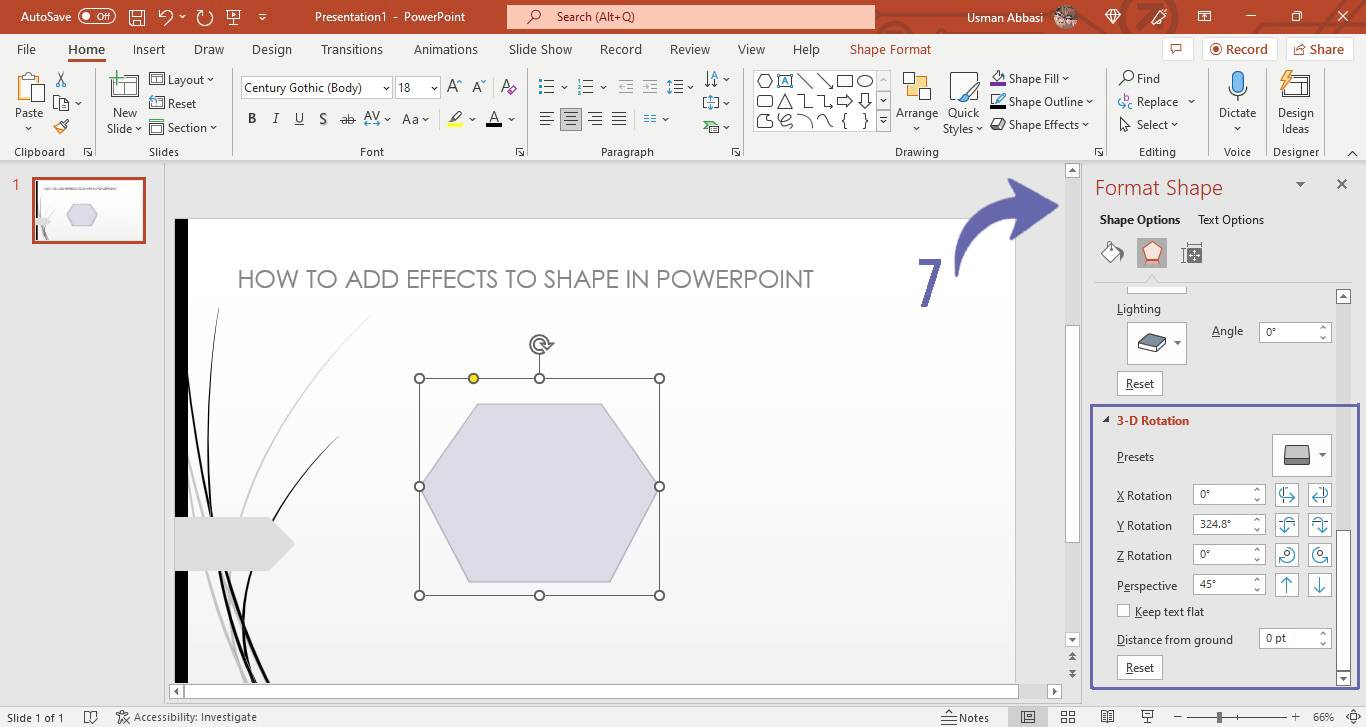
5. On the right side of the window, the Format Shape panel will appear
6. Click the “3-D Rotation” option and a few customizing options will appear i.e.,
Presets (presets are the built-in 3-D Rotation options, You can choose any preset of your choice)
X Rotation ( you can adjust the rotation of your object or shape on the x-axis through this option, click the up and down arrows to increase or decrease the rotation value OR you can simply type the value in the text box and press enter on your keyboard)
Y Rotation ( you can adjust the rotation of your object or shape on the y-axis through this option, click the up and down arrows to increase or decrease the rotation value OR you can simply type the value in the text box and press enter on your keyboard)
Z Rotation ( you can adjust the rotation of your object or shape on the z-axis through this option, click the up and down arrows to increase or decrease the rotation value OR you can simply type the value in the text box and press enter on your keyboard)
Perspective( you can also adjust the perspective of your object or shape through this option)
Distance from the ground( This option allows you to customize the distance of your shape /object from the ground, you can increase or decrease the distance by clicking the arrows up to increase and down to decrease the distance of the object /shape from the ground. Or you can simply enter the distance value in the text box and press enter on your keyboard)
Keep Text Flat ( Check this box, if you want to keep your text flat with the changes added to your object /shape )
Reset ( To reset all the changes you add to your shape/object, click this button)