Outline
How to insert a table in PowerPoint
How to customize table style options in PowerPoint
How to beautify the table in PowerPoint
How to customize the table colors in PowerPoint
How to insert a picture into the table in PowerPoint
How to add gradients to the table in PowerPoint
How to add fill texture to the table in PowerPoint
How to add borders to the table in PowerPoint
How to apply effects to the table in PowerPoint
How to insert the table in PowerPoint
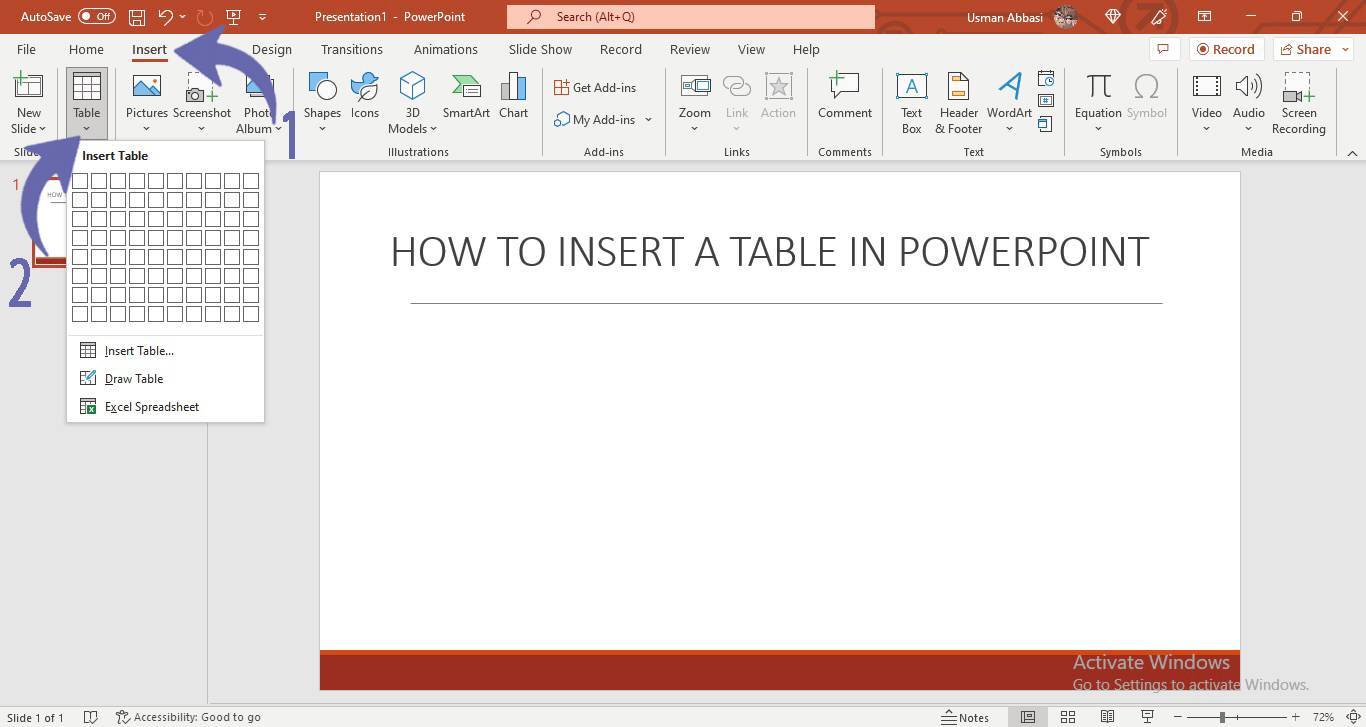
1. Go to the “Insert tab”
2. Click the “table” option in the table group
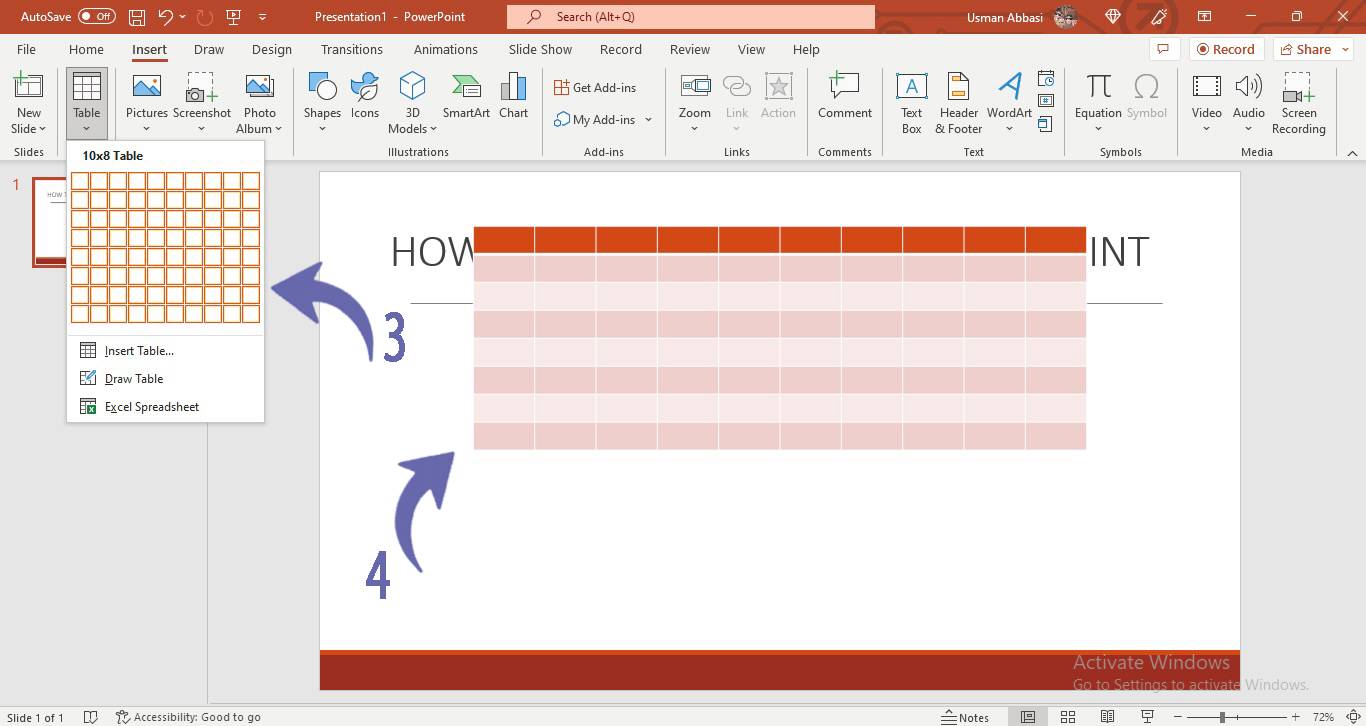
3. From the dropdown menu, select the number of rows and columns you want to add to your table
4. To customize the table style options, go to the “Table Design” panel on the top, many table customizing options will appear i.e., table style, Shading, Borders, Table Effects, and many more
How to customize the Table style options in PowerPoint

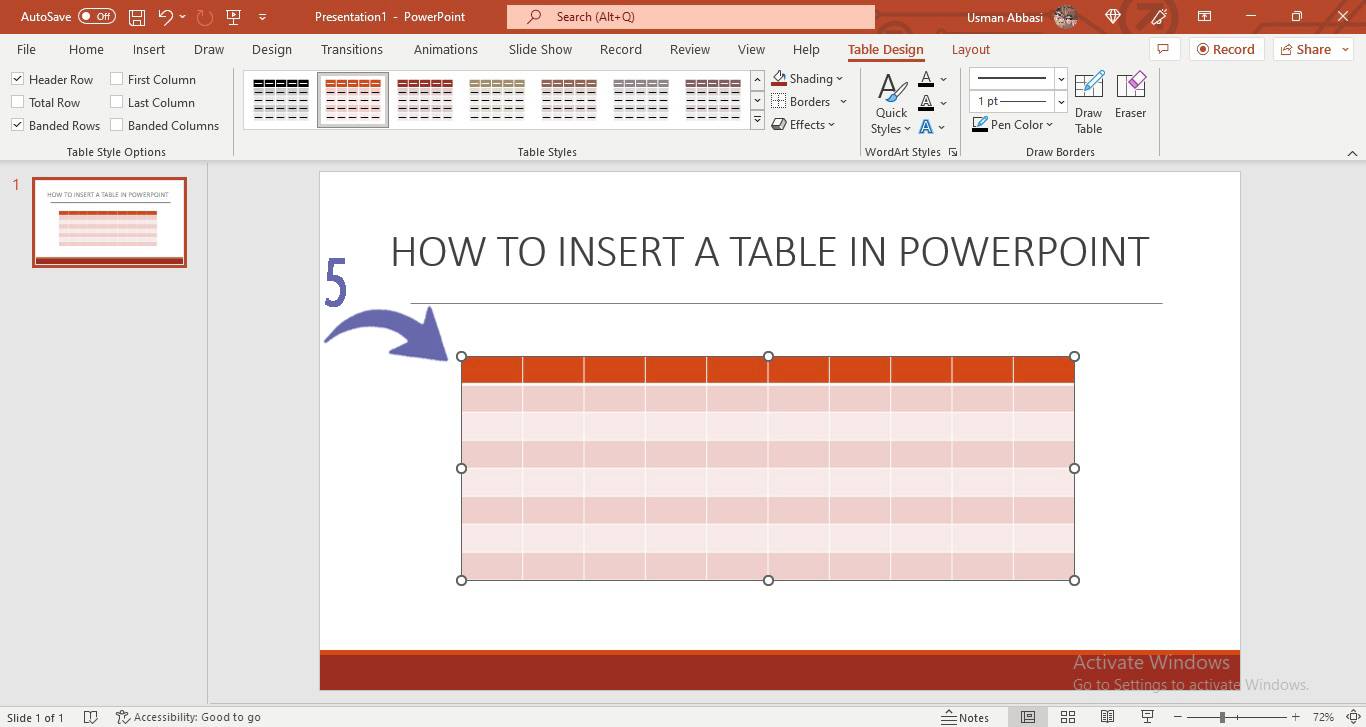
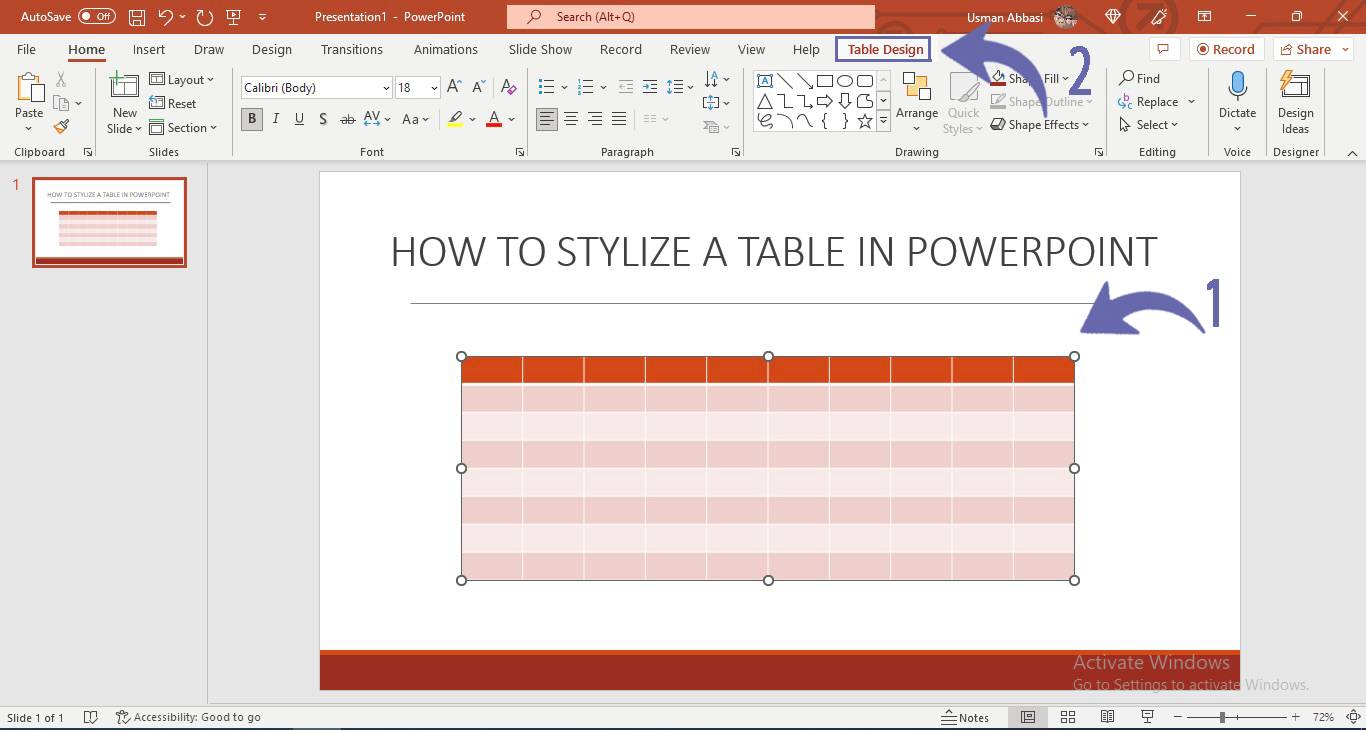
1. Select the table to add design and go to the “Table Design “ tab
2. A “Table Design Options” group will appear with the following options
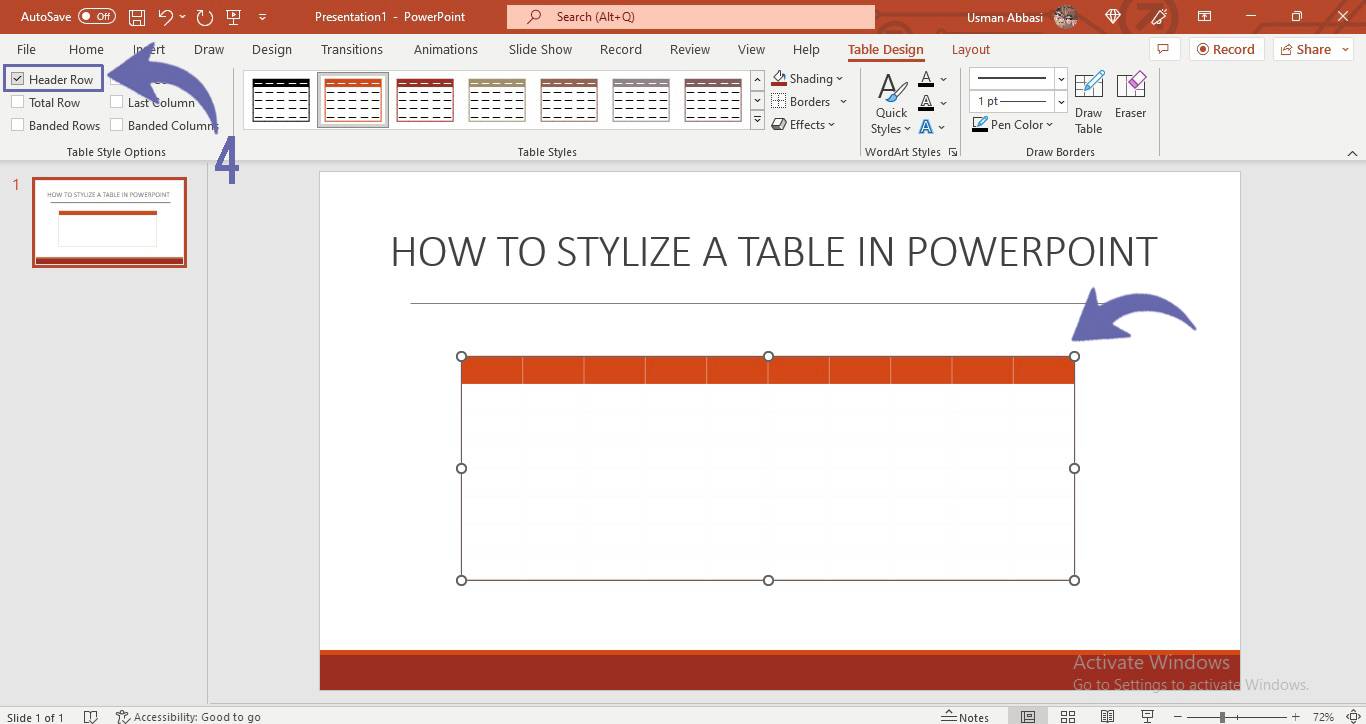
Header Row (Highlight /mark the header row with a strip of a different color )
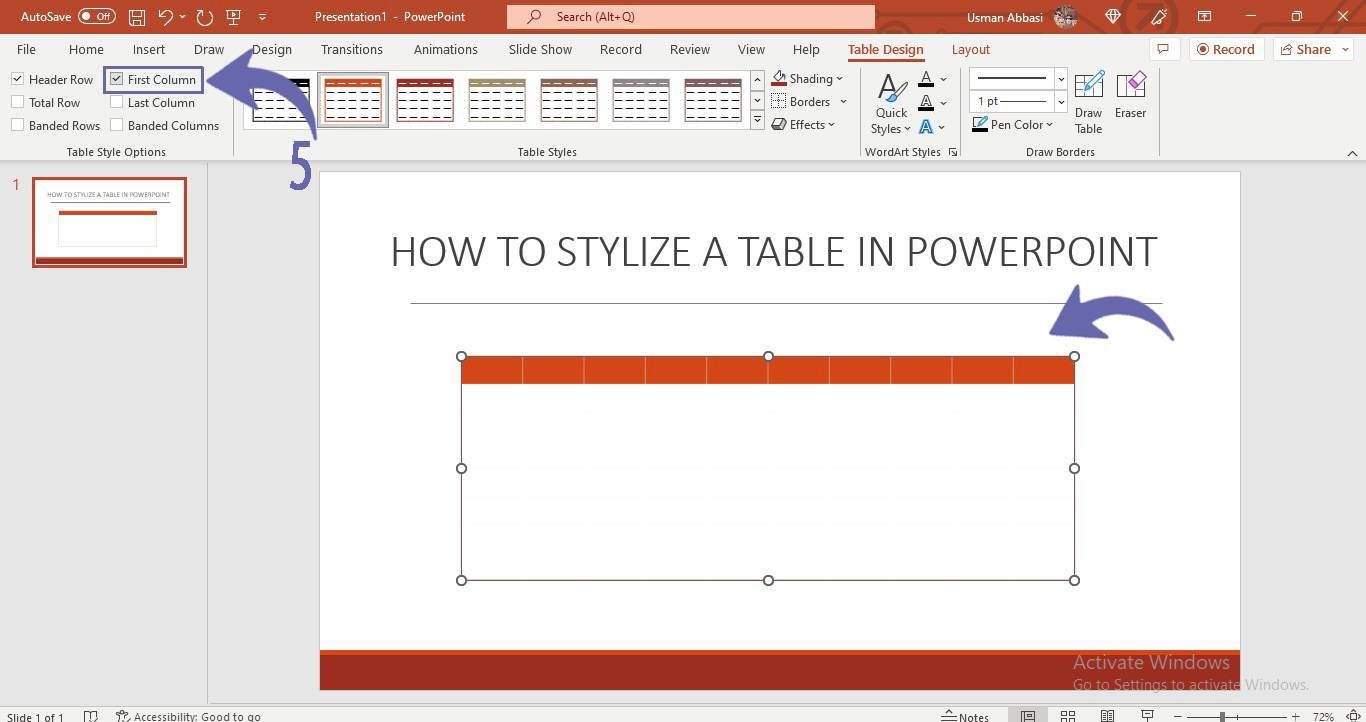
First Column (Mark the first column with a strip of a different color to make it look prominent/highlighted )
Total Row (highlight the row to show the total value )
 Figure 7
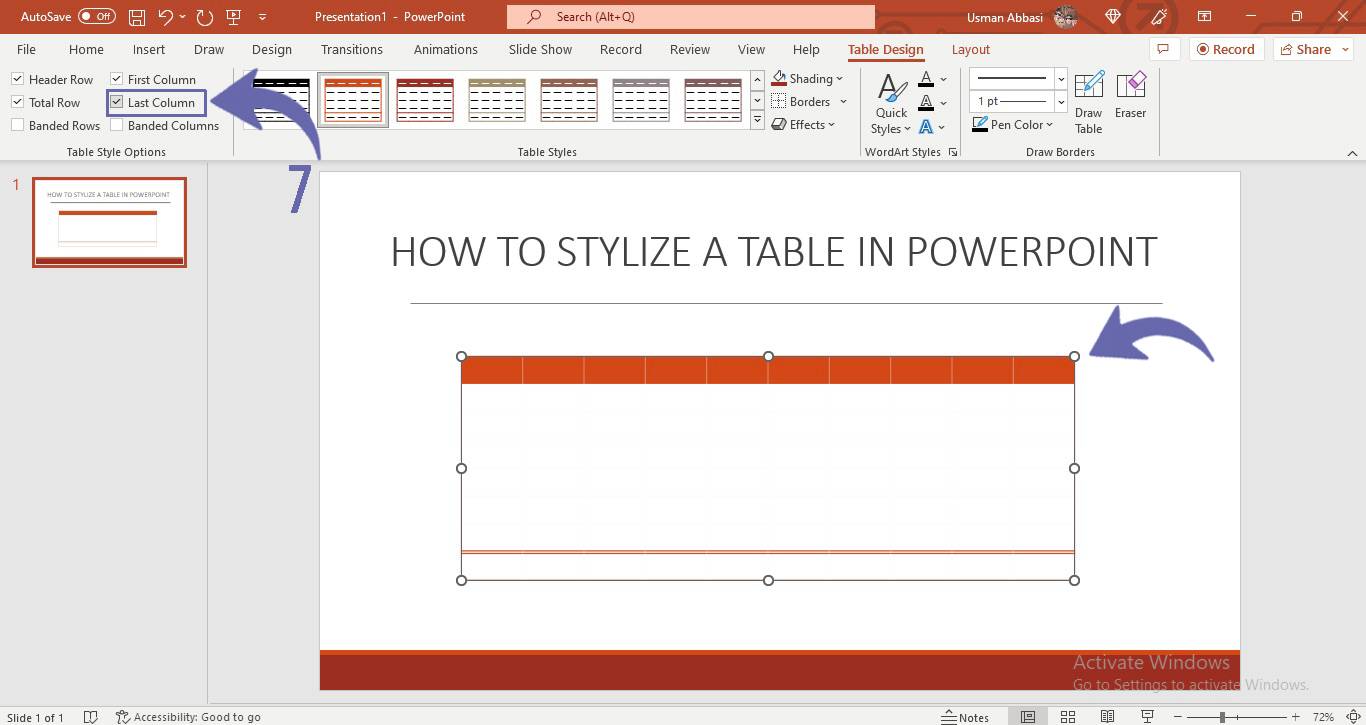
Last Column ( make the text bold of the last column )
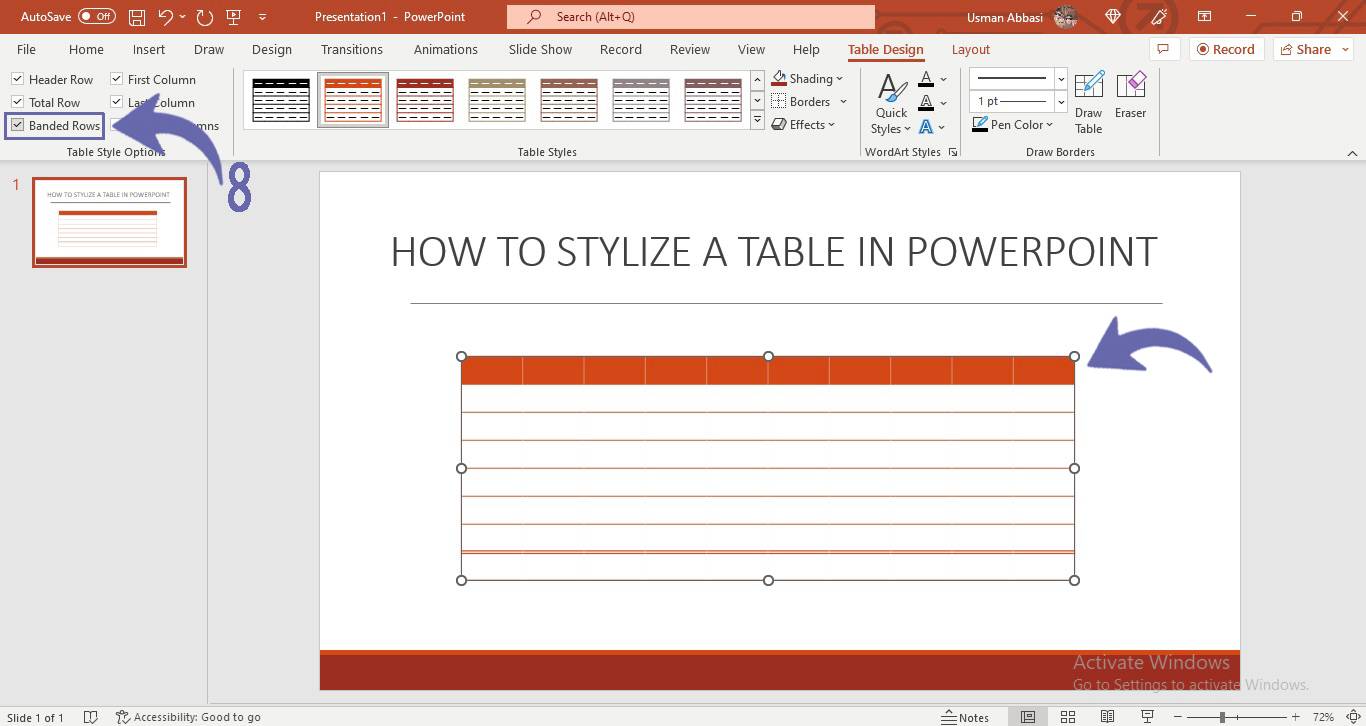
Banded Rows ( highlight to show each row separately )
Banded Columns (highlight to separate each column )
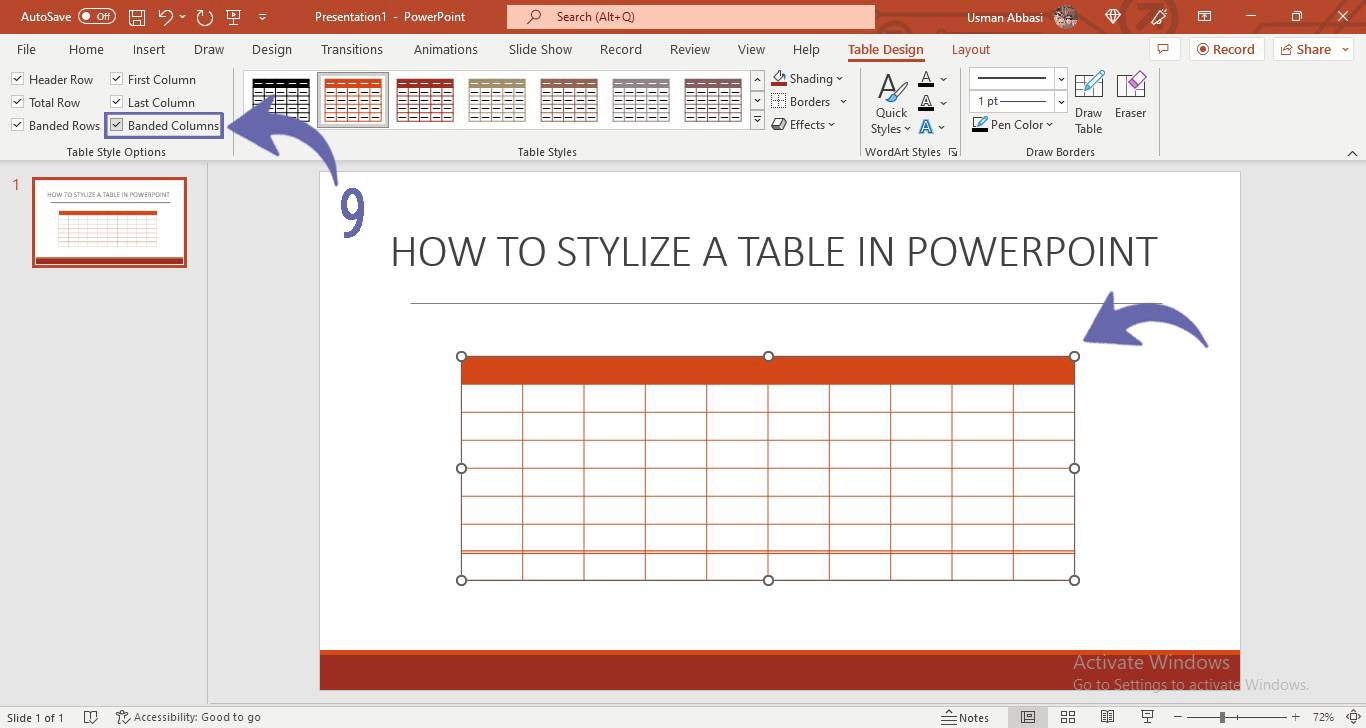
Note: Check or uncheck the options to add and remove the table design style options
How to Beautify the table in PowerPoint
1. From the Table Design panel, go to the “Table styles” option
2. Click the arrow next to it and a table styles window will appear with many table design options

3. Select your preferred Table design style
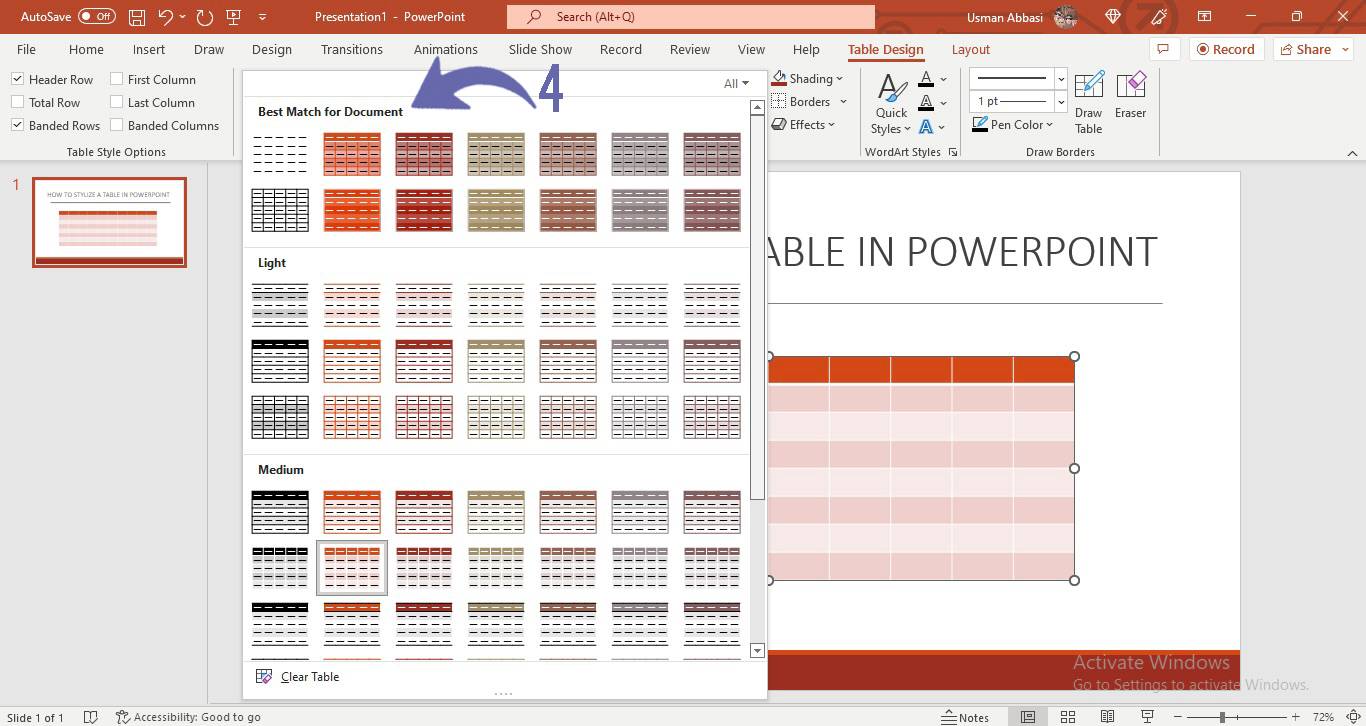
Table style options (this option allows you to add several built-in table styles options i.e., the best match for Document, Light, Medium, and Dark styles) to your table to make it more attractive and it also saves your time
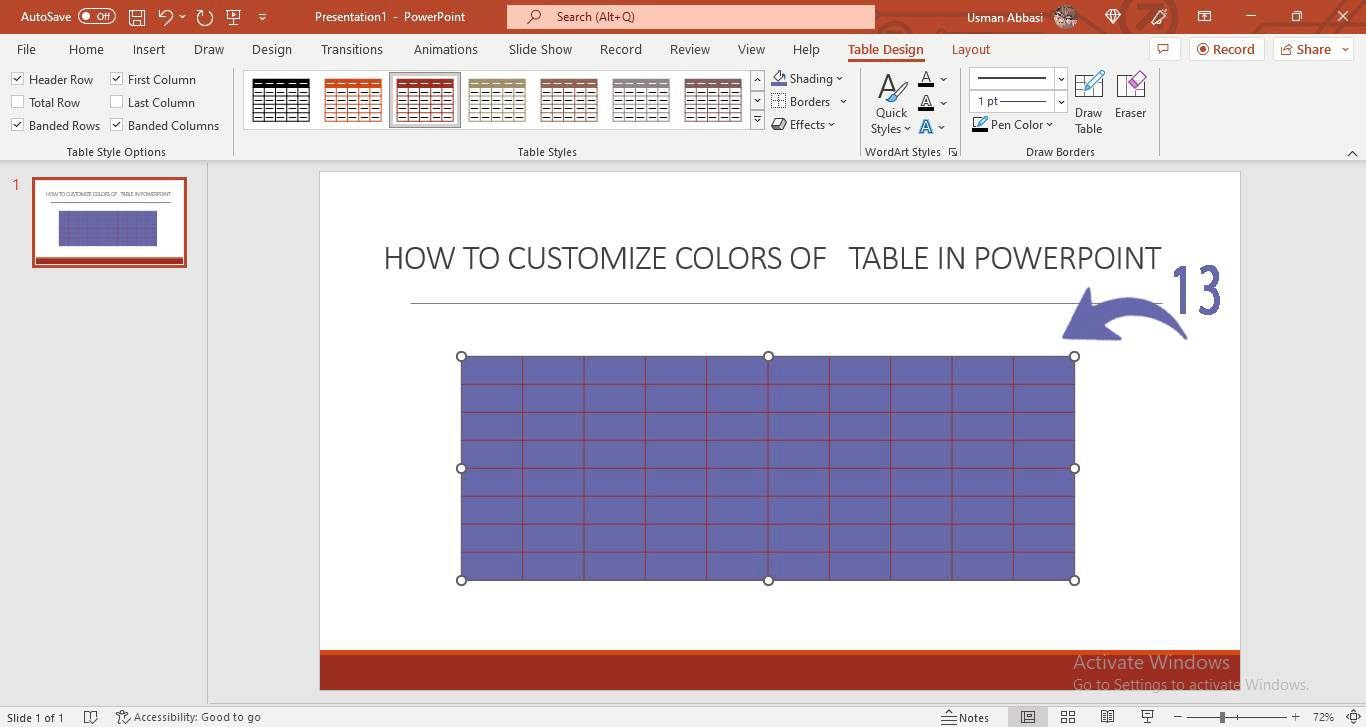
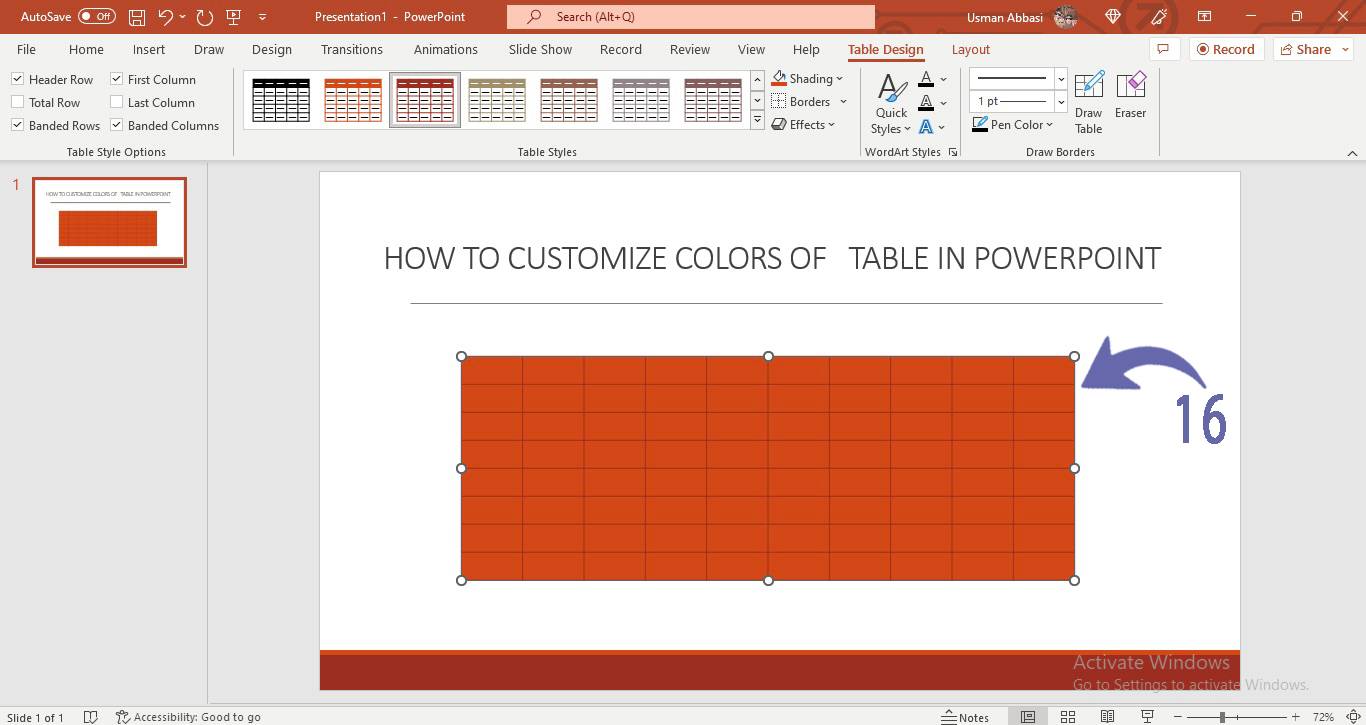
How to customize the colors of the table in PowerPoint

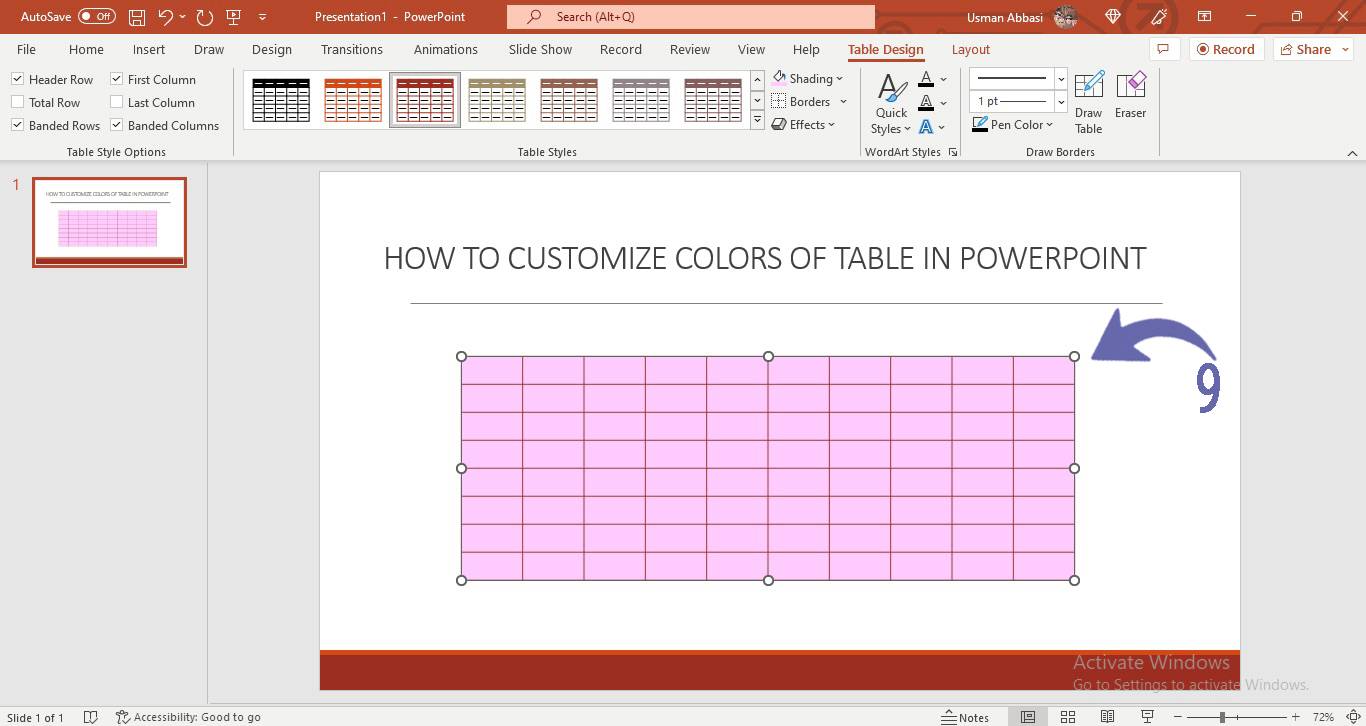
1. Select the table/cell/s to fill in colors
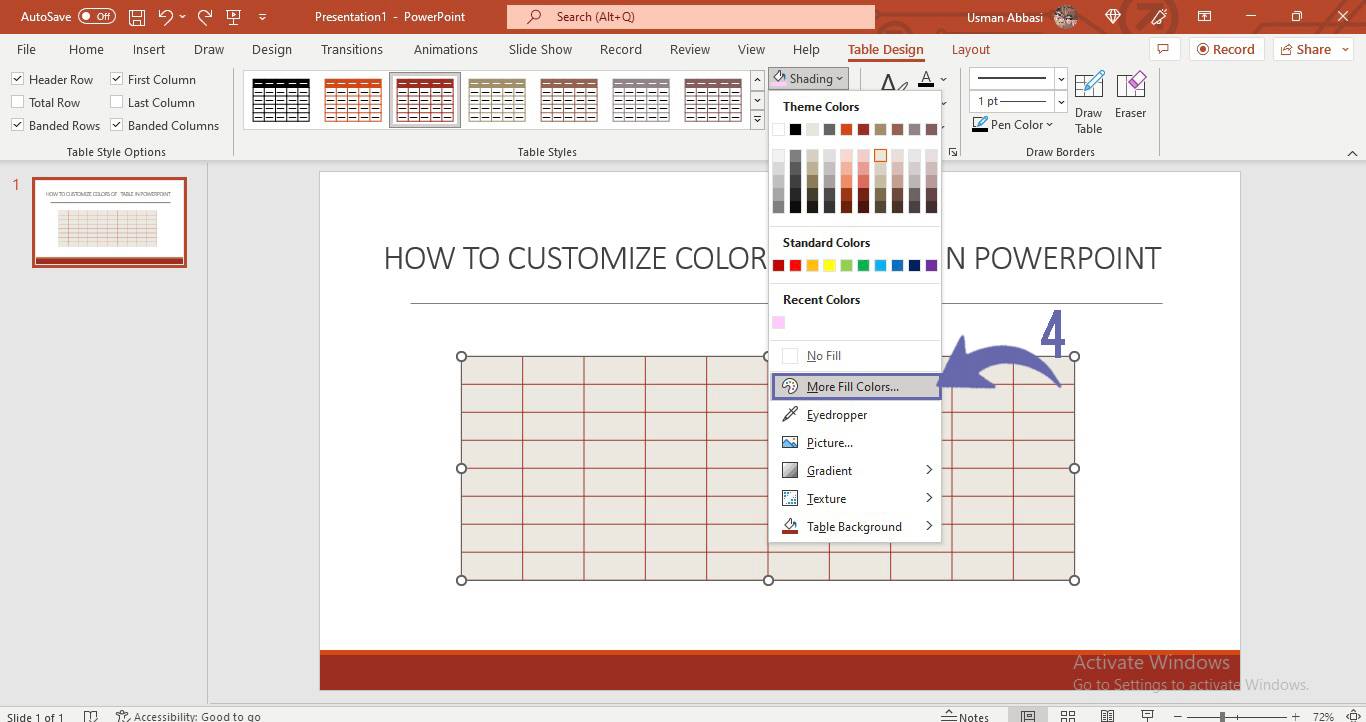
2. Go to the “Table Design” panel, click the “Shading” option
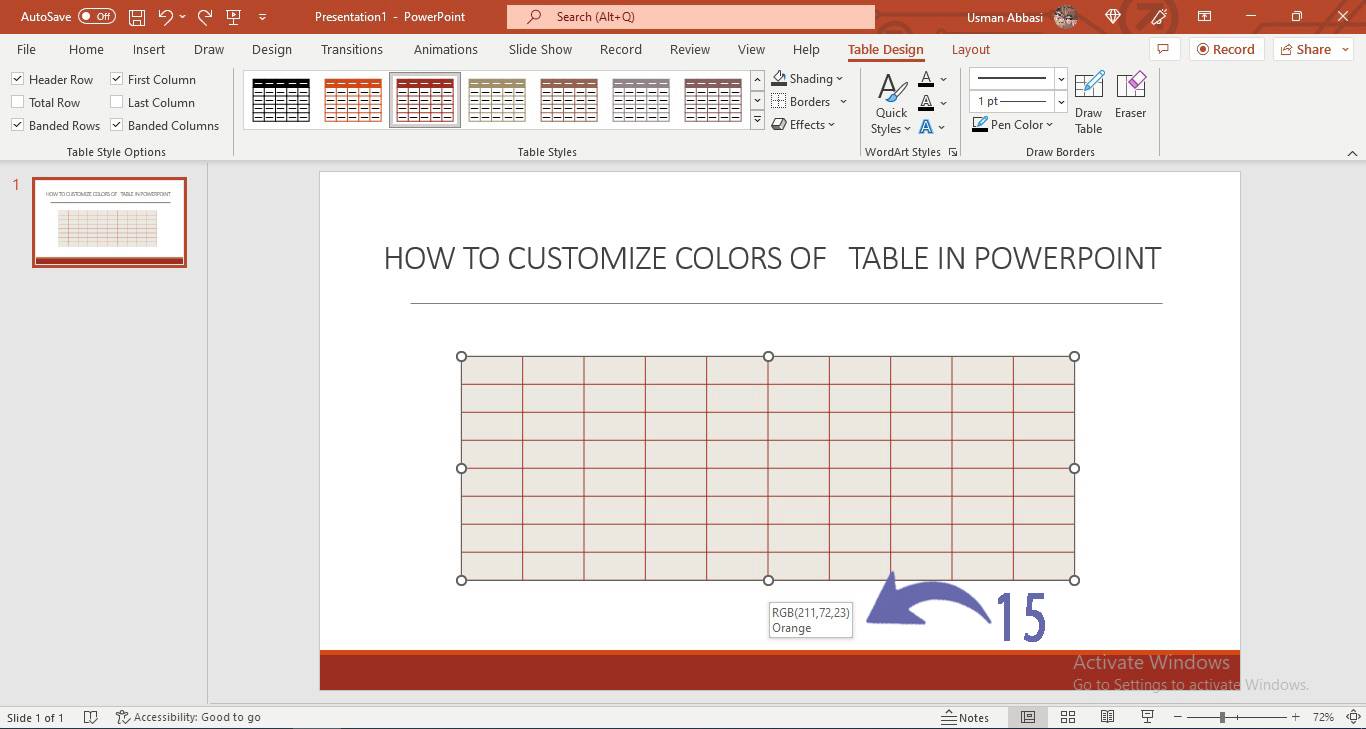
3. A drop-down menu will appear with two color categories i.e.,
Theme Colors (these colors appear according to the theme added to the table )
and Standard Colors (these ten colors are available with every theme)
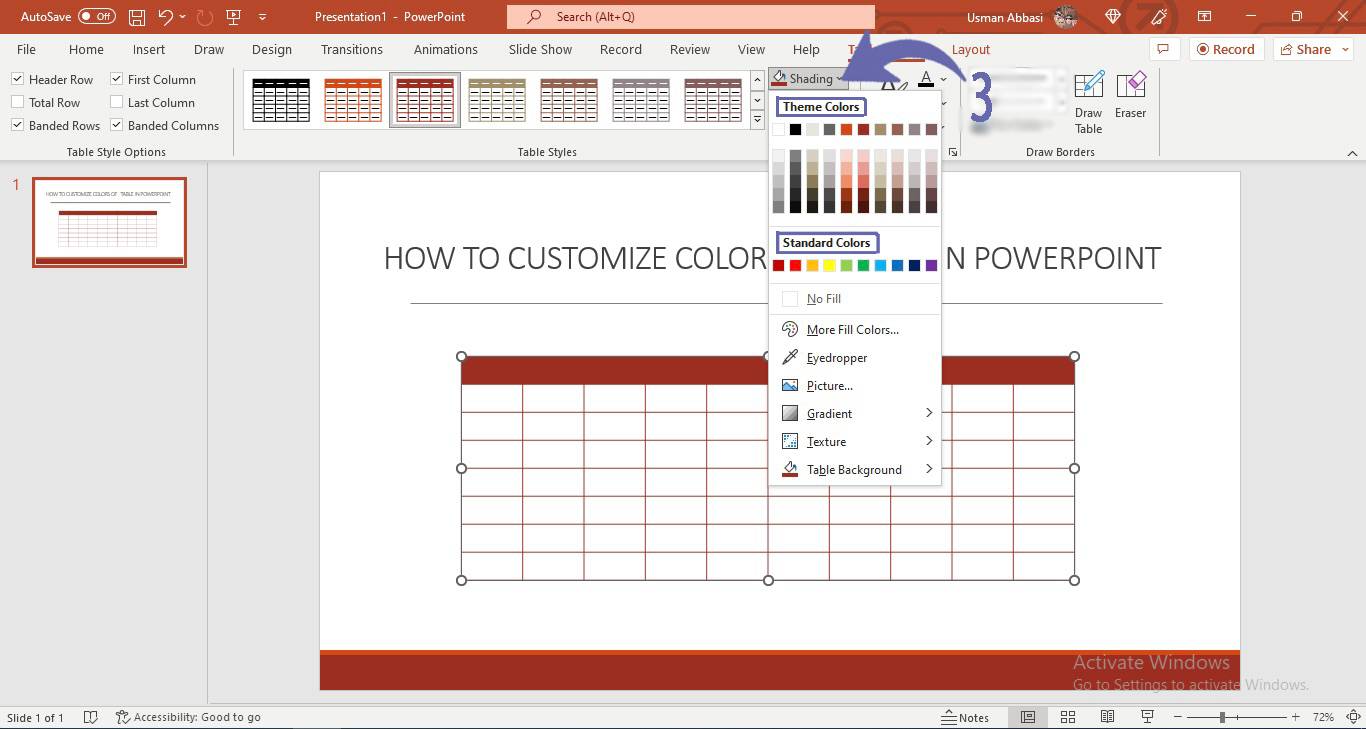

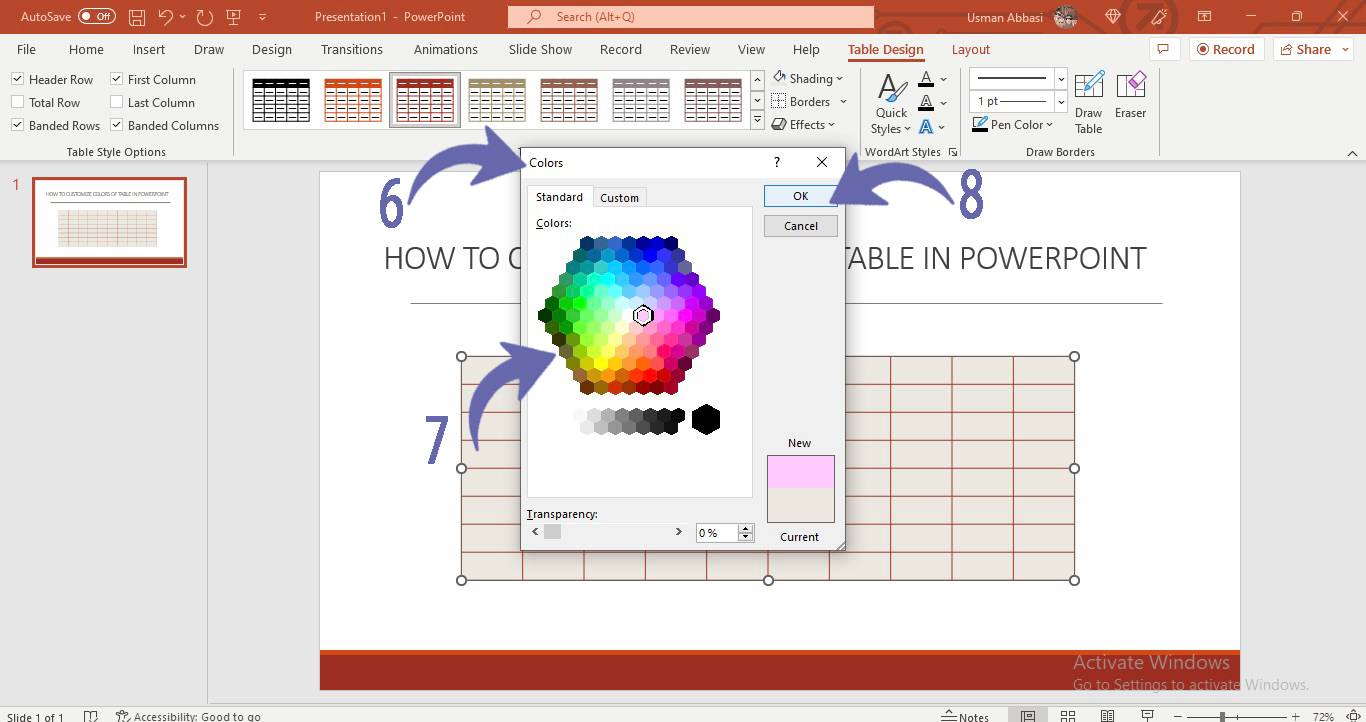
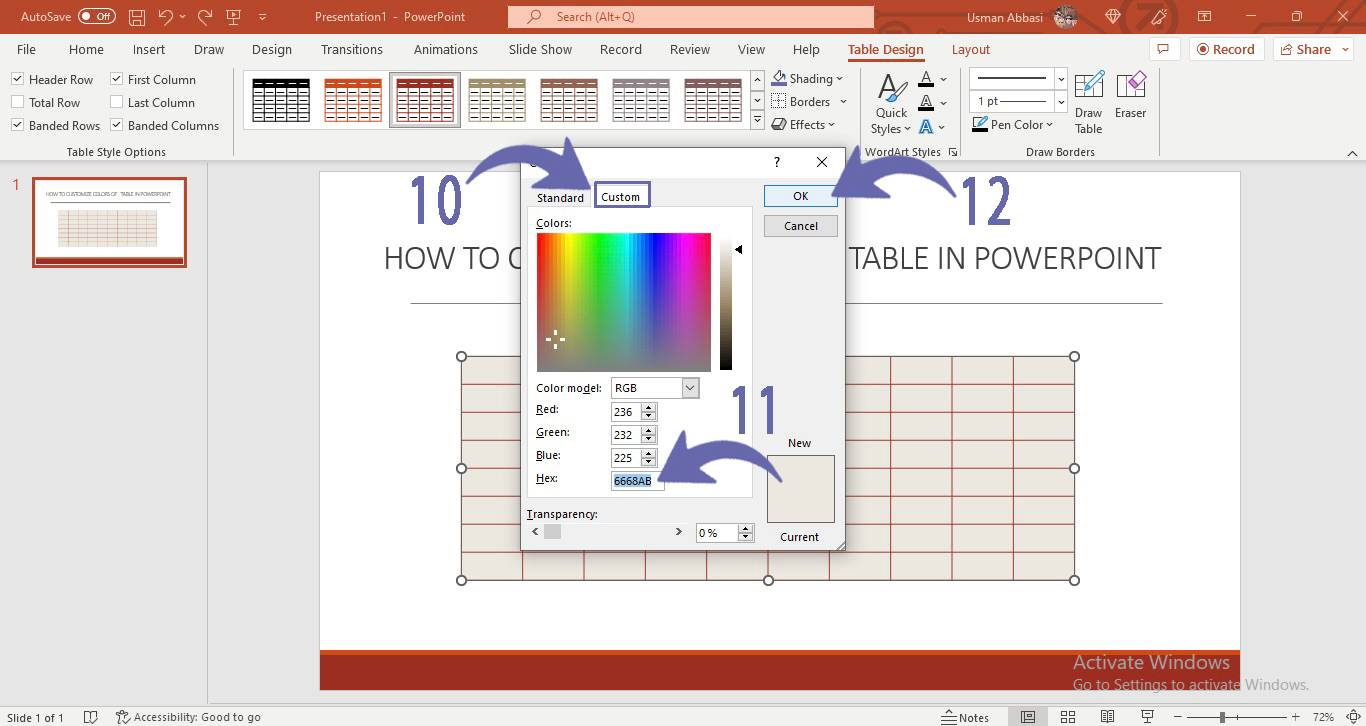
3. To customize your own table colors, Select the “More Fill Colors” Option from the dropdown menu and a window will appear with standard (you can pick your desired color from the colorwheel) and custom colors (you can get your desired color by writing its Hex code)
4. You can also use the eyedropper to pick your desired color

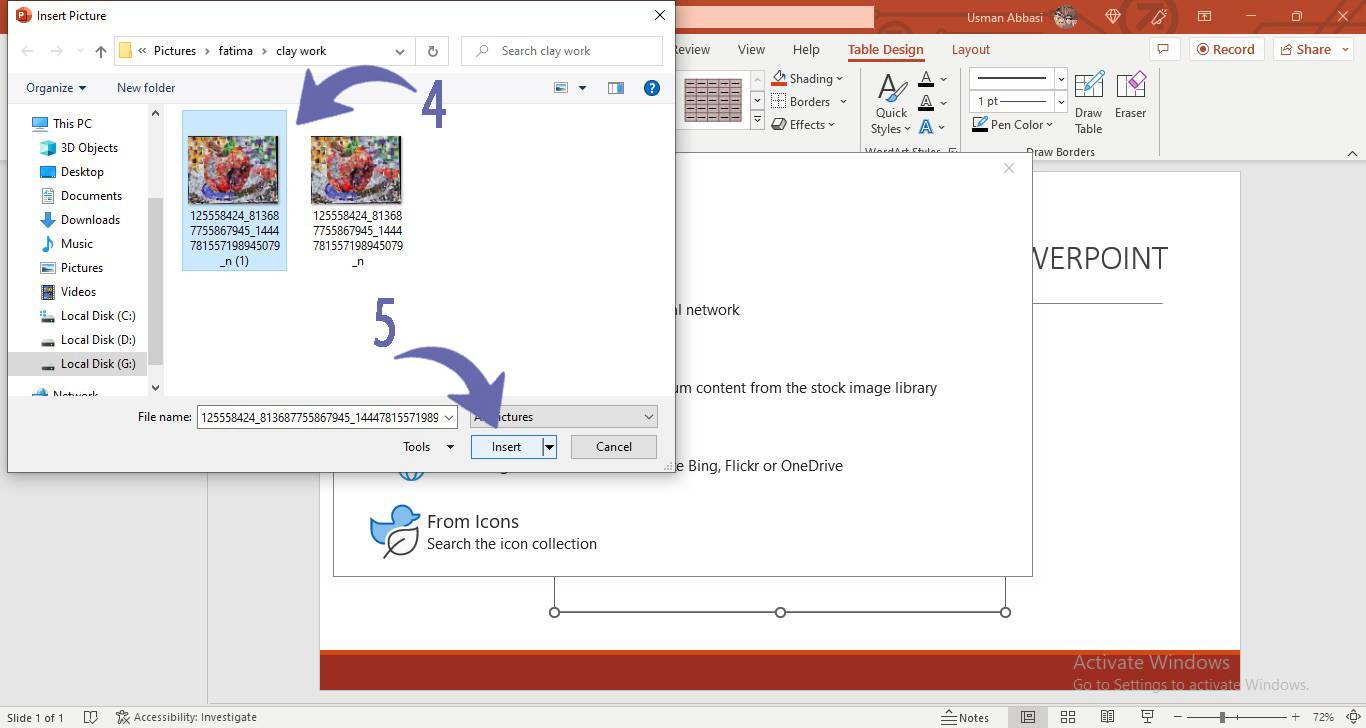
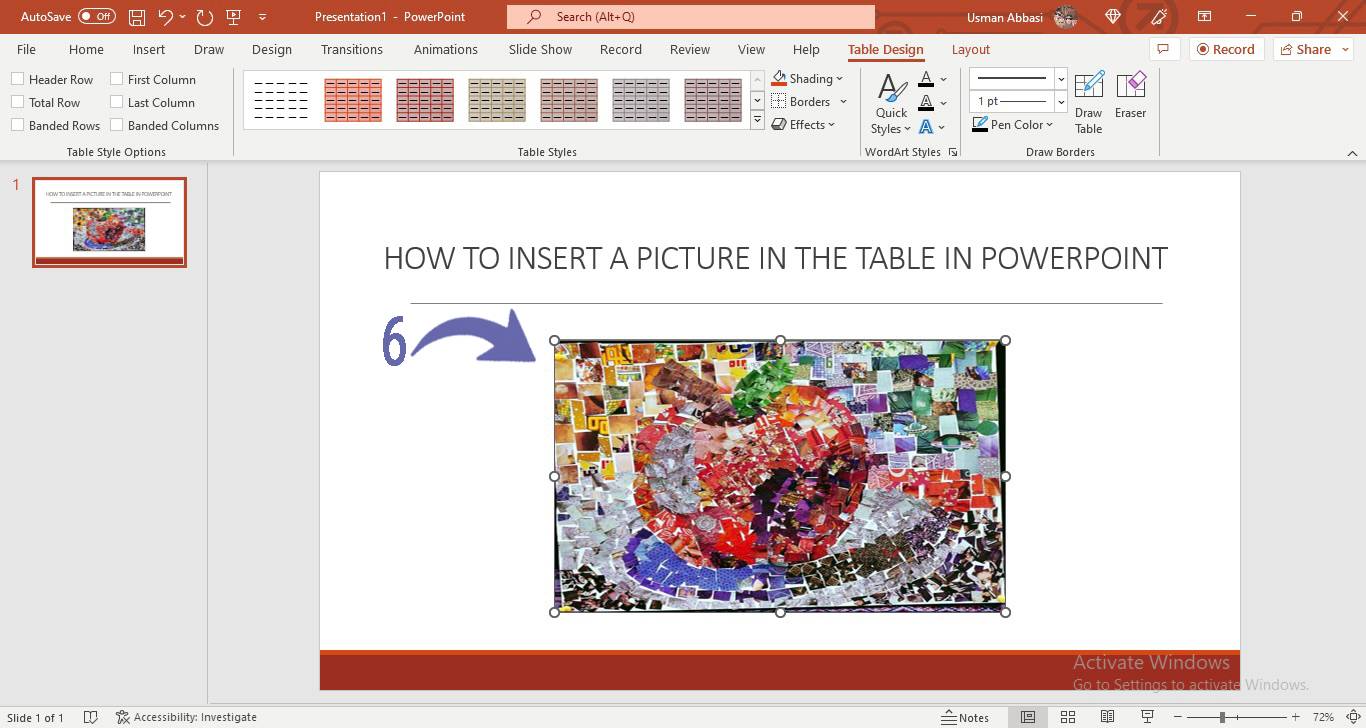
How to insert a picture in the table in PowerPoint
1. From the drop-down menu, select the “Picture” option

2. A window will appear with a few picture insert options, select your picture insert option
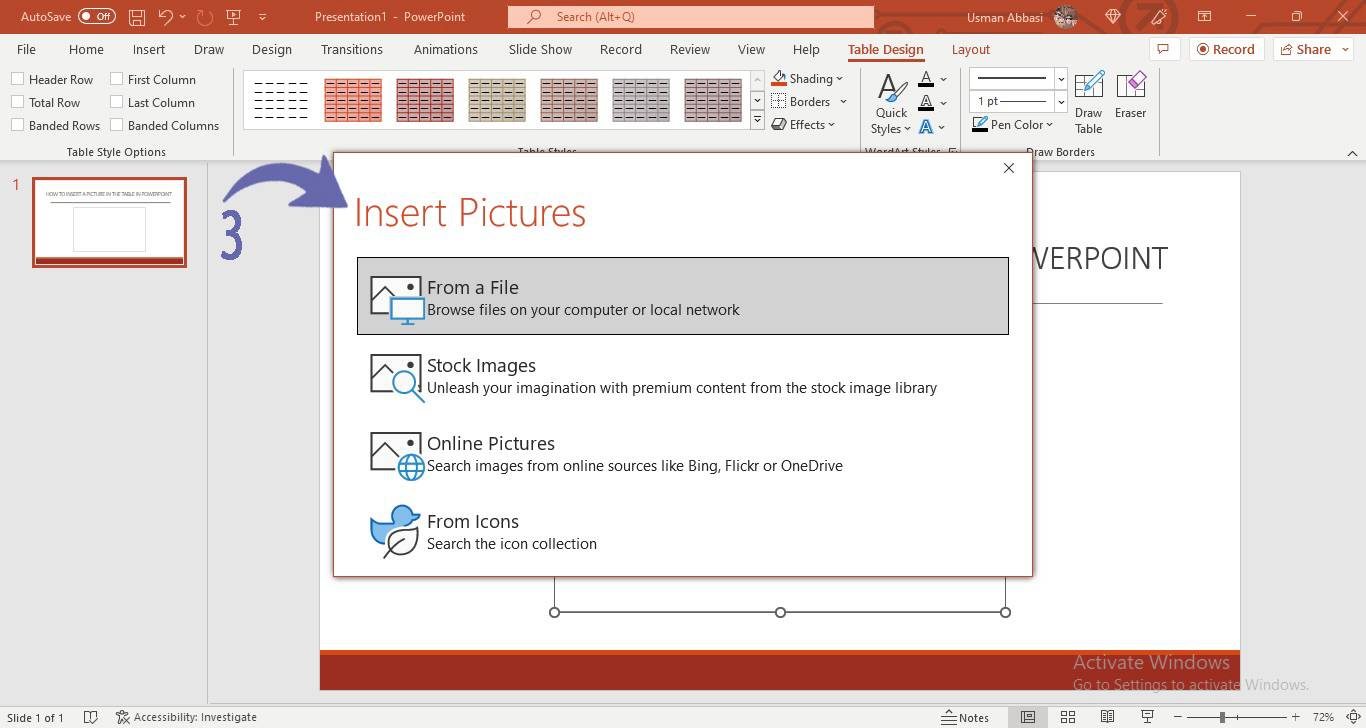
3. browse and insert an image
How to add the gradient to the table in PowerPoint
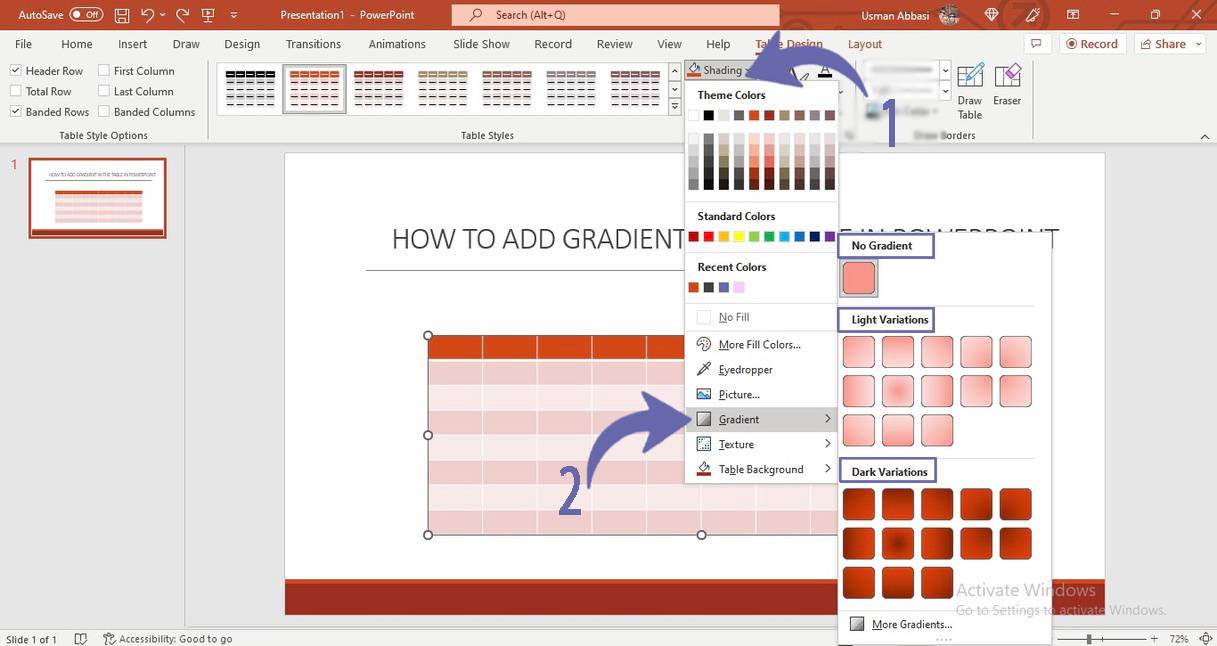
1. From the dropdown menu, click the “Gradient” and a few gradient styles will appear
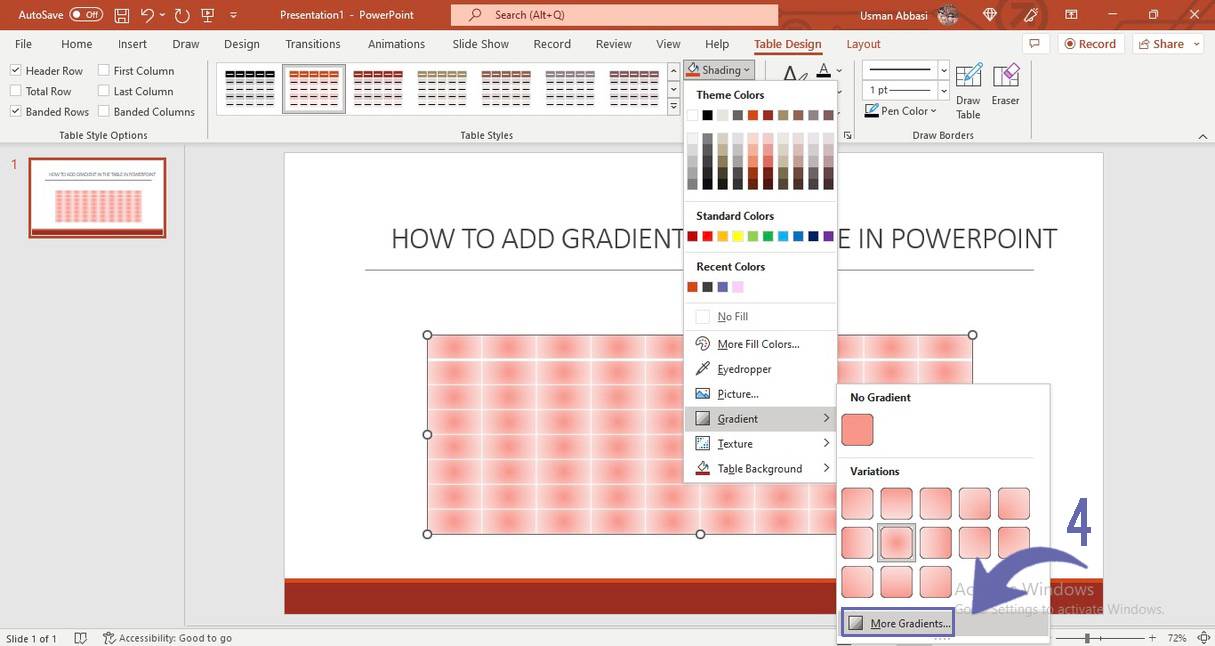
2. Select your preferred gradient effect
3. To customize your gradient effect, click the “More gradient” option from the drop-down menu
4. A “Format Shape ” panel will appear with many gradient customizing options

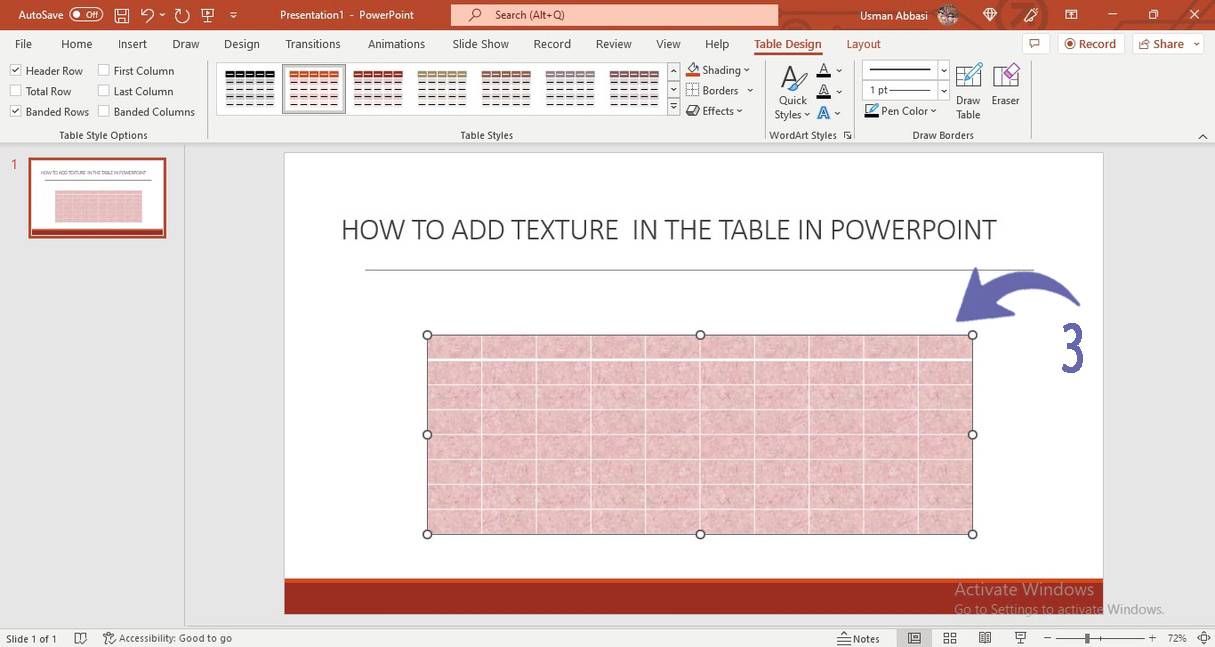
How to add texture to the table in PowerPoint

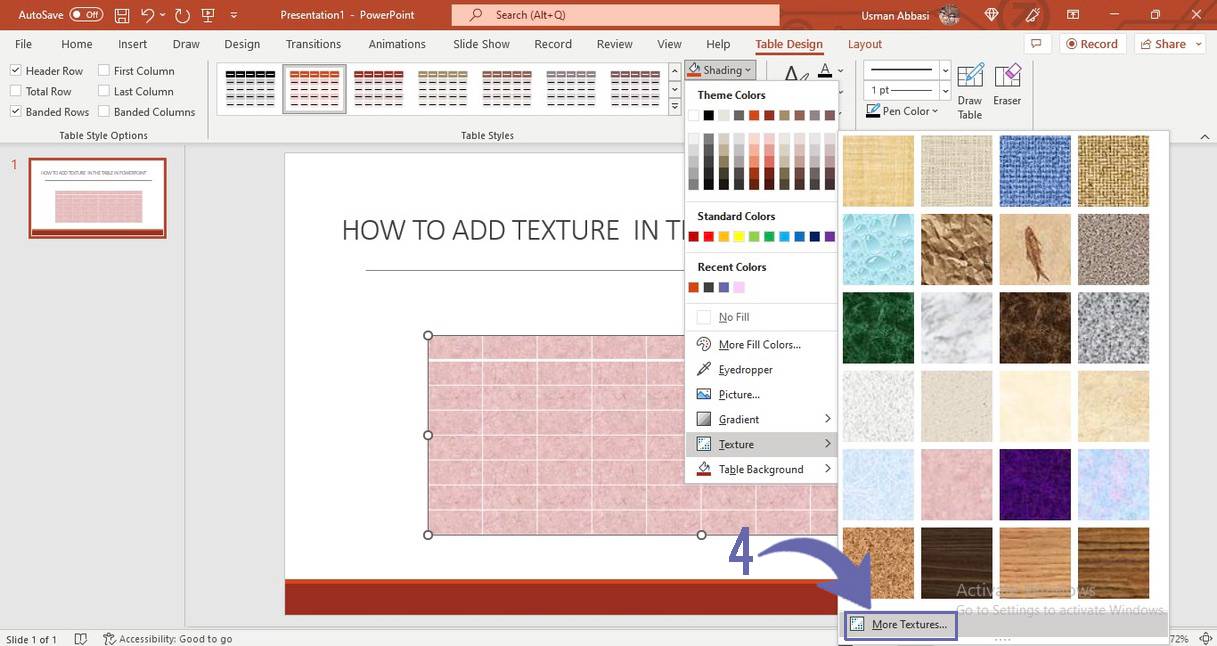
1. From the dropdown menu, click the “Texture “option and a few texture styles will appear
2. Select your desired texture option to add to the table
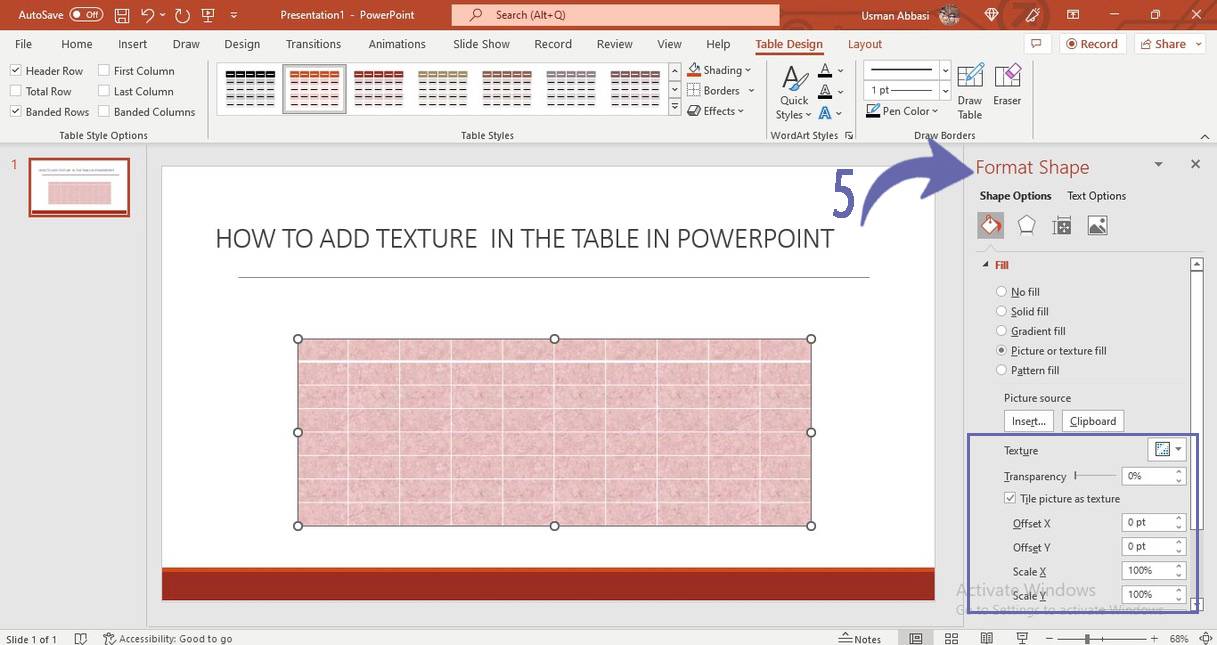
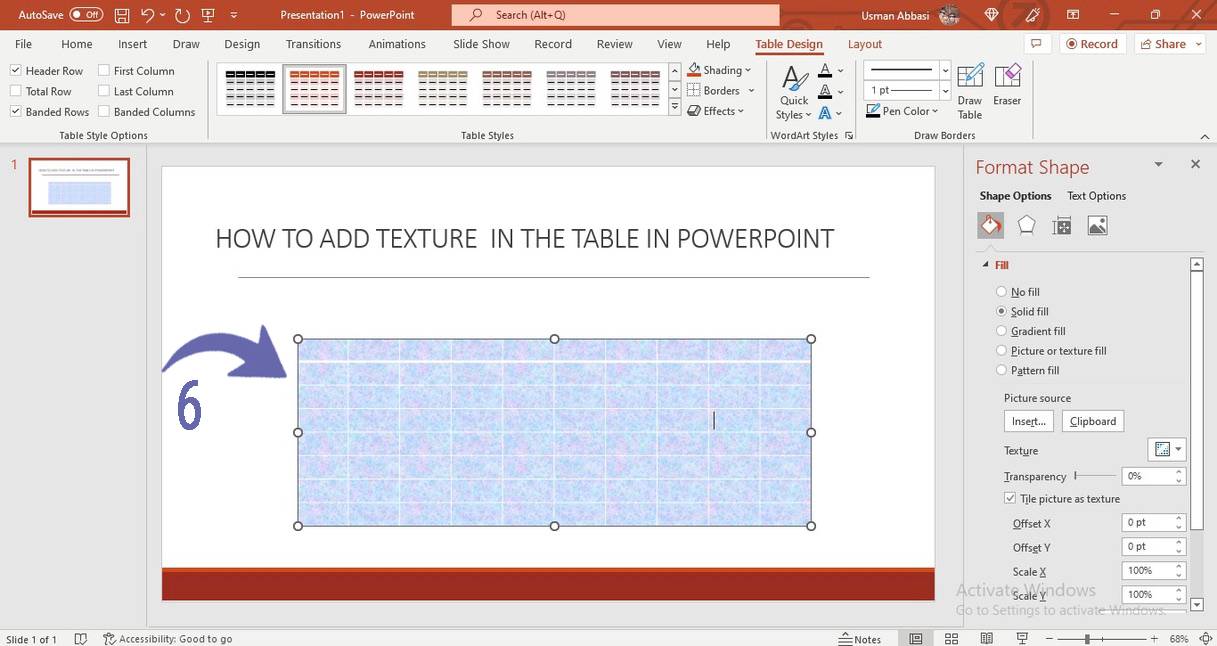
3. To customize your texture click the “More texture” option from the drop-down menu
4. A ” Format Shape ” panel will appear with many textures customizing options
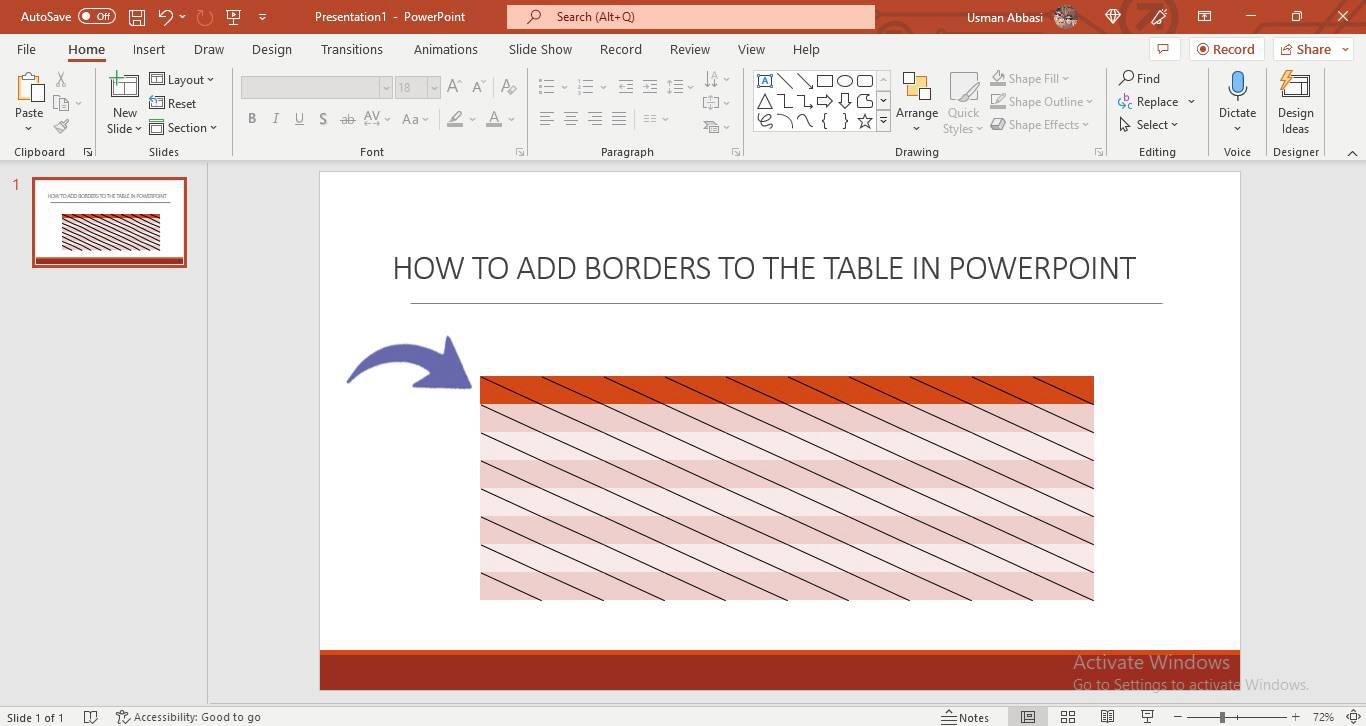
How to Add Borders to the table in PowerPoint
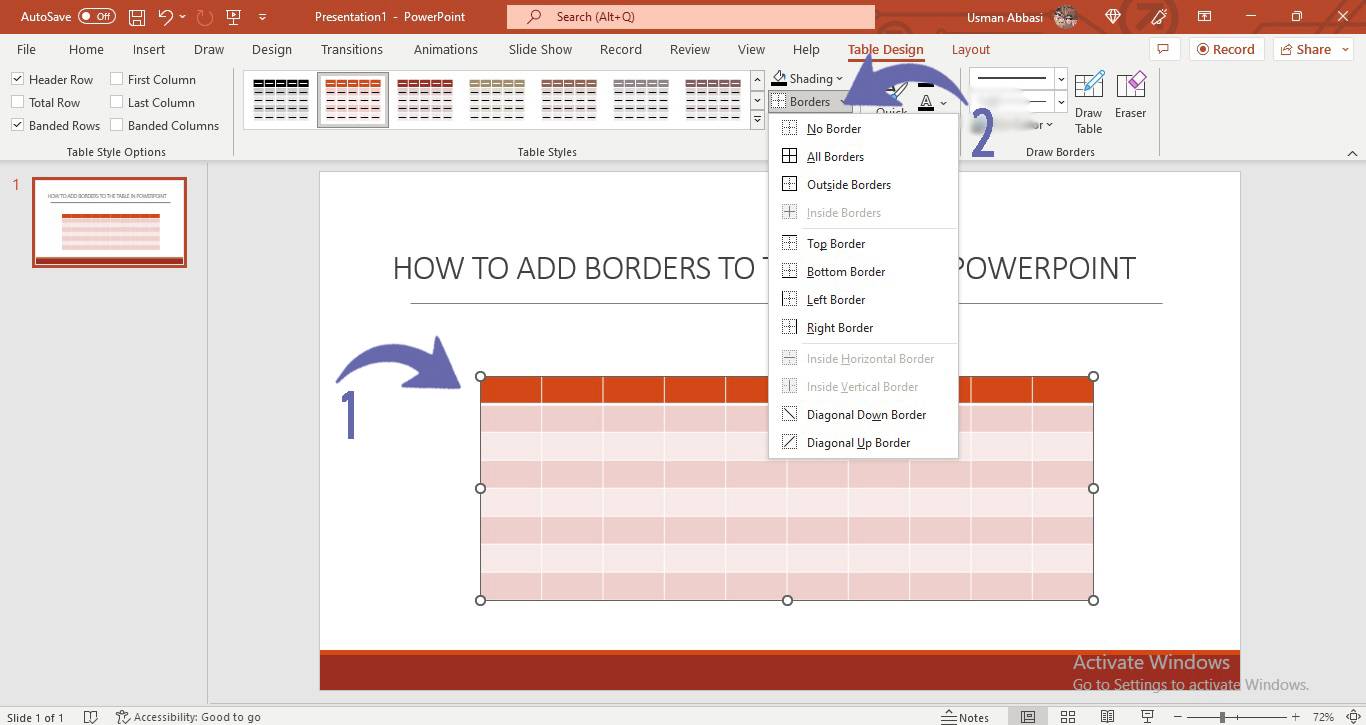
1. Select the table to add borders
2. Go to the “Table Design” panel and click the “Border” option
3. A drop-down menu will appear with many border styles, choose your required border style
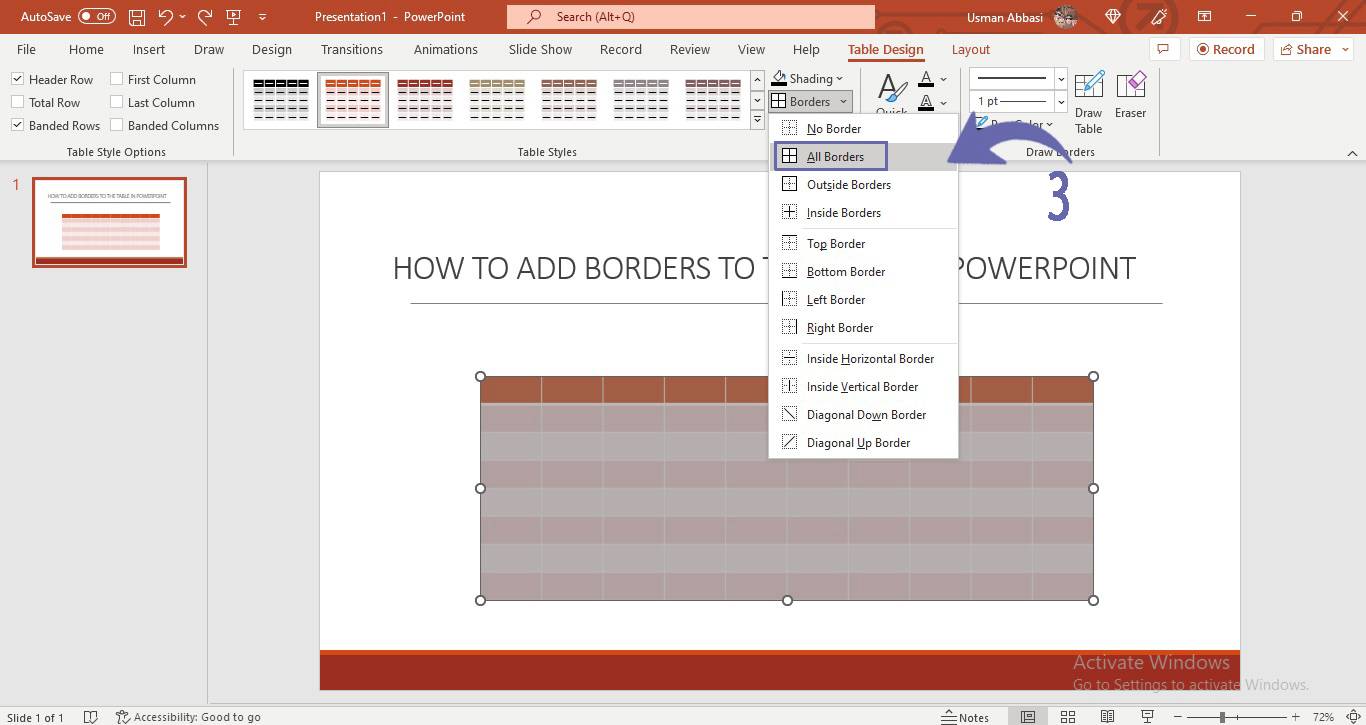
All Border (borders will apply both inside and outside the table or selected cell/s)

Inside Borders (borders will apply inside the table or selected cell/s)

Outside Border ( borders will only be outside the table or selected cell/s )

Top ( borders will only apply on top of the table or selected cell/s)
Bottom (borders will only apply at the bottom of the table or selected cell/s)

Left (borders will only apply on the left side of the table or selected cell/s)

Right (borders will only apply on the right side of the table or selected cell/s)

Inside Horizontal (borders will only apply horizontally inside the table or selected cell/s)
Inside vertical (borders will apply inside vertically the table or selected cell/s)

Diagonal -Down Borders( borders will apply diagonally downwards the table or selected cell/s)
Diagonal -Up Borders ( borders will apply diagonally upward the table or selected cell/s)

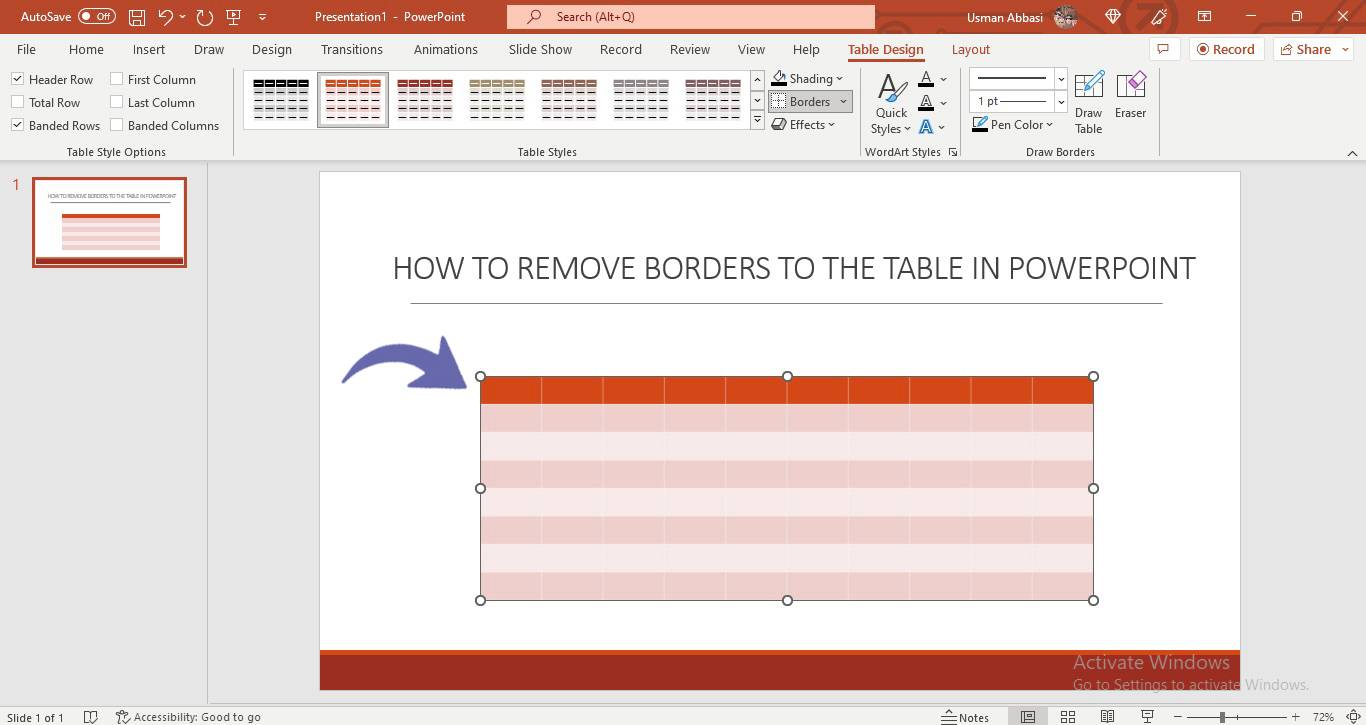
Remove Borders

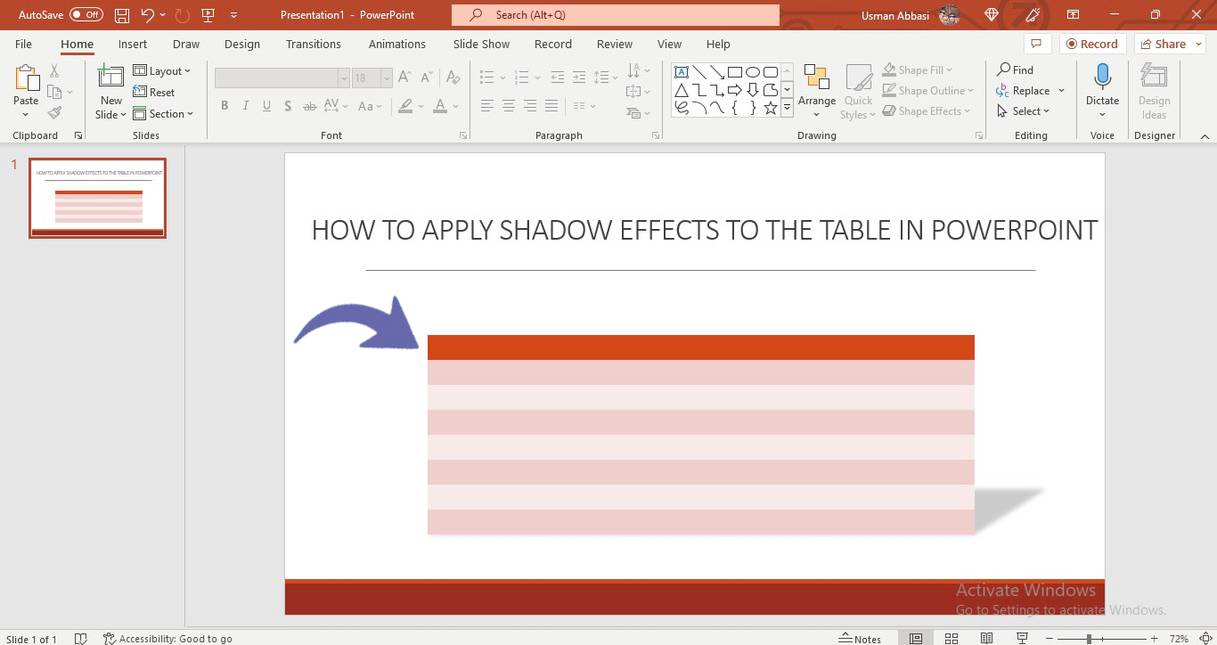
How to Add Effects to the table in PowerPoint
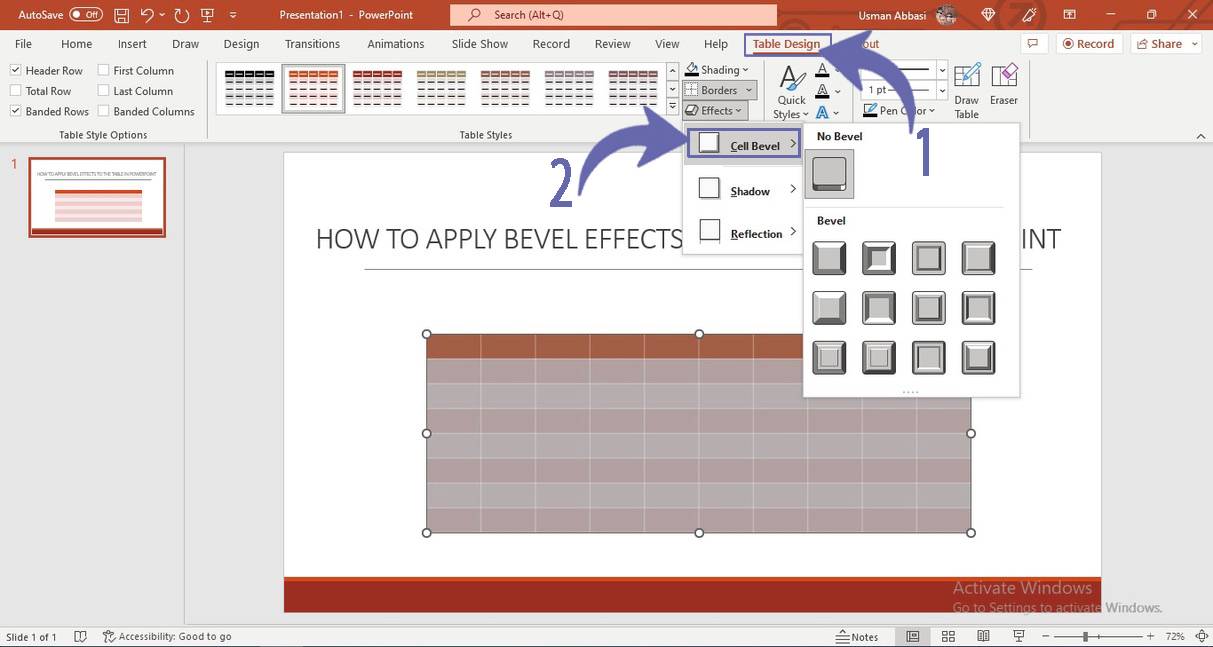
1. Select the table to add effects
2. From the “Table Design” panel, click the table “Effects” option
3. A drop-down menu will appear with a few effect options
4. Pick your desired effect i.e.,
Cell Bevel (Click this option and from the dropdown menu select the cell bevel effect you want to add to your table in PowerPoint).
To remove the bevel effect, select the “No Bevel” option
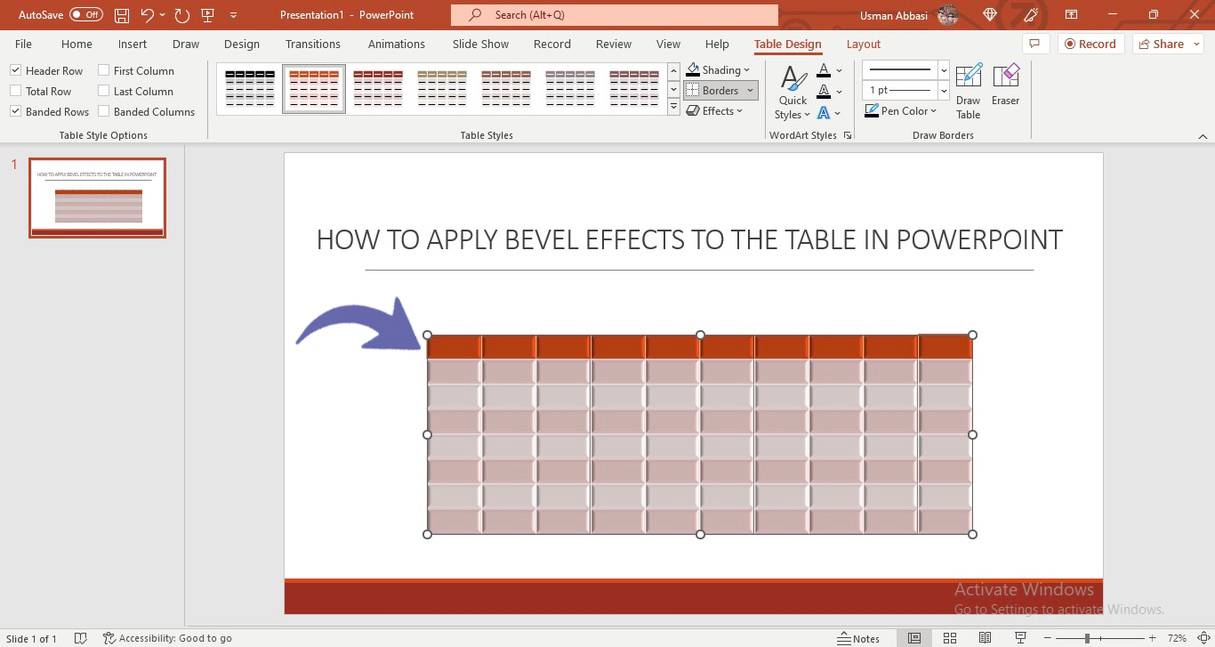 Figure 53
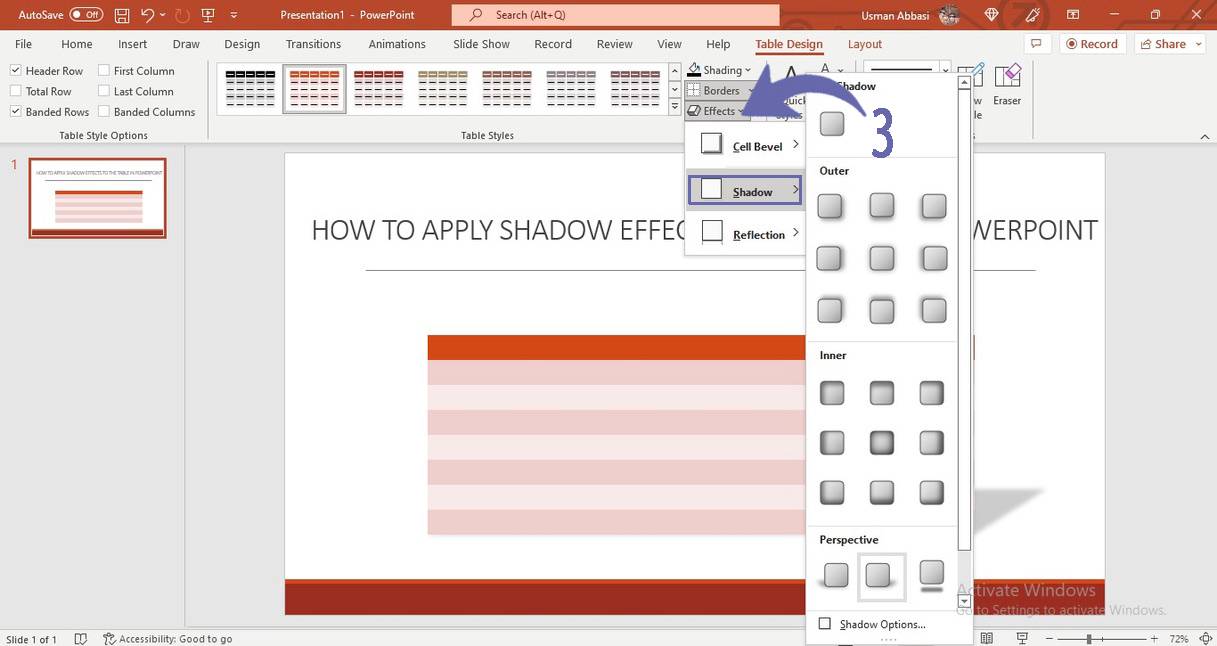
Shadow (To add Different styles of shadows to your table, click this option and select the shadow styles i.e.,
Outer (cast shadow on the outer side of the table and is used to make the table pop out of the screen )
Inner (cast shadow inside the table and it is used to make your table look like it is pressed inside from the surface )
To remove the Shadow effect, select the “No Shadow” option
Perspective (cast a shadow on different perspectives and it is used to make your 2D shape look like a 3D view)
Reflection (To add the Reflection effect in your group, Click the Reflection option and from the dropdown menu Select the Reflection style you want to add to your table in PowerPoint).
To remove Reflection, select the “No Reflection” option

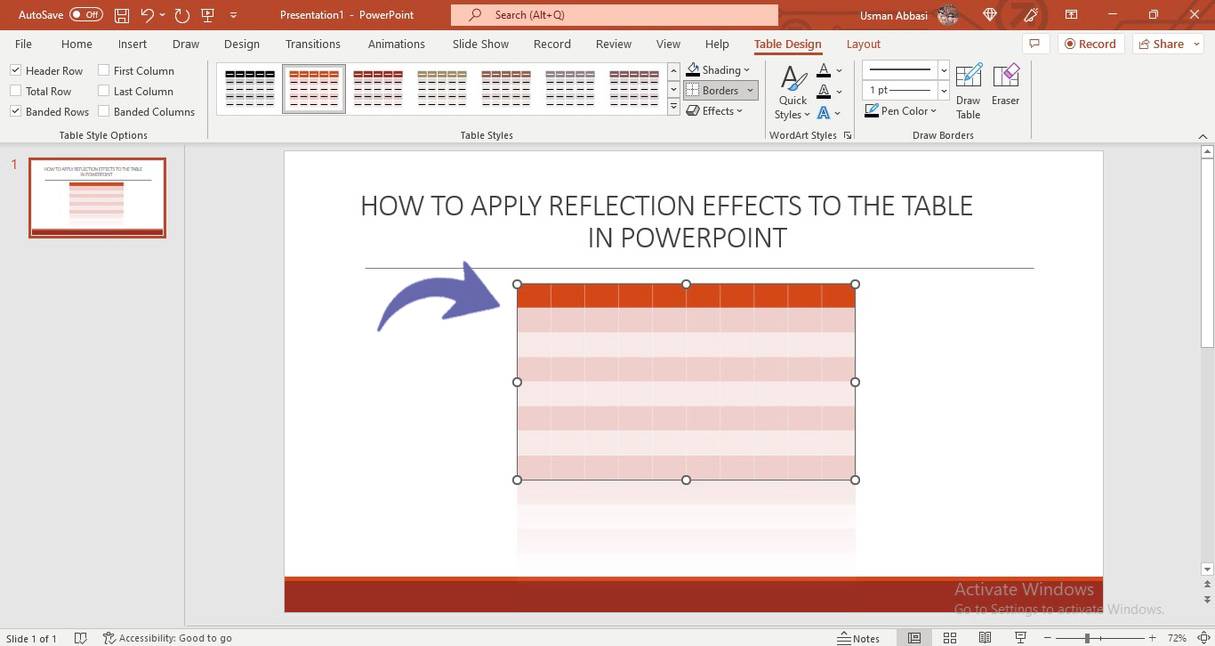 Figure 57